How to Reboot WSL in Windows 11 or 10
Do you want to know how to restart or reboot WSL (Windows Subsystem Linux) in Windows 11/10?
WSL (Windows subsystem Linux) is a built-in Windows OS feature that allows us to run a GNU/Linux environment directly on a Windows 11/10 machine without a traditional virtual machine or dual boot setup. By default, the feature or service is disabled, but you can easily enable it from the control panel.
Sometimes, you might want to restart or reboot the WSL service on your PC without restarting your computer.
So, in this article, I’ll show you how to reboot WSL in Windows 11/10.

Well, using WSL, you can use both Windows and Linux at the same time by installing a Linux distribution (such as Ubuntu, Kali, Debian, OpenSUSE, Arch Linux, etc.) on your Windows computer. So, you can use Linux applications, command-line tools, and utilities directly on a Windows computer without any virtual machine.
To use this feature, your machine must be running on Windows 11 or Windows 10 with a 2004 or higher version.
The current version of WSL is WSL2 and it supports Systemd which is a suite of basic building blocks for a Linux system. Snap, microk8s, and systemctl are examples of Linux apps that depend on systemd. Systemctl tool can interact with services on your Linux machine using commands.
However, you can manage the Linux services using commands, but restarting or rebooting the WSL service can solve most problems.
How to Reboot WSL in Windows 11 or 10
Method 1. Reboot WSL using Command
You can use PowerShell or Windows Command Prompt to use WSL commands. By default, there is no command available to reboot the WSL. But you can shut down the service and start it again.
The steps are given below to restart WSL using a command.
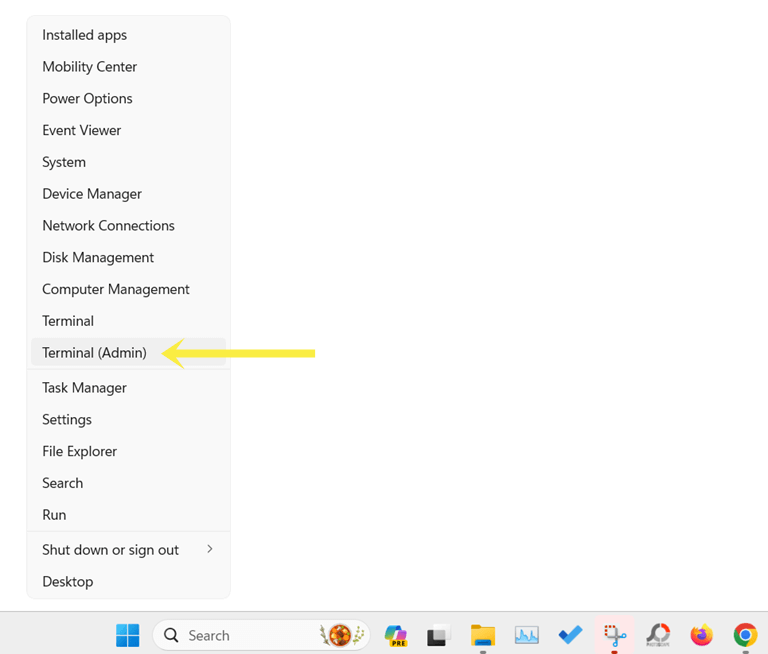
- Right-click on the Windows icon (start icon) from the taskbar and select the Terminal (Admin) or PowerShell (Admin) option from the context menu.

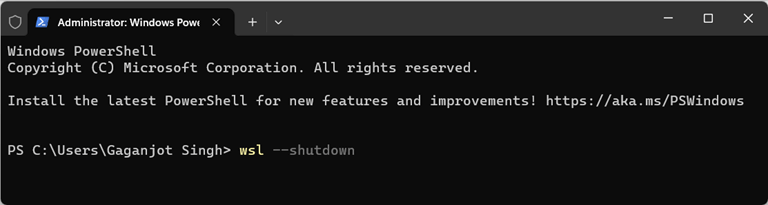
After that, click on the Yes button from the User Account Control prompt. - Type the given command in the PowerShell command prompt.
wsl --shutdown

- After typing the command, press the enter button and the WSL service will shut down.
- Open the Linux app to start the service again.
- That’s all.
When you type the wsl –shutdown command and press the enter button, it terminates all running distributions and the WSL 2 lightweight utility virtual machine. However, you can use the wsl –terminate <Distribution Name> command to terminate the specified distribution.
Method 2. Restart LxssManager Service
Services are the core components of the Windows OS that runs in the background. Windows provides the “Services Control Manager” panel to manage the services. The panel allows us to start, stop, pause, resume, and restart the services.
The LXSSManager service acts as an intermediary for the LX subsystem driver. Whenever an NT process intends to initiate the LX binary, the request is routed through the LXSS Manager service.
You can restart the LxssManager service to reboot the WSL. There are two options available to restart the LxssManager service. You can either use the services control manager panel or PowerShell to do this task.
Steps to Restart LxssManager Service using Services Control Manager Panel
- Open the Services Control Manager Panel on your Windows computer. For this, press the Windows key + R from the keyboard to open the Run command prompt. After that, type services.msc in the command prompt and press the Enter button.

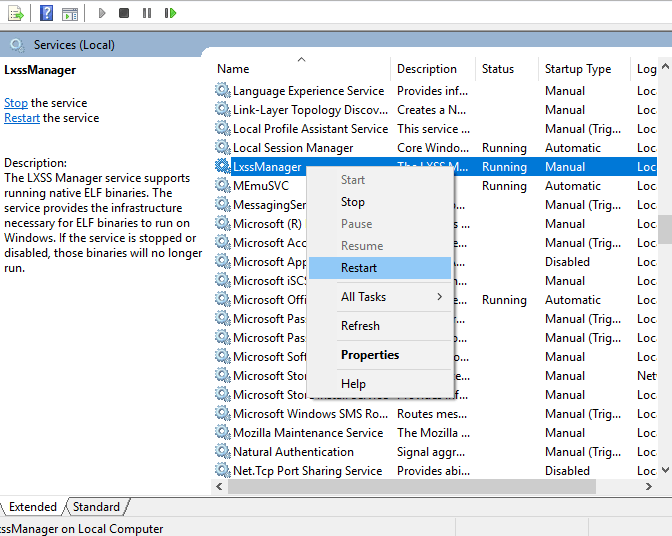
- Now the Services Control Manager Panel will be open and you’ll see the list of all available services.
- Search for the LxssManager service from the list and right-click on it. From the right-click context menu, select the Restart option to reboot the service. If the Restart option is grayed out or unclickable, select the Stop option and Start the service again manually.

- That’s all.

Steps to Restart LxssManager Service using PowerShell
- On Windows PowerShell on your Windows computer. For this, right-click on the Start menu icon (Windows icon) from the taskbar and select the Terminal (Admin) or Windows PowerShell (Admin) option from the list. After that, click on the Yes button from the User Account Control prompt.
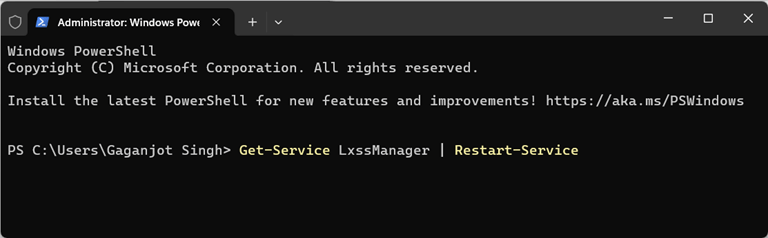
- Now the Windows PowerShell will be open. Type the given command in the PowerShell and press the Enter button.
Get-Service LxssManager | Restart-Service

- After that, the LxssManager service will restart automatically to reboot the WSL (Windows Subsystem for Linux).
- That’s all.
Final Words
I hope this article helped you learn how to restart or reboot WSL (Windows Subsystem for Linux) in Windows 11/10. However, you can directly stop the WSL service using Windows PowerShell and start the service again by launching the app. But, restarting the LxssManager service from the services control manager panel method also works well.
Popular on OTW Right Now!


About The Author
Gagan Bhangu
Founder of otechworld.com and managing editor. He is a tech geek, web-developer, and blogger. He holds a master's degree in computer applications and making money online since 2015.