How to Enable Chrome Auto Delete History after Closing
Do you want to make Chrome Auto Delete History and browsing data when you close the browser?
Web browsers store your browsing data such as browsing history, download history, cookies, cache files, etc. Though, you can delete your browsing data at any time according to the time range in the Google Chrome browser. But you can also enable the Chrome auto delete history.
So, in this article, I’ll show you how to enable Chrome auto delete history and browsing data after closing.
In the age of the internet, privacy is the main concern for most users. That’s why modern web browsers offer plenty of privacy and security features.
The privacy and security features help to keep safe while browsing the web and your local stored browsing data.
Google Chrome helps you keep safe from data breaches, malicious extensions, and more with its inbuilt safety check feature.
The Security check scans the browser as well as a device for pending updates, compromised passwords, safe browsing protection levels, bad extensions, and harmful software.
Apart from security checks, it offers privacy guides, a privacy sandbox, control site settings, and cookies, etc.
Well, Google Chrome gives an option to clear browsing data (history, cache, cookies, and more) manually. There is no official or direct option available in the browser that forces the browser to delete history automatically at the exit. But there are few ways available to do that.
Why You Need to Enable Chrome Auto Delete History?
Most people are concerned about their privacy when they browse the web on devices that are shared with others. If your PC or laptop is often used by your friends, family members, or co-workers, you might be worried about your browsing history. Well, No one wants to show their browning history to others.
Chrome offers an option to delete history manually. But sometimes you may forget to delete your browsing history.
So, enabling the Chrome auto clear browsing data at exit is a good option to overcome this problem.
After doing that, no one can see what you search on the web or what websites are visited by you.
How to Enable Chrome Auto Delete History after Closing
The available methods are given below with a step-by-step guide. Let’s get started.
1. Using Auto History Wipe Extension

Google Chrome allows us to install extensions to add additional features to the browser. Its web store has numerous extensions that add the auto delete history functionality to the browser.
Well, Auto History Wipe is one of the most popular extensions that can automatically delete browsing history and other data.
The Auto History Wipe extension doesn’t collect and send any kind of data from the browser. It runs offline and doesn’t require any special permission.
The extension won’t run in the background that’s why it won’t require background permission.
Note that it deletes the history when you start/open Chrome rather than exit. So, when anyone starts the browser, the extension automatically deletes the previous entire history or other data.
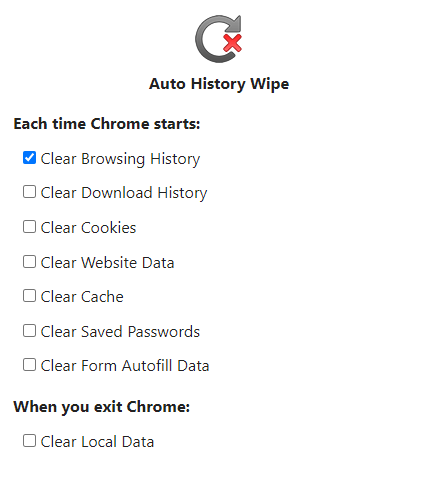
The auto history wipe extension can clear the browsing history, download history, cache, saved passwords, cookies, website data, and form autofill data. You can select the data options manually that you want to clear.
Steps to install and use Auto History Wipe extension for Chrome
- Install Auto History Wipe extension from Chrome web store. The link is given below.
Install Auto History Wipe
From the Web Store page, click on the Add to Chrome button and then select Add extension from the popup. - That’s all. Now when you close the browser and open it next time, you won’t see the previous history.
By default, the extension only clears the browsing history. But you can also enable it to clear other data. For this, click on the extension’s icon from the toolbar and click on the Menu (three vertical dots) next to the Auto History Wipe. Select options and the extension options will be open in a new tab. Enable the options as you need.
2. By Opening Incognito Mode
Chrome offers Incognito mode to browse the web privately. It helps to prevent others from seeing your browsing activity on your device.
When you browse the web using Incognito mode, Chrome won’t save browsing history, cookies, site data, information entered in forms, etc.
However, the browser temporarily stores the browsing data while surfing the web, but deletes it automatically when you close the Incognito windows or close the browser.
Steps to Open Incognito Mode in Google Chrome
- Open Google Chrome and press Ctrl + Shift + N (on Windows) or ⌘ + Shift + N (On Mac).
Alternatively, click on the Customize Menu (three vertical dots) from the top right and select the New Incognito Window option from the list. - After the new Incognito window will be open. Browse the web using that window. You can use multiple tabs in private mode.
- That’s all.
Each time you need to open incognito mode manually. But you can also create an Incognito mode Shortcut on the desktop to open private mode directly. And this is a more convenient method.
Steps to Add Chrome Incognito Shortcut on Desktop
- Create a new Google Chrome shortcut on the Desktop. If the shortcut is already on the desktop, then copy and paste it. Otherwise, click on the start menu and drag the Chrome icon from the list of apps to the desktop.
Otherwise, right-click on the Chrome icon from the start menu and go to More » Open file location. Right-click on the Chrome icon from the startup menu folder. After that, select Show more options and then click on the Create shortcut option. - Now right-click on the newly created icon and select Properties.
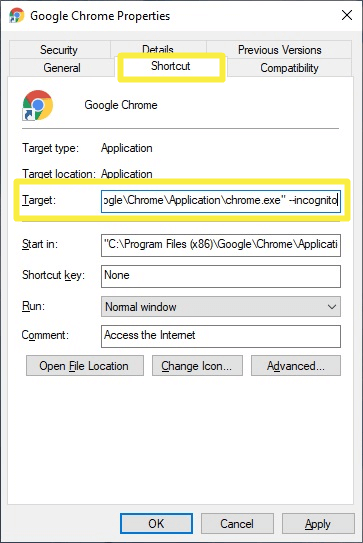
- From the Shortcut tab (opened by default), click on the Target text field and write ” – -incognito” (without quotes) at the end of the path. Note that, there is a space before two hyphens.
The target path will look a like “C:\Program Files (x86)\Google\Chrome\Application\chrome.exe” – -incognito

- Click on Apply and OK. If UAC warning pop-ups, then click on Continue.
- That’s all.
Now when you open Chrome using this shortcut, the incognito mode will open automatically. When you close the browser, the browsing data will delete automatically.
3. Enable Clear Cookies and Site Data at Exit
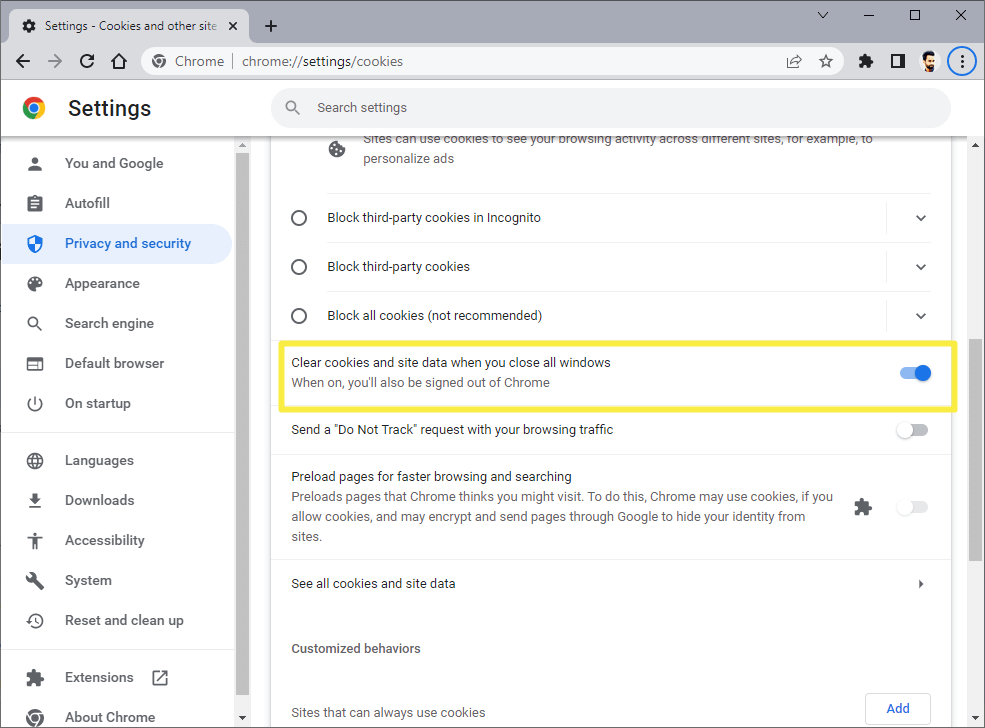
Google Chrome has an inbuilt “Clear cookies and site data when you close all windows” option that enables the browser to clear cookies and other site data when you exit the browser.
By enabling this option, you can keep cookies under control that track you. Note that, this option won’t clear the history.
The steps are given below to enable clear cookies and site data when you close all windows options. Let’s get started.
- Open Google Chrome and click on the Menu (three dots) from the top right and open Settings from the list.
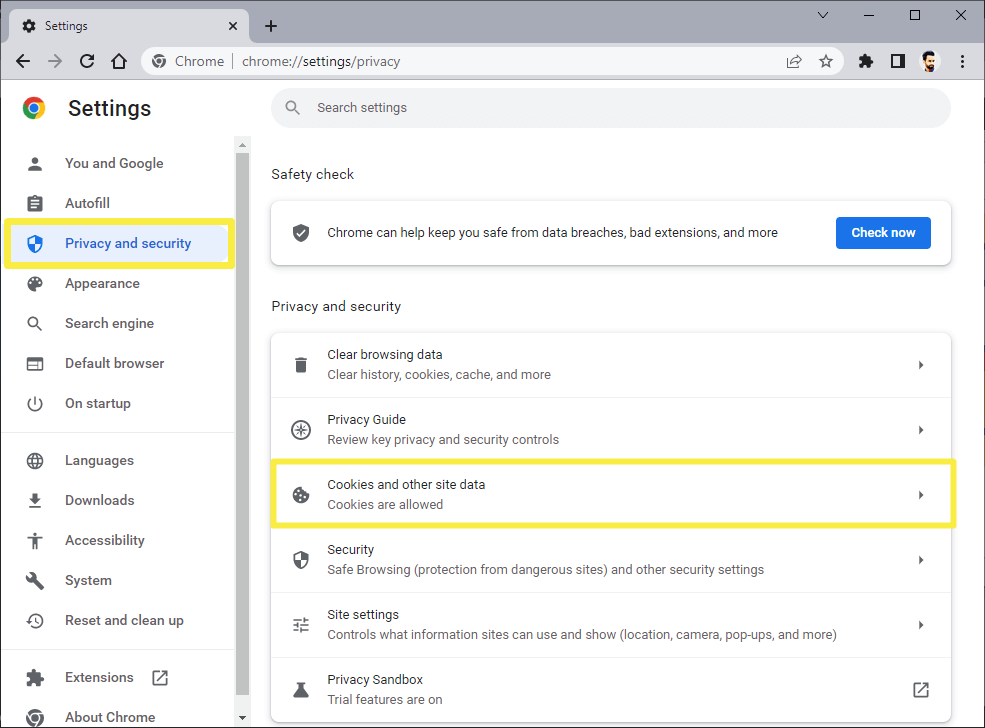
- From the settings page, click on the Privacy and Security option from the left navigation pane.
- Now click on the Cookies and other site data options.

- Enable the toggle button next to the “Clear cookies and site data when you close all windows” option.
- That’s all.
4. Manually Delete Browsing History and Data before exit
Well, if you don’t want to use an extension or incognito mode, you can delete the history and other data before closing the browser.
You can open Clear browsing data in three ways – From Menu, Using Keyboard Shortcut, or Using Chrome Actions.
Steps to delete browsing data and history using menu
- Open the Clear browsing data pop-up window on Chrome.
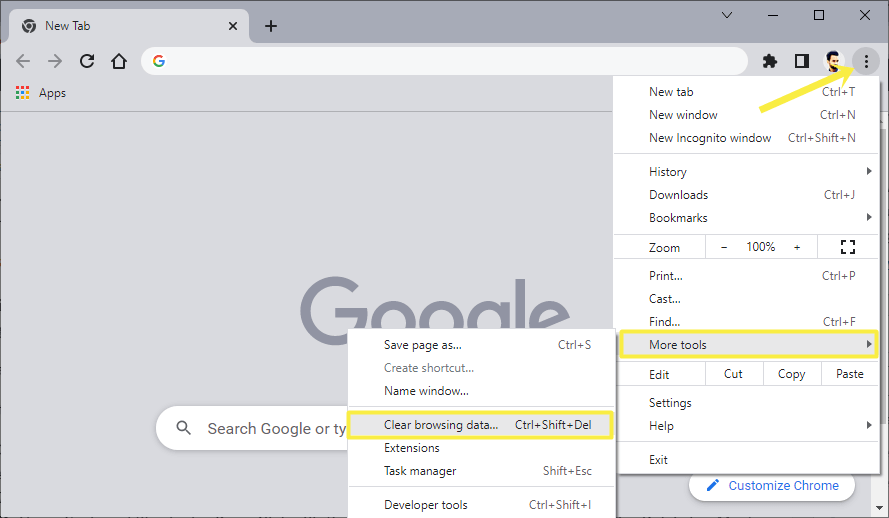
A. Using Menu – Click on the Menu (three dots) from the top right of the Chrome browser and go to More Tools » Clear Browsing data option.
B. Using Keyboard Shortcut – Press Ctrl + Shift + Delete (on Windows) and Cmd + Shift + Delete (on Mac) from the keyboard.
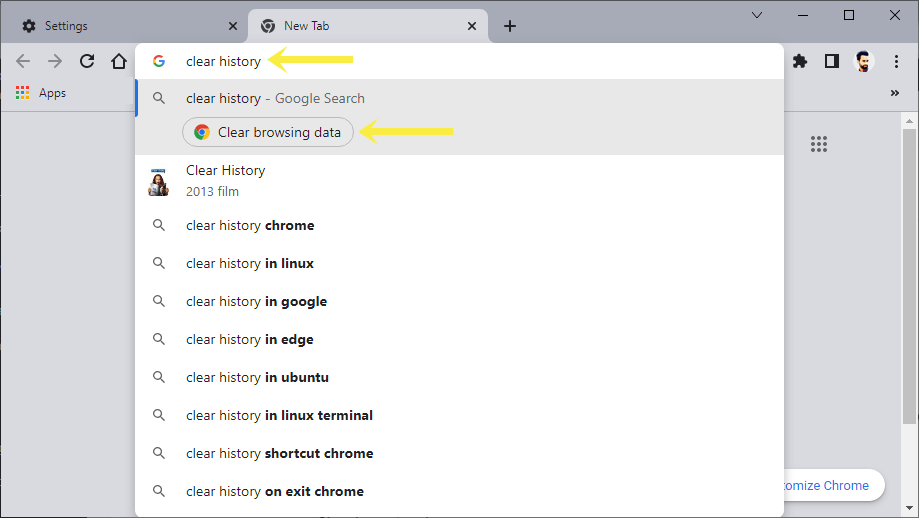
C. Using Chrome Actions – Type Clear History in the Omnibox and you’ll see the Clear browsing data button in suggestions.
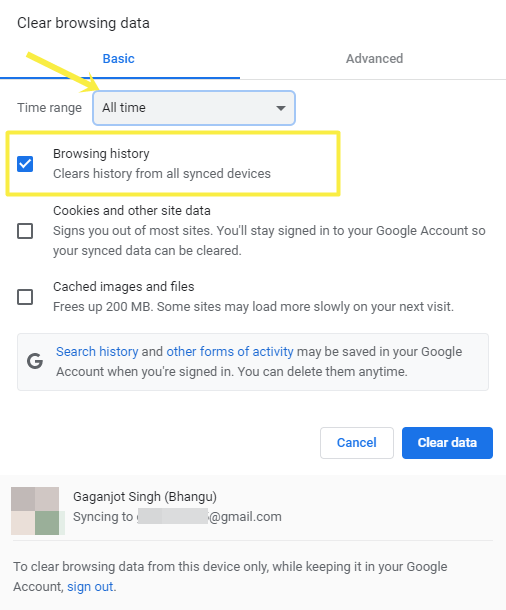
- After that, the Clear browsing data pop-up will be open.
- Select only Browsing history and All time from the Time range.

- Click on the Clear data button.
Conclusion
I hope this article helped you learn how to make Chrome auto delete history and data after closing. Though, there is no official option available on the browser for this. But third-party extensions make it possible. Also, you can use incognito mode to prevent the browser from saving your data. If you often use Incognito mode, you should add the incognito mode desktop shortcut to open it directly.
Popular on OTW Right Now!


About The Author
Gagan Bhangu
Founder of otechworld.com and managing editor. He is a tech geek, web-developer, and blogger. He holds a master's degree in computer applications and making money online since 2015.