6 Prisma App Tips And Tricks For Better Results
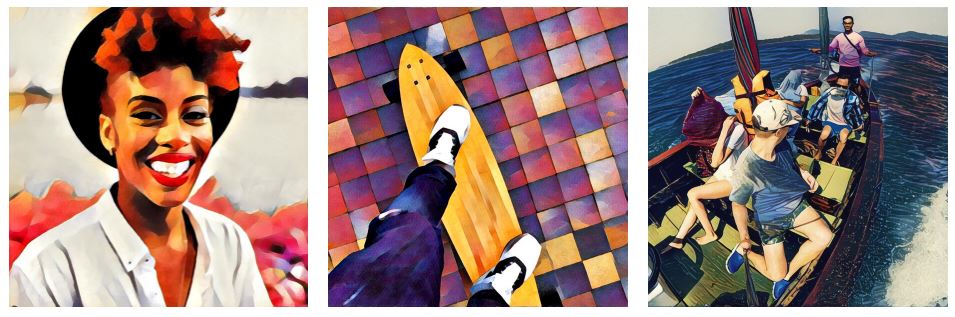
Here are the Prisma App Tips And Tricks For Better Results. Prisma is a photo editing app the Prisma app achieved so much popularity in a short time. The Prisma app is very popular nowadays because of its unique filters. It converts the photo into artwork using Artificial Intelligence. This app is available on IOS and Android OS. The popularity of this app increased when it became available for Android OS. Earlier, this app was only available for IOS users. But now the Android version of this app is available in Google Play Store.
There are many duplicate apps available in Play Store with Prisma name. So, you need to download the official app of Prisma. Prisma provides many amazing and unique filters and effects. So, if you are using the Prisma app, you can use these tips and tricks to use this app like a pro.
Download Prisma


How Does Prisma App Work?
Prisma app converts a photo into artwork using Artificial Intelligence. Unlike other photo editing apps, the Prisma app does not edit images on your phone.
In Prisma, your photo will be uploaded to the Prisma server and after processing the photo, it gives the result back. But, it gives amazing results. So, you need an internet connection to use this app.
Why Does Prisma Take Time To Apply a Filter?
Sometimes this app irritates every user because it takes time to apply filters. It gives results after some time.
When you apply filters on any image then the image will be uploaded to the Prisma server (cloud) and on the server, it converts your image into artwork. After processing, your photo will be sent back to your phone and you will see the result.
Prisma App Tips And Tricks For Better Results
With these tips and tricks, you can get better results from the Prisma app. So, let’s start with these tips to create artwork for your photos.
1. Apply Filter On Full-Size Image
Like the Whatsapp profile picture, the Prisma app supports only square-size images. You need to crop your image in a 1:1 ratio before applying the filter on it in the Prisma app. So, if you want to apply the filter to a full-size image then you need to convert your photo into a square shape.
You can convert a full-size image into a square shape in the photo editor or either in the app. You can download the app from Google Play Store to convert any full-size image into a square shape. The SquareDroid app is also useful for doing this.
2. Remove Prisma Watermark
When you apply the filter to your image in the Prisma app, The Prisma watermark will be added to your photo at the bottom of the image. You can remove this watermark from the settings of the Prisma app.

- To turn off the watermark, Open the Prisma app, and tap on the gear (settings) icon, turn off Add watermark. After turning off this option, the watermark will not be added to your photos.
3. Tips To Make Prisma Faster
Sometimes Prisma app takes a lot of time to apply filters on an image and this is a major drawback of this app. Your internet connection is also affected by the loading time because images will be uploaded to the server for processing. Here are the tips to make the Prisma app faster:
- Use WiFi or Fast Data Connection: If your data connection is slow then it takes too long time to process the images and it may show errors after some time. So, you need a reliable data connection to use this app.
- Do not Minimize the App: When you apply filters or create artwork, then do not minimize the Prisma app until it completes the process. Because Prisma canceled your process when you minimize the app while creating artwork.
- It doesn’t support multi-window: Some Android phones have a multi-Windows feature, but the Prisma app doesn’t support multi-window. So, you need to wait until it finished the process.
4. Don’t Use the Built-in Camera of Prisma
Prisma provides an inbuilt camera to take pictures, but it lacks many features. So, you can take better pictures from a default camera app on your phone. The Prisma app allows you to take a simple picture from your phone. If you like HDR mode, Night mode and want to adjust White balance and sharpness when you are taking pictures always use the default camera app on your smartphone.
Read Also: 20 Best Launchers To Customize Android Phone
5. Adjust Intensity For Better Results
By default, the Prisma app applies full intensity (100%) to your image. But you can adjust the intensity for better results. Sometimes, you get a better image when you set the intensity from 50% to 60%. So, it is better to adjust the intensity before saving the image.
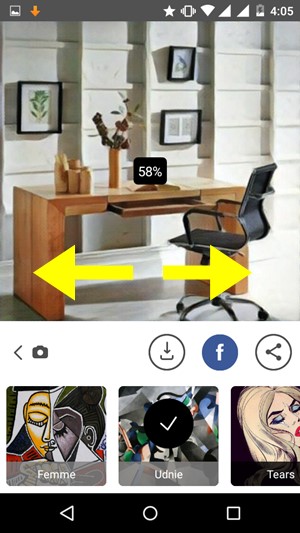
- To adjust the intensity, Swipe from the left or right after applying the filter.
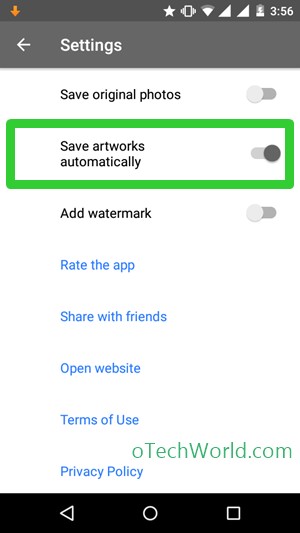
6. Turn On ‘Save Artworks Automatically’ To Save Images Automatically
If you love the Prisma app and want to process many photos, then this option is useful for you. All your images will be saved automatically after applying filters. All images will be saved in the Prisma folder and you can find all images easily in this folder.
Conclusion
So, these are the best Prisma app tips and tricks for better results. You can enjoy creating artwork of your image. Write in the comments if you know other tips and tricks of the Prisma app.
Popular on OTW Right Now!


About The Author
Gagan Bhangu
Founder of otechworld.com and managing editor. He is a tech geek, web-developer, and blogger. He holds a master's degree in computer applications and making money online since 2015.