
I Tried Creative Fabrica Studio AI for Creative Projects. Here’s What I Learned
AI tools have become part of my daily workflow. I use them to create blog graphics, test design ideas, prepare thumbnails, and edit images. Most of the tools I use run in a browser, so I was curious about trying a desktop application that keeps much of the work on my own computer.
The latest version of the Creative Fabrica Studio AI App caught my attention because it focuses on local AI image generation. It also includes High Quality Rendering, built-in LoRAs, background removal, image upscaling, and text-to-speech in one application. Rather than installing several tools for different jobs, I wanted to see how well one application could handle an entire creative workflow.
Over several projects, I used the desktop app to generate images, improve older graphics, and prepare visuals for blog posts and presentations. While every creator has different needs, the experience gave me a good idea of where the application fits into everyday creative work.
What I Tested
During my review, I used the Creative Fabrica Desktop App to:
- Generate blog featured images
- Create YouTube thumbnail concepts
- Compare low-quality and High Quality Rendering
- Test multiple built-in LoRAs
- Remove backgrounds from product photos
- Upscale older graphics
- Create narration using text-to-speech

Getting Started Was Quick and Straightforward
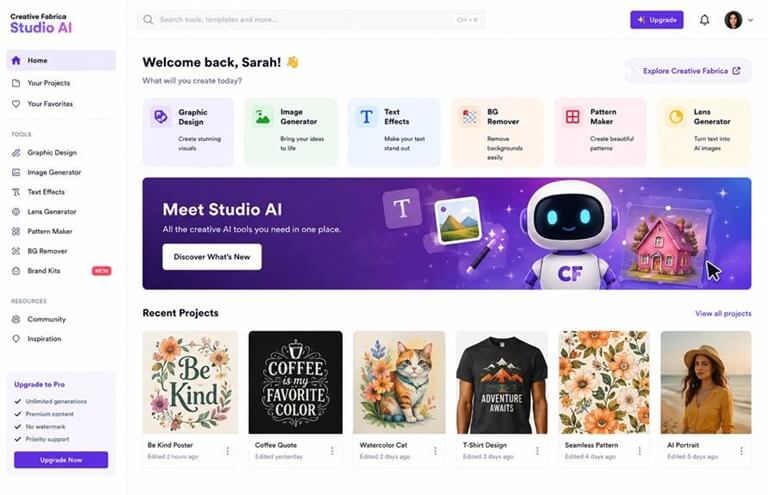
The installation process was simple. After downloading the application and completing the setup, I opened the desktop interface and spent a few minutes exploring the available tools. The layout felt familiar, with the main creative features organized in a way that was easy to understand.
What stood out first was that the application brings several AI tools together instead of focusing on only one feature. Image generation, background removal, image upscaling, and text-to-speech are available from the same workspace. That means you do not have to keep opening different websites whenever your project reaches the next step.
To get familiar with the interface, I started with a small task. I wanted a featured image for a technology blog article about smart home devices. I entered a simple prompt describing a modern living room with connected devices and generated a few draft images. Within a short time, I had several different concepts to compare, making it easier to decide which direction worked best before moving on to a higher-quality version.
For anyone who regularly creates visual content, having these tools organized in one place can make the creative process feel much more structured.
My First Test Focused on AI Image Generation
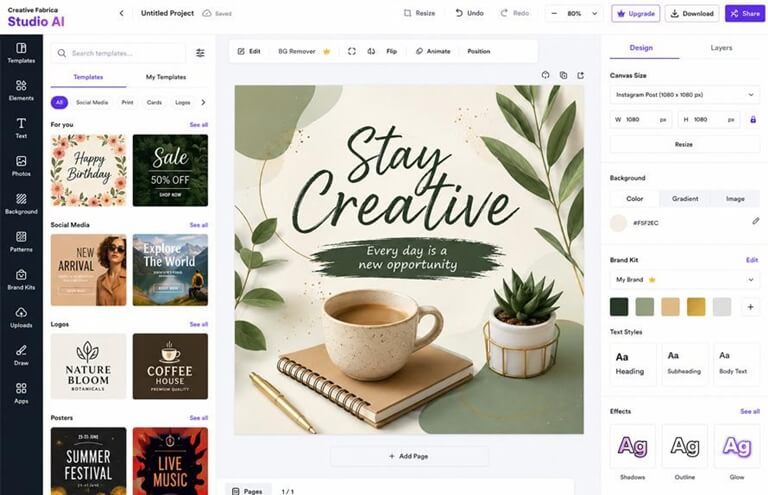
The feature I wanted to explore first was AI image generation because it is something I use almost every day. Instead of trying one complicated project, I chose a few simple examples that reflect common creative work.
The first test was a YouTube thumbnail for a technology tutorial. I generated several quick versions using Low Quality Rendering. This mode worked well for experimenting with different layouts, lighting, and color combinations without waiting long between each attempt.
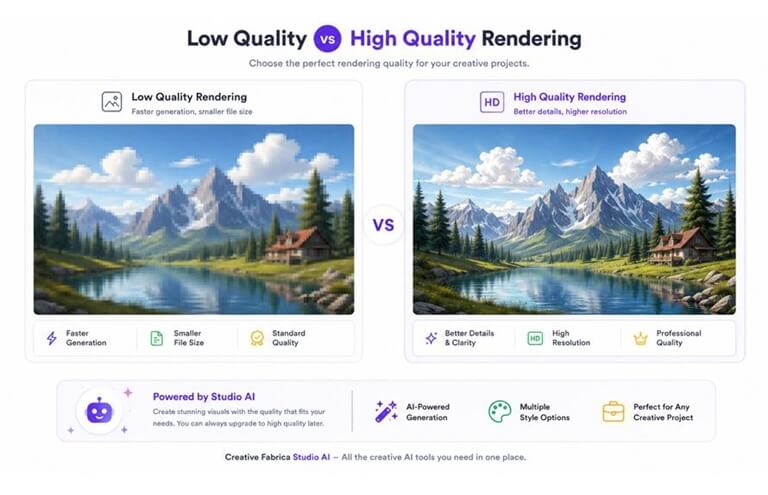
After choosing my favorite concept, I switched to High Quality Rendering. The difference was easy to notice. The final image showed cleaner edges, improved lighting, and more detail in the smaller elements. It looked much closer to something I would be comfortable using for a finished project.
Next, I created a featured image for a blog post about productivity software. Again, I started with several draft versions before producing a higher-quality final image. Being able to move from quick concepts to polished artwork inside the same application made the workflow feel natural.
I can also see this feature being useful for social media graphics, presentation covers, marketing banners, and digital products where original visuals help content stand out.
Low Quality Rendering vs High Quality Rendering
| Feature | Low Quality Rendering | High Quality Rendering |
| Best For | Testing prompts and creative ideas | Final artwork ready to publish |
| Rendering Speed | Faster | Slightly longer |
| Image Detail | Basic | Sharper textures and finer details |
| Lighting | Standard | More natural and balanced |
| Best Use | Brainstorming and concept creation | Blog graphics, presentations, marketing, websites, print, and social media |
The Built-in LoRAs Added More Variety Than I Expected
One feature I was especially interested in was the collection of built-in LoRAs. If you are new to AI image generation, a LoRA is a small add-on that helps the AI create artwork in a particular visual style without changing the main model.
The application includes more than fifteen built-in LoRAs, so I did not need to search for additional downloads before trying different looks.
To see how much difference they could make, I used the same prompt several times while changing only the selected LoRA. One version produced artwork with a soft illustrated appearance that would suit a children’s book. Another created a bold comic-inspired style that worked well for entertainment content. I also tested styles that felt more realistic for blog graphics and promotional material.
This approach saves time because you can keep the same basic idea while exploring completely different visual directions. For designers, bloggers, YouTubers, and content creators, that flexibility makes it easier to match artwork to the style of each project instead of relying on the same look every time.
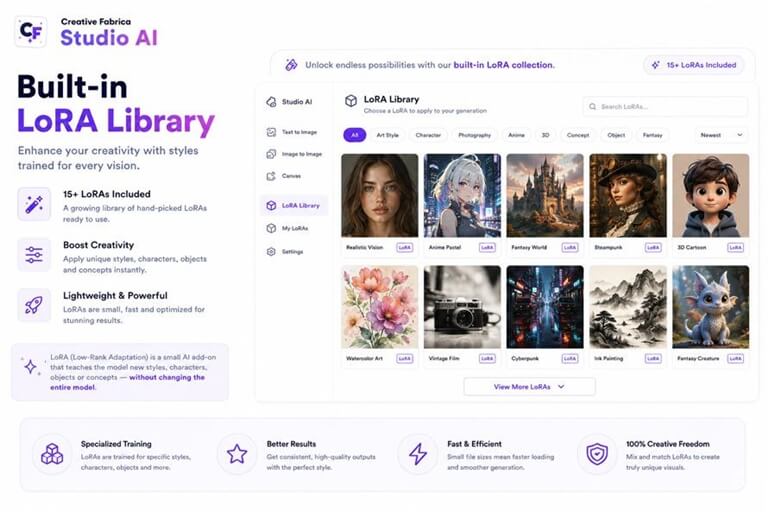
Built-in LoRA Styles I Tried
| Built-in LoRA | My Experience |
| Realistic | Great for blog graphics and promotional images |
| Comic | Worked well for thumbnails and entertainment content |
| Watercolor | Good for greeting cards and children’s illustrations |
| Fantasy | Produced interesting concept art and book cover ideas |
| Anime | Useful for character artwork and fan projects |
| Digital Painting | Nice for wallpapers and creative illustrations |
Background Removal Turned Out to Be More Useful Than I Expected
I originally thought I would use the background removal tool only once or twice. After a few projects, it became one of the features I opened most often.
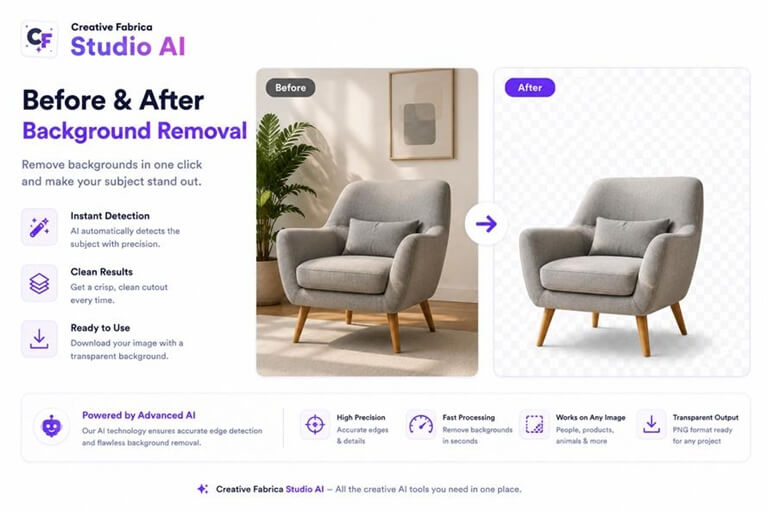
One example involved a product photo for a blog review. The original image had a busy background with shelves and other items that pulled attention away from the product. Instead of searching for another image or editing it manually, I removed the background and placed the product on a clean white background. The final graphic looked much better for the article header.
I also tested it with a profile photo that I wanted to use in a presentation. After removing the background, I added the image to a custom slide with a simple color gradient behind it. It took only a few minutes and saved me from opening separate editing software.
Another practical use was creating transparent PNG files for website graphics. Whether it was a product image, an icon, or a simple illustration, removing the background made it much easier to reuse the same asset across different projects.
I Gave the Image Upscaler a Real-World Test
Most creators have older images that still have value but are no longer large enough for modern websites or larger displays.
I collected a few files from previous projects to see how the image upscaler would perform.
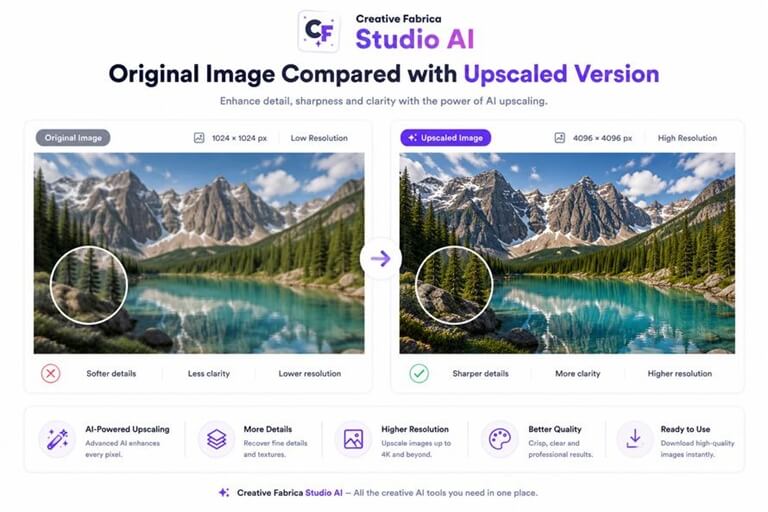
The first was an older blog featured image that had been created several years ago. It looked acceptable on smaller screens but started to lose detail when displayed at a larger size. After upscaling it, the image appeared cleaner and worked much better as a full-width header.
Next, I tested a small logo that had originally been designed for social media. I wanted to include it in a presentation, but enlarging the original file made the edges look rough. The upscaled version looked much sharper and was suitable for larger slides.
I also tried an older product image that could be used in an online marketplace listing. A clearer image helps products appear more professional, and improving the existing file was much faster than creating a completely new one.
These examples showed me that image upscaling is not only useful for designers. Bloggers, teachers, marketers, online sellers, and anyone with an archive of older graphics can also benefit from it.
Text-to-Speech Was a Nice Addition
Image generation may be the feature that attracts most people, but I was pleasantly surprised to see text-to-speech included in the application.
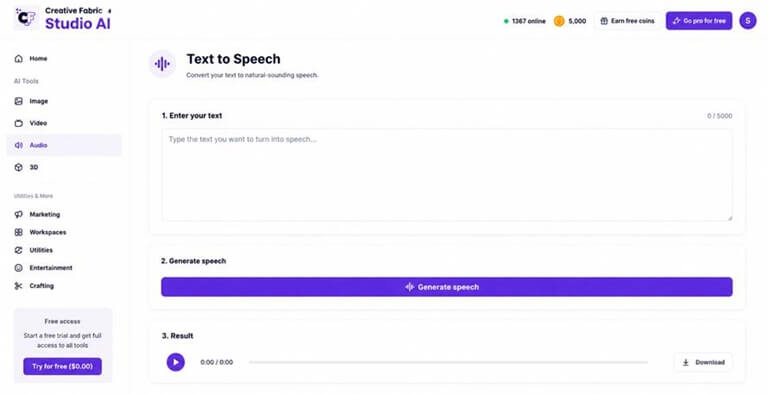
I tested it with a short script that explained a technology topic. Within a short time, I had narration that could be added to a presentation or a simple video.
This feature could be useful in several situations. A YouTuber can prepare a quick introduction before recording the main video. A teacher can create audio for classroom lessons. A business owner can produce narration for a product demonstration or a company presentation.
Even if text-to-speech is not something you use every day, having it available in the same application means you do not need to look for another service when the need comes up.
For creators who regularly produce visual content, combining AI-generated images with narration opens more possibilities for tutorials, explainers, and promotional videos.
My Overall Experience
After spending time with the application, I found that the biggest advantage was not one single feature. It was having several useful tools working together in one place.
I could generate an image, improve it with High Quality Rendering, remove the background, upscale the finished result, and prepare narration without moving between multiple websites. That made the workflow feel smoother, especially when working on several small projects during the same day.
The addition of more than fifteen built-in LoRAs also made it easier to experiment with different visual styles. Instead of rewriting prompts from scratch, I could keep the same concept and see how it looked in different artistic directions.
If your work involves blog graphics, social media content, presentations, product images, or marketing materials, having these features together can help reduce the amount of time spent switching between different applications.
Final Thoughts
After using the desktop application across several creative tasks, I came away with a clear impression of where it fits best. It is designed for people who regularly create visual content and want several AI-powered tools available in one workspace.
The Creative Fabrica Desktop App combines local AI image generation, High Quality Rendering, built-in LoRAs, background removal, image upscaling, and text-to-speech in a single application for Windows and Mac. Rather than relying on separate services for each task, you can move from the first idea to the finished asset without leaving the application.
Whether you are preparing blog graphics, marketing material, presentation slides, product images, or creative projects for clients, the latest version offers a practical workflow that keeps everything organized while giving you plenty of room to experiment with new ideas.
Frequently Asked Questions
What is High Quality Rendering?
High Quality Rendering creates cleaner AI images with sharper textures, improved lighting, and finer details. It works best for graphics that are ready to publish or print.
Is High Quality Rendering worth using?
Yes. I found it most useful after choosing my favorite concept in Low Quality Rendering. The final image looked much cleaner and required less editing.
What is a LoRA?
A LoRA is a small AI model that teaches the main image model a different artistic style or concept without replacing the original model.
Which built-in LoRA did you find most useful?
The realistic and comic-style LoRAs were the ones I used most often because they worked well for blog graphics, thumbnails, and promotional content.
Can I use the same prompt with multiple LoRAs?
Yes. Testing the same prompt with different built-in LoRAs is an easy way to compare artistic styles while keeping the same subject.
Is image upscaling useful for older graphics?
Yes. I tested it with older blog headers, presentation graphics, and product images. The upscaled versions looked noticeably cleaner on larger displays.
Can I remove backgrounds from regular photos?
Yes. The background removal tool works with both AI-generated images and standard photographs, making it useful for presentations, marketing graphics, and transparent PNG files.
Who is Creative Fabrica Desktop App best suited for?
It is a good fit for bloggers, designers, marketers, YouTubers, educators, freelancers, online sellers, and anyone who regularly creates visual content.
Popular on OTW Right Now!


About The Author

Gagan Bhangu
Founder of otechworld.com and managing editor. He is a tech geek, web-developer, and blogger. He holds a master's degree in computer applications and making money online since 2015.