How to Add Line in Word for Resume
Do you want to know how to add a horizontal and vertical line in Word for a resume?
People often use Microsoft Word to create resumes. No doubt, Word is the best tool for this task and you can easily create the resume by using its pre-built templates. But still, you need to customize the template according to your requirements. Sometimes you may need to add a new section by adding or inserting horizontal or vertical lines.
So, in this article, I’ll show you how to add line in word for resume.
Well, creating a resume is not an arduous task because of online resume makers and prebuilt word templates. You don’t need to create the resume from scratch.
A well-organized resume includes several sections that add visual appeal. The basic and mandatory sections are given below.
- Header (Contact Information)
- Objectives/Summary
- Work Experience
- Education
- Skills
Apart from these mandatory sections, you can add some additional sections if you want.
When you create a new resume in Microsoft Word (on a blank page or prebuilt template), you might need to add or remove the sections. The sections are often separated by lines.
So, horizontal and vertical lines help to make eye-catching resumes by categorizing the resumes into different sections.
If you’re one of those who is troubled with inserting lines in a word document, then this article will help you learn about that.
How to Add Horizontal Line in Word for Resume
In Microsoft Word, there are plenty of ways to add or insert horizontal and vertical lines as discussed below.
1. Insert Horizontal Line from Ribbon
Microsoft Word allows us to add a horizontal line across the entire page, cell, or column from the ribbon. Also, you can format the line as you want.
The steps are given below. Let’s get started.
- Open a word document or resume in Microsoft Word and place the cursor where you want to put the horizontal line.
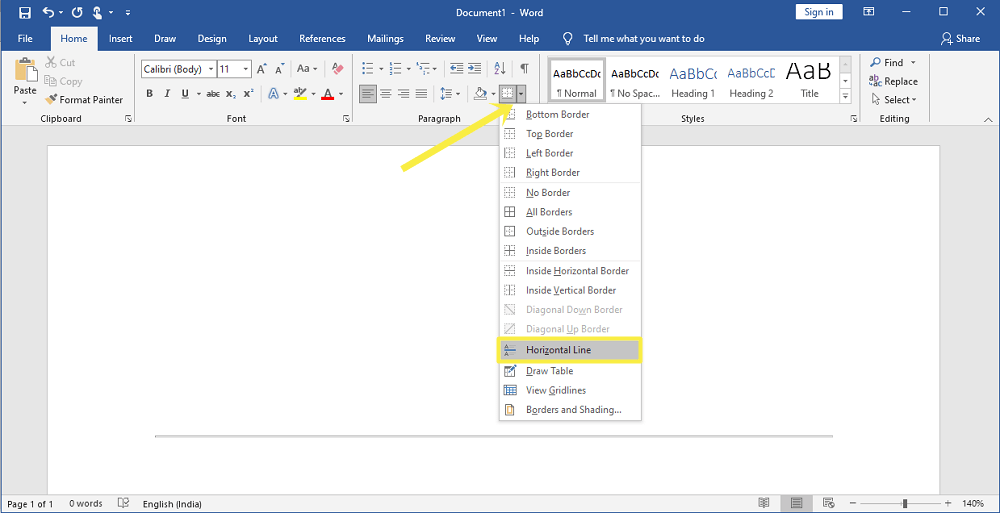
- Now from the Home tab, click on the dropdown menu of the Borders icon from under Paragraph options.
- After that, you’ll see the list of options. Select Horizontal Line from the list.

- Now the horizontal line will be inserted where you placed the cursor.
By default, the color of the line is automatically selected by Microsoft Word according to the page color. If the page color is light, then the line color will be dark. Similarly, if the page color is dark, then the line color will be light.
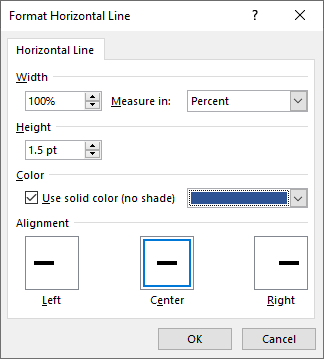
But you can format the line. For this, double-click on the added line to change its width, height, weight, color, and alignment.
2. Insert Horizontal Line Using AutoFormat
Using AutoFormat is one of the easiest methods to add a straight line in the word document or resume. Microsoft Word has inbuilt 6 horizontal rules that can be accessed through three-character shortcuts.
You just need to type three characters and press the enter button. After that, the characters automatically convert into a full-width line. You can add six types or lines i.e., thinner, thicker, doted, double-line, and wavy.
The steps are given below to add a line through the autoformat.
- Open the Word Document and place the cursor where you want to insert the horizontal line.
- Type the three charterers from the given below and press the Enter button.

- That’s all.

The line is inserted in the full width of the page or column.
If this functionality isn’t working, then you need to enable it. Microsoft Word gives the option to enable and disable AutoFormat lines from the Options settings.
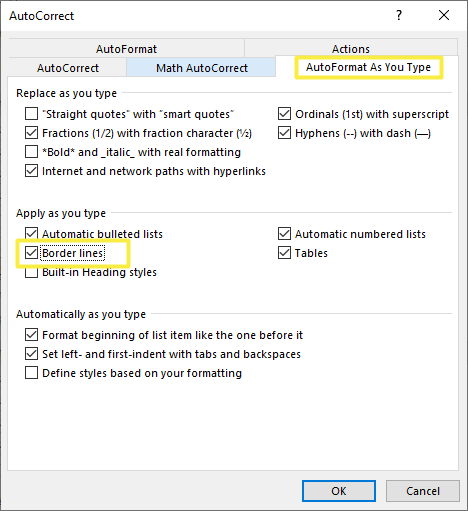
For this, click on the File from the ribbon and open Options. From the options dialog box, click on the Proofing tab option from the left navigation list.
Now click on the AutoCorrect Options button and select AutoFormat As You Type tab. Check or uncheck the Border Lines option to enable or disable it. After that, click on OK to make the changes.
3. Add Horizontal Line using Borders
You can insert the line using the border option from the ribbon. Though the border provides a separate horizontal line option. But sometimes you may need to add a line on the top, bottom, left, or right of the text or paragraph.
The steps are given below.
- Open a resume or document in Microsoft Word and place the cursor where you want to add the straight line.
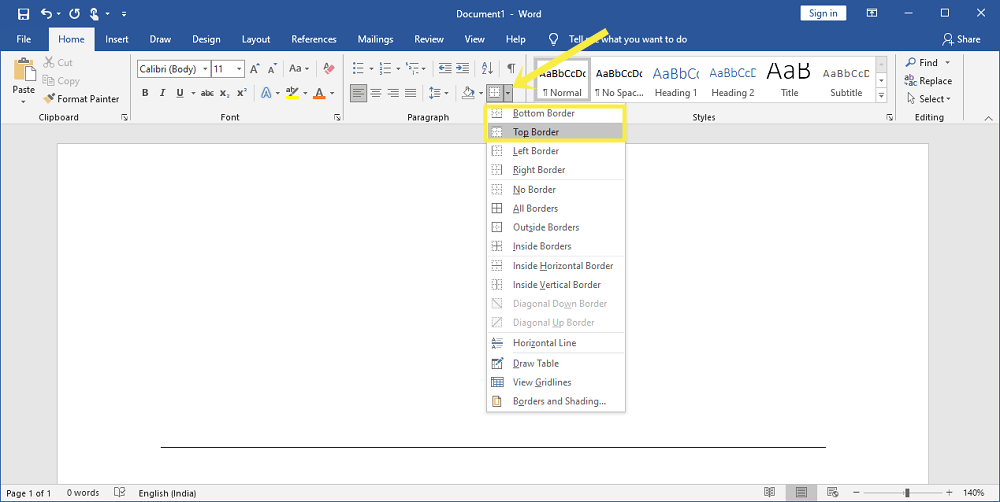
- From the Home tab, click on the Borders option from under Paragraph. Otherwise, click on the drop-down menu from the Border option and you’ll see the list of options. For horizontal lines, select the Top border or Bottom border option as you need.
- After selecting, the line will be added to the document. You can also see the live preview by hovering the mouse on options.

- That’s all.
You can also format the line to change the style color and width. For this, click on the drop-down menu from the Borders options from the ribbon. After that, open the Borders and Shading option. Select the Horizontal line style, color, and width, and click on the OK button.
4. Use Shapes to Add Horizontal Line
In Microsoft Word, you can add shapes (Lines, Block Arrows, Flowcharts, Callouts, Stars, and Banners) to documents and resumes. One of the best things about using shapes is that you can draw the line in any angle that you want.
The steps are given below to use shapes.
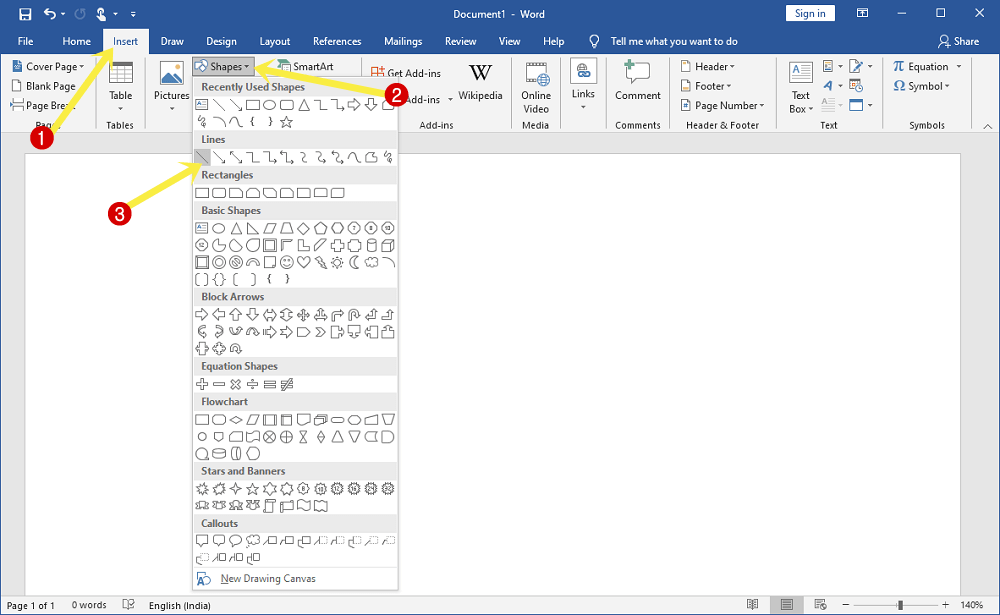
- Open Word Document and click on the Insert tab from the top.
- Click on the Shapes option from the ribbon and select a simple line from under the Lines.

- Now using the mouse, draw the line on the document where you want. (Tip: for straight line, press and hold the shift key and draw the line using a mouse)
- That’s it.
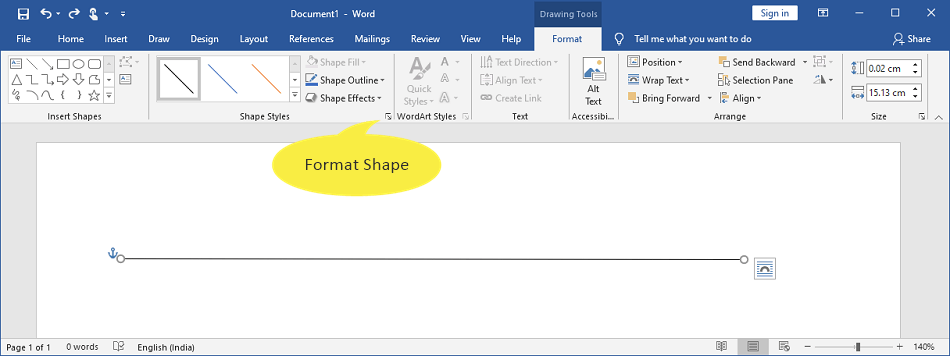
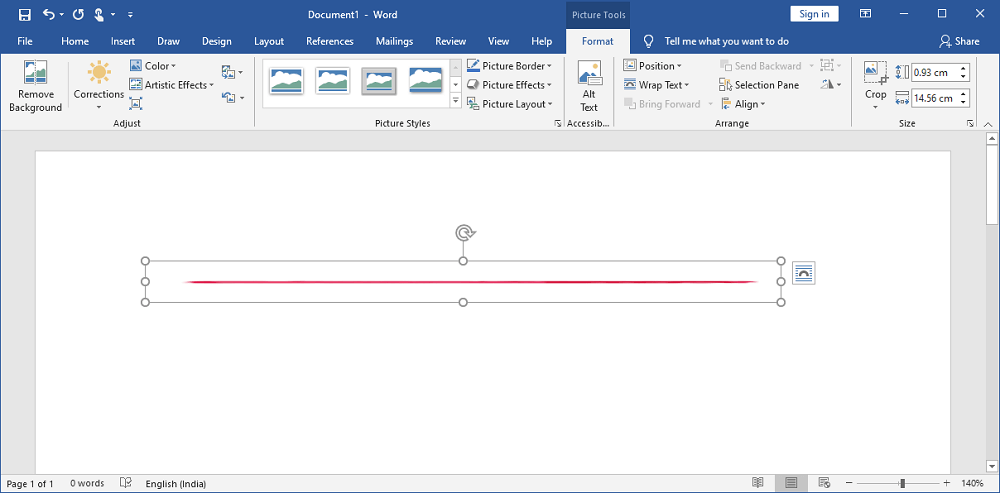
After inserting the line, you’ll see the Format option on the ribbon. Otherwise, double-click on the line to see the options. You can select the shape styles, outline, shadow effects, 3D effects, alignment, and more.
To change the color and size of the line, click on the Format Shape (Advanced Tools) option from under the Shapes Style.
5. Insert Horizontal Line using Pictures
To add the creative line, you can use graphics or pictures. You can use pictures from your device or online. The steps are given below.
- Open a document in Word and place the cursor where you want to put the line.
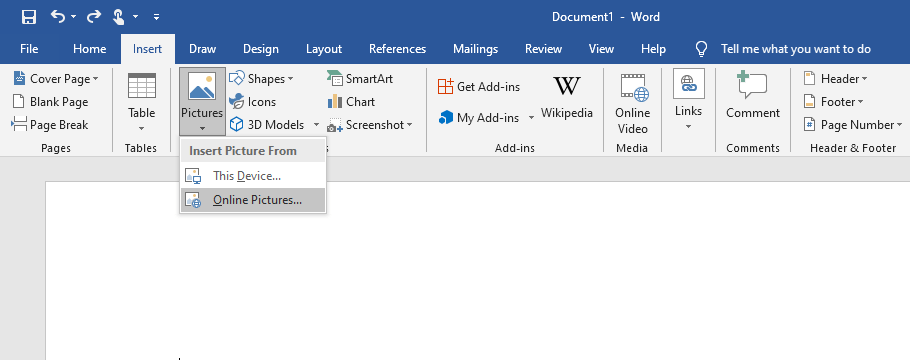
- Click on the Insert tab and click on the Pictures option. You’ll see two options – This device and Online pictures.

- If the picture is already available on your device storage, then click on the This device option and select the picture. Otherwise, select the Online Pictures option and search for the horizontal line. The search is powered by the Bing search engine.
- Select the line from the results and click on the Insert button. The image will be inserted into the document.
- Use sizing handles to resize and align the graphic line.

- That’s it.
Also Read: How to Extract and Save Images from Word Document
How to Add a Vertical Line in Word for Resume
The vertical lines are also adding a visual appeal to the resume by creating sections. So, the methods are given below to add a vertical line in word for a resume.
1. Insert Vertical Line in Word using Borders
If you want to put a vertical line at the left or right of the text or paragraph, you can use borders. The steps are given below.
- Open the Word document and place the cursor where you want to insert the vertical line.
- From the Home tab, click on the drop-down arrow icon from the Borders icon under Paragraph.
- Select the Left border or Right Border and click on it.

- After that, the line will be inserted into the document.
- That’s all.

You can also format the border line to change the style, color, and width. For this, click on the drop-down arrow icon from the Borders option and select the Borders and Shadings option from the list. Select the line style, color, and width, and click on the OK button.
2. Use Shapes to Add Vertical Line
Shapes are the easiest way to add or insert the vertical line according to the user’s requirement. Because you can draw the line. The steps are given below.
- Open the document and click on the Insert tab.
- Click on the Shapes option and select the simple line from Lines.
- Draw the line using the mouse. (Tip – Press and hold the Shift key and draw the straight vertical line)
- That’s it.
After inserting, you’ll see the Format options on the ribbon. If not, then double-click on the line to see the format options to change the shape styles, outline, shadow effects, 3D effects, alignment, and more.
To change the color and size of the vertical line, click on the Advanced Tools (Format Shapes) option from under the Shapes Style.
3. Add Vertical Line by Splitting text into Columns
Sometimes, you need to split the resume into two columns. For this, you can use columns from the layout. The steps are given below.
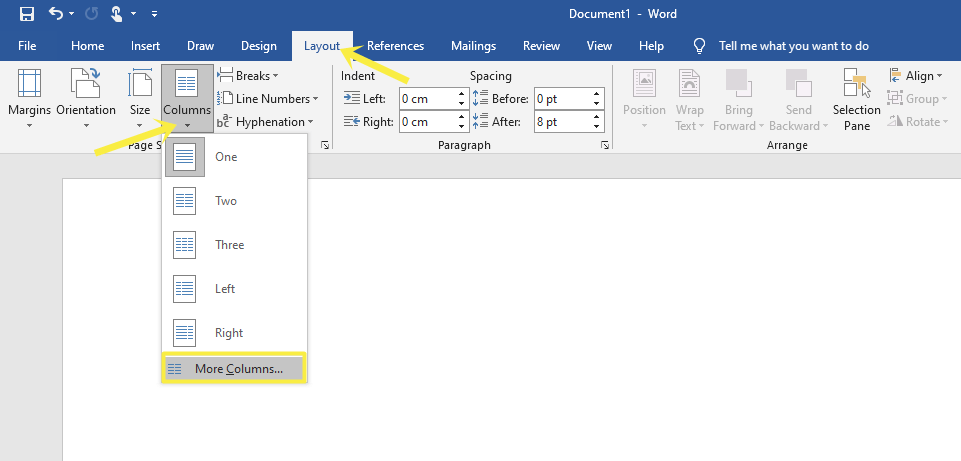
- Open the document in Word and click on the Layout tab from the top.
- Click on the Column option and select the More Columns option from the list.

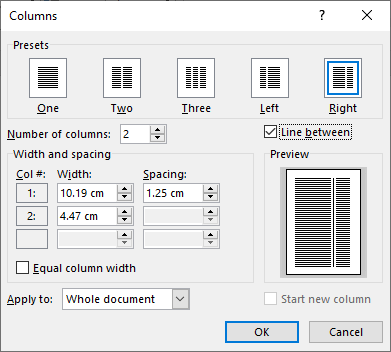
- Select the Presets from the dialog box. For resumes, Left and Right preset are best.
- After selecting the preset, enable the Line between option.

- Click on the OK button and that’s it.
Final Words
I hope this article helped you learn how to add a line in Word for your resume. Microsoft Word gives plenty of ways to insert horizontal and vertical lines in different styles to add visual appeal to your document and resume. Moreover, you can format the line according to your requirement.
Popular on OTW Right Now!


About The Author
Gagan Bhangu
Founder of otechworld.com and managing editor. He is a tech geek, web-developer, and blogger. He holds a master's degree in computer applications and making money online since 2015.