WebGL in Chrome – How to Enable, Disable and Troubleshoot
Do you want to know how to enable and disable WebGL in the Chrome browser?
All modern browsers support WebGL (Web Graphics Library). Now, this functionality is enabled by default on most browsers. But still some browsers require it to enable it manually.
However, in the new version of the Chrome browser, WebGL is enabled by default and you don’t need to enable it manually. But Chrome also offers an option to manage WebGL functionality. For example, you can enable hardware acceleration and turn on WebGL draft and developer extensions.

Moreover, because of the options to manage this service, there are chances that users may disable this service accidentally.
In this post, I’ll show you how to enable, disable, and troubleshoot WebGL in the Chrome browser for PC and Android.
What is WebGL?
WebGL (Web Graphics Library) is a JavaScript API and open web standard to render 2D and 3D graphics and scenes in a web browser without installing extensions or plug-ins.
Now all modern web browsers support it. But your device must have the hardware that supports it.
WebGL has used both software (CPU) and hardware (GPU) rendering. However, it is your choice whether you want to force your device’s GPU to render 2D and 3D graphics in the browser.
The service is developed and maintained by Khronos Group. The latest version of WebGL is 2.0 and from February 2022, the 2.0 version supported by all browsers.
How to Know whether Chrome Supports WebGL or not?
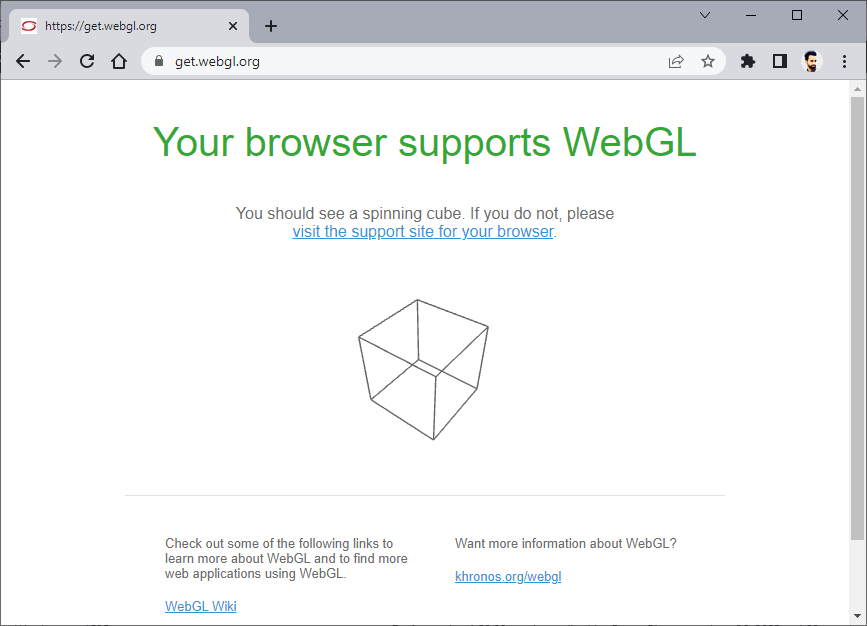
You can easily know whether your browser supports WebGL or not by opening the get.webgl.org website.
After opening the website, if Chrome supports this service, you’ll see the spinning cube on the web page with the message “Your browser supports WebGL”.
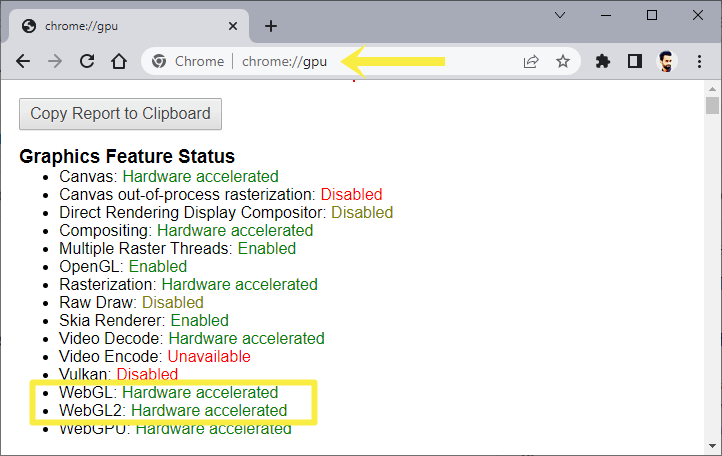
Alternatively, type chrome://gpu on the address bar (Omnibox) and open the link, and see the WebGL and WebGL2 status from under Graphics Feature Status. You’ll see one out of three statuses given below.
- Hardware-accelerated – The service is enabled and accelerated with GPU (running on both software and hardware).
- Software only, hardware acceleration unavailable – The service is enabled and running only on software.
- Unavailable – The service is not available. Your browser does not support WebGL.
How to Enable and Disable WebGL in Chrome Desktop
Now, the WebGL and WebGL2 service is enabled by default. Google Chrome removes it from the optional features as earlier it was available in the flags to enable or disable manually.
Well, you can enable or disable the additional options of this service.
1. Enable or Disable Hardware acceleration
Well, now the browsers have become heavy, and the web services and their sizes are increasing. Modern websites or web pages use different types of web services. And these services require too much processing power to execute and render.
Sometimes, the processor is not enough to run all web browser services smoothly. Hence, you’ll see the slow performance and lag.
To solve this problem, modern browsers (like Chrome) utilize the GPU to handle graphics-based tasks. It helps to reduce the CPU load and speed up the browser. And you’ll get a smoother web experience.
To render high-quality 3D graphics, WebGL requires more processing power. So, you should enable hardware acceleration.
However, hardware acceleration is enabled by default in Chrome. But you can manually enable or disable this option manually as you need. The steps are given below.
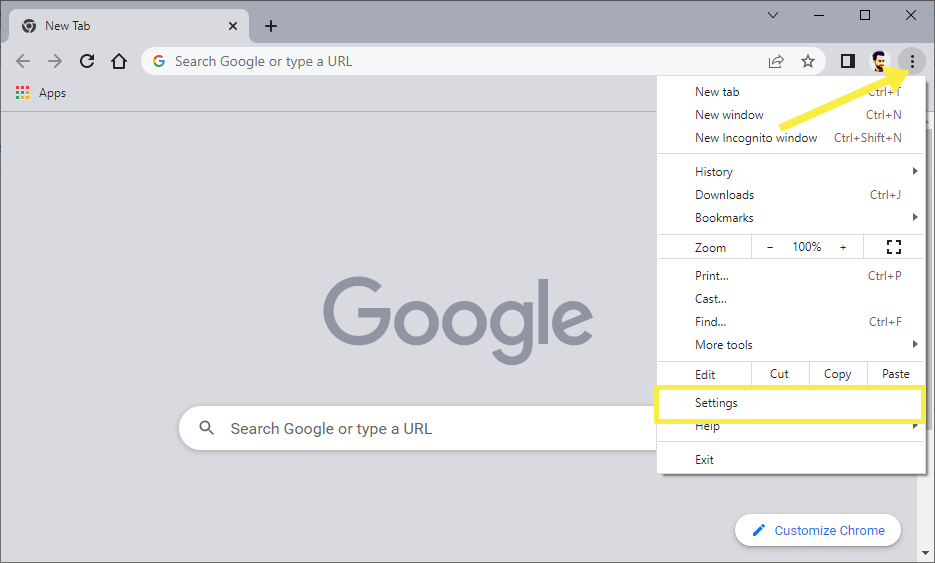
- Open the Chrome browser on your PC and click on the Menu (three vertical dots) from the top right.
- From the context menu, click on the Settings option.

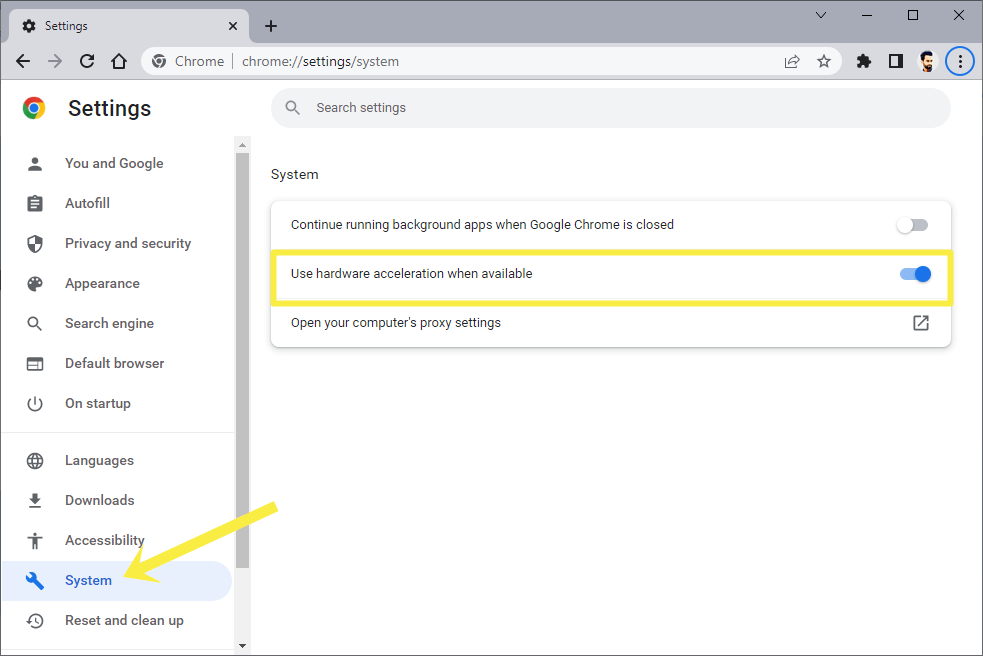
- Now the settings page will be open. Click on the System option from the left pane.
- Turn on or off the button next to “Use hardware acceleration when available”.

- Click on the Relaunch button to restart the browser to make the changes.
- That’s all.
2. Enable WebGL Chrome Flags
Chrome allows us to enable or disable the flags. Flags are experimental features that are under development. In the past, Chrome introduced WebGL in flags, and users could manually enable or disable this feature. Now the browser integrates this service permanently.
But Chrome provides some additional flags for this service that you can enable according to your requirements. The steps are given below.
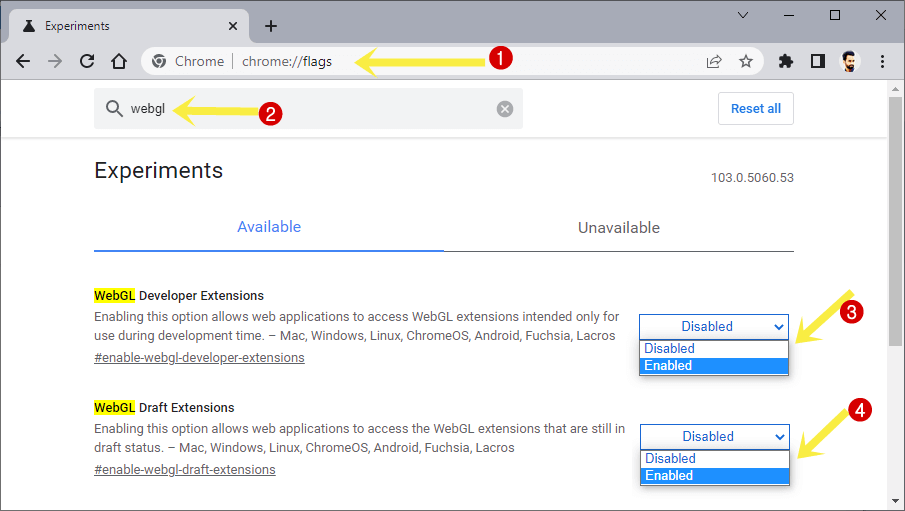
- Open Chrome browser on your PC and type chrome://flags in the address bar and open the link.
- On the flags page, type WebGL in the search field and you’ll see the 3 flags as given below.
WebGL Developer Extensions – This flag allows web apps to use WebGL extensions only while the development time.
WebGL Draft Extensions – It allows web apps to use WebGL extensions that are under draft.
Enables Display Compositor to use a new GPU thread – This flag forces Chrome to use two GPU threads instead of one. - To turn on the dedicated flag, click on the button next to the flag and select the Enabled or Disabled option from the drop-down menu.

- After selecting the option, click on the Relaunch button from the bottom right of the page to restart the browser to make the changes.
- That’s all.
How to Enable and Disable WebGL Extensions on Chrome Android
The WebGL is also integrated and enabled by default on Chrome for Android. You don’t need to enable it manually. But using flags, you can enable and disable its additional functionality. The steps are given below.
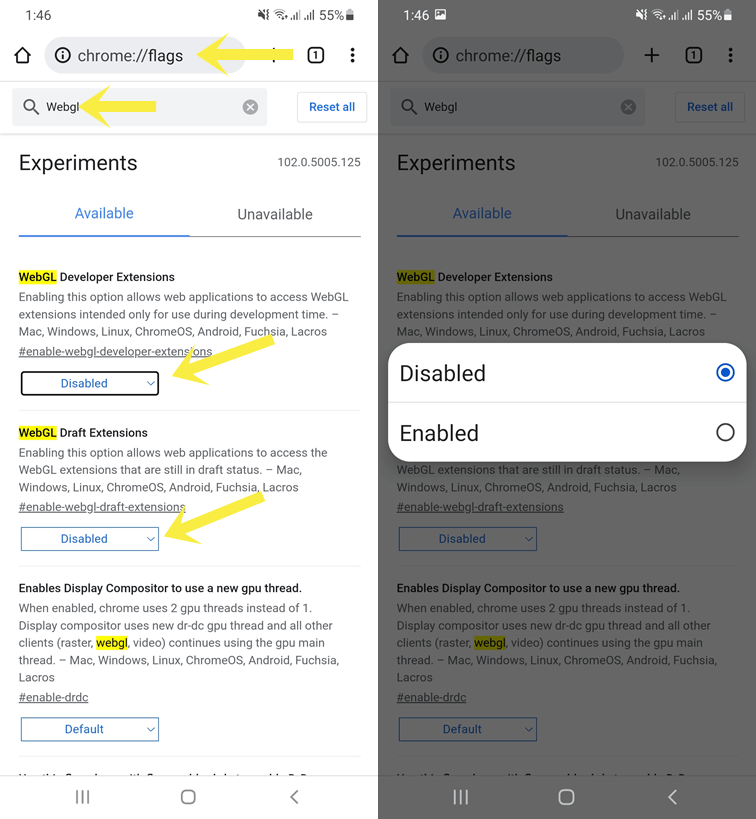
- Open the Chrome app on your Android device and type chrome://flags in the Omnibox. Tap n the go to open the link.
- From the flags page search for WebGL using the search field.
- Enable or Disable the WebGL Developer Extensions (Enables web applications to use WebGL extensions only at development time) and WebGL Draft Extensions (Allows the web apps to use extensions that are still in draft).

- Tap on the Relaunch button from the bottom of the screen to restart the app and see the effects.
- That’s all.
Also Read: Best Chrome Flags for Android
How to Troubleshoot WebGL Problems in Chrome
Follow the following steps to troubleshoot the problems.
Step 1. First, you need to know whether the Chrome version that is installed on your device supports WebGL or not. For this, open https://get.webgl.org and you’ll see the message on your screen. If you’ll see the spinning cube with the message “Your browser supports WebGL” then the browser supports this service. Otherwise, go to step 2.
Step 2. In the second step, check whether the hardware acceleration is enabled on not. If not, then you need to enable it. On the Chrome browser, click on the Menu » Settings » System (from the left pane) » Enable Use hardware acceleration when available option.
Step 3. Now check the WebGL status from the Chrome GPU information page. Type chrome://gpu in the Omnibox and open the URL. Check WebGL and WebGL2 from under the Graphics Feature Status title. If the status shows Hardware-accelerated it means it uses the graphics card as well as the CPU. Otherwise, Software only, hardware acceleration unavailable status tells that the service is using only CPU and running at a software level. Unavailable status means that this service isn’t available on your device due to outdated software or hardware.
If the service is unavailable or not hardware accelerated. From the GPU information page scroll down and check the information about WebGL under Problems Detected. You’ll see the problems.
Frequently Asked Questions (F.A.Q)
1. My Chrome browser does not support WebGL, what should I do?
If your browser doesn’t support WebGL, then there may be two reasons for this.
- Outdated Chrome Version or Operating System – If you’re still using an old version of the browser or an outdated operating system, you can’t use this service. You need to update/upgrade the browser and operating system. To update Chrome, click on the Menu » Helps » About Google Chrome to update the browser.
Note that, due to outdated hardware and Operating system (CPU and OS) you may be unable to update the browser. So, you may need to upgrade the hardware and OS. - Outdated/Blacklisted CPU and Hardware – If your machine is still running on old hardware, you can’t use this service. The outdated CPU doesn’t support WebGL. You need to upgrade the hardware. Also, some GPUs are blacklisted and the WebGL is disabled on that GPUs.
2. Is it necessary to enable hardware acceleration?
However, it is not necessary to enable hardware acceleration. But there is no downside to enabling this option. This option will boost the performance of the browser. To render the 3D graphics, it forces the GPU to execute the tasks and it helps to reduce the CPU load.
3. Can I permanently disable WebGL in Chrome?
No, you can’t disable this feature permanently on the Chrome browser. The new versions of Chrome support and offer this service by default. However, you can disable its additional features and extensions from flags.
Final Words
I hope this article helped you learn how to enable, disable, and troubleshoot WebGL in the Chrome browser. All modern browsers use WebGL to render 3D and 2D graphics. However, it can only render low-level graphics within the browser. But you don’t need to install plugins or extensions.
Note that, you should enable the “Use hardware acceleration when available” option. Because this option helps to increase the performance of the Chrome browser. It forces the GPU to execute graphics computations and it removes the lag while rendering the 3D objects and graphics.
Popular on OTW Right Now!


About The Author
Gagan Bhangu
Founder of otechworld.com and managing editor. He is a tech geek, web-developer, and blogger. He holds a master's degree in computer applications and making money online since 2015.