What You Should Know About Disk Management on Windows 10?
About Disk Management on Windows 10
With more and more data in your disks, managing disks and partitions in Windows 10 or 11 becomes more and more important. But when it comes to tools for managing partitions, Disk Management is probably the first thing that comes to mind.
As a built-in tool, Windows Disk Management is well known by PC users for its no-download, high security, and free features. Indeed, Disk Management can solve some common problems for users, such as creating, deleting, shrinking, expanding partitions, and so on. It is a handy tool for Windows 10 users.
How does Disk Management work?
In this section, I will show you how to open Disk Management and how to perform related operations with Disk Management.
How to access Disk Management on Windows 10
Generally, there are 2 ways to open Disk Management.
Way 1. Shortcut keys
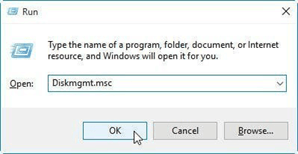
Press “Windows + R” on the keyboard at the same time, type in “Diskmgmt.msc” and click OK to open Disk Management.
Way 2. Open Manually
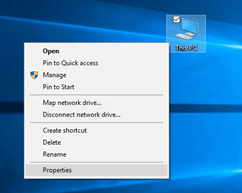
Right-click “This PC” on the desktop and select “Manage”. Then, under the Storage menu bar, find Disk Management.
How to use Disk Management on Windows 10
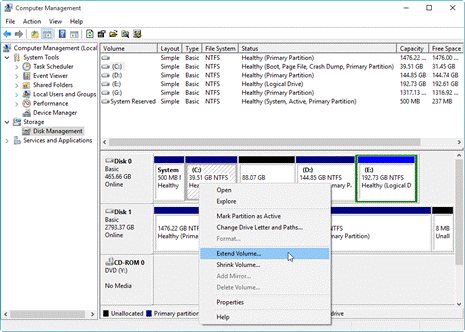
After opening Disk Management, you will see that all disks and partitions on your computer will be displayed. By right-clicking on any partition, you can perform different actions. For example, when the C drive is running low on space, we can extend it. Just select Extend Volume.
Error: Disk Management on Windows 10 extend volume greyed out
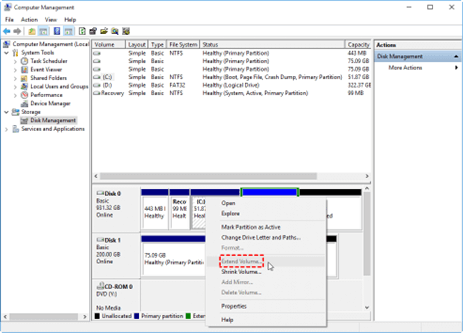
Even though everything seems to be going well, it can still go wrong. You will find Windows extend volume greyed out when you extend the partition because there is no unallocated space next to the C drive. In this case, the only way to extend the system partition is to delete the partition behind the C: drive. Or you can find a way to move the middle partition so that the C drive is adjacent to the unallocated space. But deleting the partition will lose data and Disk Management does not have the option to move the partition. So, it is inevitable to find alternative software if you want to extend the C drive.
Better partition manager for Windows 11/10/8/7
How can I extend my C drive as much as I want without any restrictions? I recommend a free partition manager named AOMEI Partition Assistant Standard, a powerful partition magician which can easily solve the problem of extend limitation in Disk Management.
For example, it allows users to extend partitions in Windows 11/10/8/7/Vista/XP, no matter if there is adjacent unallocated space behind the extended partition. Because it can move unallocated space so that it is adjacent to the extended partition. Or, you can just merge the non-adjacent unallocated space with the extended partition into a larger partition.
It is worth mentioning that the interface of this software is very intuitive, and the graphical user interface makes it easy for users without a computer background to try it out. Moreover, it was developed by a professional team and is extremely secure, with no malicious pop-ups or ads during use.
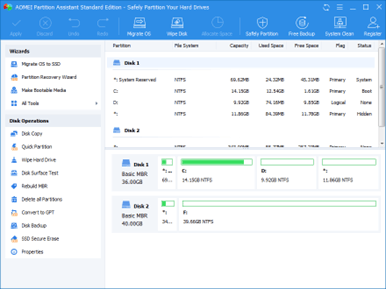
As you can see, it has several embedded features, which can help you effectively solve different disk partitioning challenges. For example, converting MBR to GPT on Windows 10, replacing a hard drive without reinstalling, wiping the disk, etc.
Next, I will show you how to extend the C drive in two different ways.
Option 1. Merge partitions
You can right-click the unallocated space or select the target partition to select Merge Partitions.
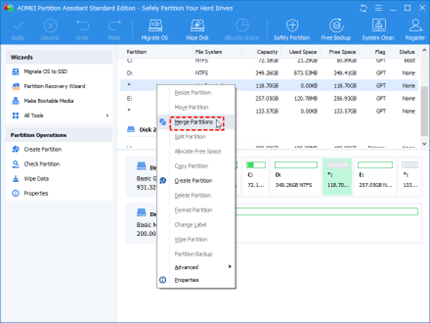
Then, check the target partition and non-adjacent unallocated space, you can even select multiple unallocated spaces. Finally, click OK and Apply to generate the action.

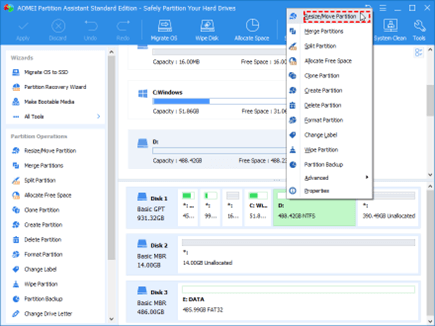
Option 2. Move unallocated space
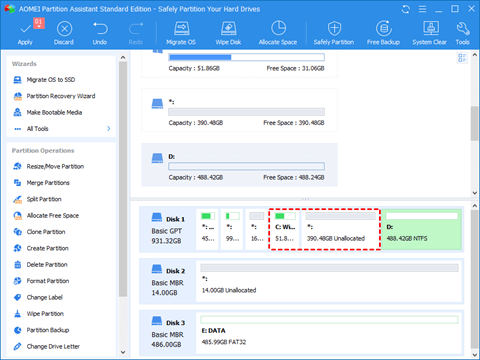
As shown in the figure, when C: is separated from the unallocated space by a D:, you can right-click D: and select Resize/Move Partition.
In this window, drag the bar to the right to move D: behind the unallocated space. Click OK.
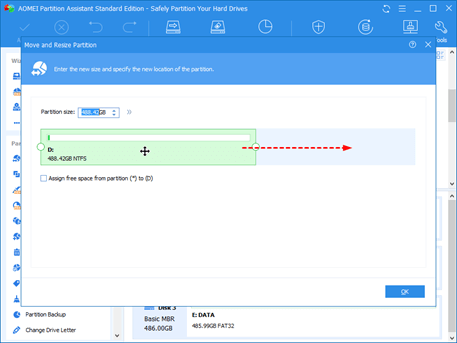
At this point, you will see that C: is already adjacent to the unallocated space in the preview results. Then click Resize/Move Partition and pull the border to extend C:.
You should now have a clear idea of how to extend a drive in Disk Management on Windows 10, even when the unallocated space is not adjacent to the target drive.
Popular on OTW Right Now!


About The Author
Gagan Bhangu
Founder of otechworld.com and managing editor. He is a tech geek, web-developer, and blogger. He holds a master's degree in computer applications and making money online since 2015.