2 Ways To Turn Off Windows 10 Updates
How To Turn Off Windows 10 Updates: Windows 10 provides a lot of new features than the previous versions of Windows. Also, Microsoft provides the updates for windows 10 from time to time for more security and new features. You don’t need to find and download any update for new features. Windows 10 does this automatically itself. Windows 10 also fixes critical issues automatically itself.
By default, Windows 10 updates install automatically on your PC/Device. So, it uses a lot of internet usage in a background. Sometimes, it irritated us, when Windows 10 steals the bandwidth in the background. So, here is how to turn off Windows 10 Updates.
In Windows 8/8.1, there is an option to turn off Windows updates. But, in Windows 10, there is no option is available to do this. Though, Windows 10 provides a metered connection option to disable background data usage. In which it also disables the Windows updates. But, there is more than one option available to do this.
Why Should You Need To Turn Off Windows 10 Updates?
- You are doing some important work on your PC and updates may take the system and network resources.
- Internet bandwidth is being stolen by automatic updates in the background.
Note: Don’t turn off Windows 10 updates if you want the new features and prefer the security. You can turn off updates temporarily by set your connection as metered.
How To Turn Off Windows 10 Updates
1. Using Metered Connection (Easy Way)
In Windows 10, You can set a connection as a metered connection to restrict background data. When you set your WiFi or ethernet connection as metered, then the background data will be disabled. Also, the updates will be disabled. So, this is the easiest way to turn off the updates. Though, you can manually download and install updates after set connection as metered. But, Windows won’t download and install any update automatically.
When and Why Set connection as a metered connection?
This option is very helpful when you are doing some work on your device, and Windows 10 steals your internet bandwidth to download updates in a background. So, you can use this option to overcome this problem.
How To Set Connection as a Metered Connection?
You can set the connection as a metered on both WiFi and Ethernet connections. Below are the steps.
For WiFi Connection:
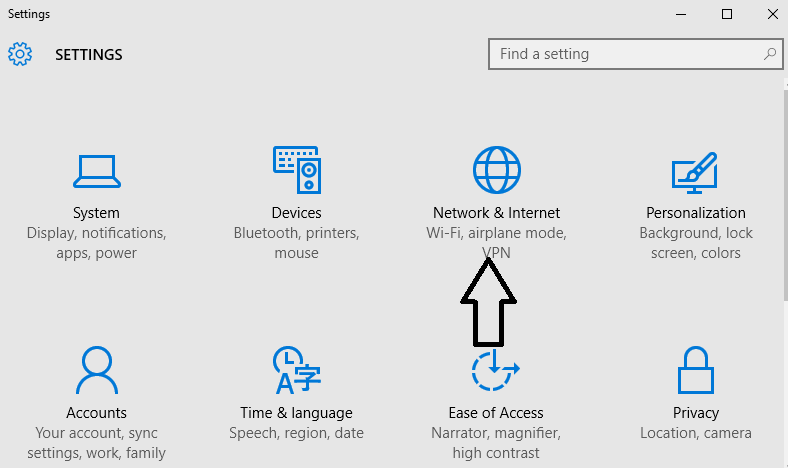
- Open “Settings” (Keyboard Shortcut: Windows Key + I) and Click on “Network & Internet” option.

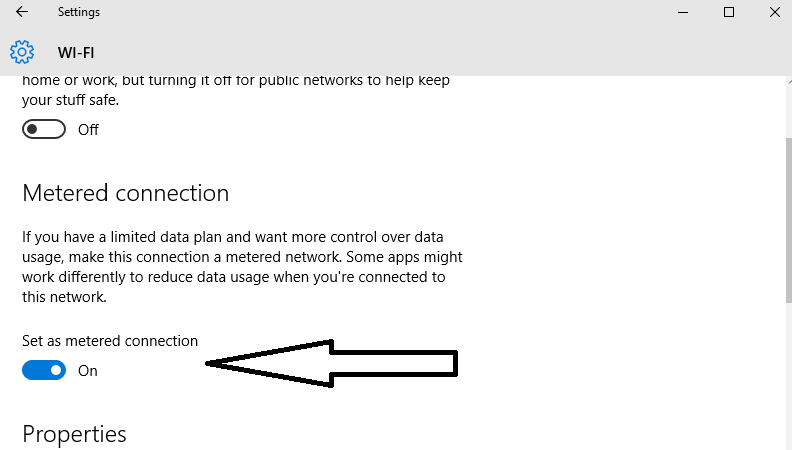
- After that, Click on the WiFi option from the left side and click on your WiFi Connection name.
- Turn on “Set as metered connection” option.

You can also set WiFi connection as metered from the taskbar. Click on the WiFi icon from the taskbar and click on the WiFi connection. After that, click on the “Properties” option and Turn on “Set as metered connection” option.
For Ethernet Connection:
You can also set Ethernet connection as metered in Windows 10 Creators update. If you have a previous version of Windows 10, then, don’t worry you can also do this with a registry hack. Below are the steps to set ethernet connection as metered.
- Open “Settings” and click on the “Network & Internet” option.
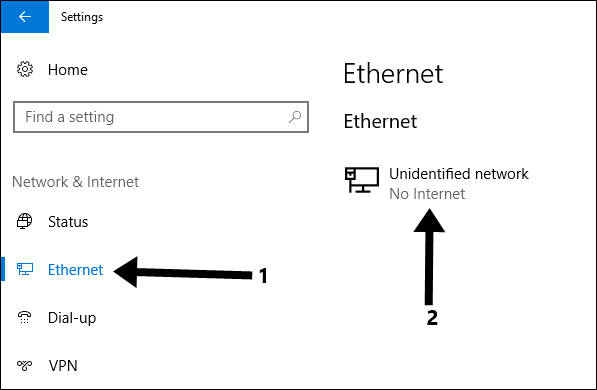
- After that, Click on the “Ethernet” option from the left side and click on the Ethernet connection name.

- Turn on “Set as metered connection” option.


So, these are the easy steps to disable background data and windows update with metered connection option.
Note: If you found any problem to set metered connection, then, here is the complete guide on How to disable background data in Windows 10.
2. Using Windows Services
Below are the steps to disable updates using Windows services.
- Type services.msc in the search box/Cortana and open Services.

- Scroll down to find the Windows update and right click on the Windows update. After that, click on the Properties.

- Select the Disabled option from the Startup type list box and click on the Apply and OK button. (Note: You can select Automatic option any time to enable automatic updates)


After doing this, the update process will not start automatically. The automatic updates will be disabled.
Final Words
So, These are the two easiest ways to turn off windows 10 updates. Though there is an another option (With Group Policy Editor) also available to do this. But, Group policy editor only works, if you have Windows 10 Pro, Enterprise, or Education. But, above two methods are easy to use in any edition of Windows 10.
Popular on OTW Right Now!


About The Author
Gagan Bhangu
Founder of otechworld.com and managing editor. He is a tech geek, web-developer, and blogger. He holds a master's degree in computer applications and making money online since 2015.