How to Use Vidmud Photo Enhancer for Better and Clearer Images
In today’s digital world, high-quality images are important for social media, blogs, online stores, and personal memories. Blurry or low-quality photos can reduce the overall impact of your content. Thankfully, AI-powered tools now make photo enhancement easier than ever. One popular solution is Vidmud, a smart platform designed to improve image quality quickly and efficiently.
This tutorial guides you step-by-step through the Vidmud photo enhancer and how it has proven itself to be a convenient tool for creators, photographers, bloggers, and others.
What Is Vidmud Photo Enhancer?
Vidmud photo enhancer is an AI-based photo enhancement app that enhances images automatically. Can enhance unclear pictures, boost clarity, enhance details, reduce noise, and bring old or lower resolution images to a more professional look.
Unlike conventional editing software, Vidmud automatically analyzes the photos and enhances them with AI, eliminating the need for manual adjustments. This not only saves tim, but also allows for easy photo editing, even for newbies.
The platform is suitable for many purposes, including:
- Social media posts
- Blog images
- Product photography
- Portrait enhancement
- Old photo restoration
- Content creation
- Marketing visuals
Due to its ease of use, anyone can improve images without the need for advanced editing knowledge.
Why People Use Vidmud
Vidmud is preferred by many users due to its quick and easy editing process. The standard photo editing tools can be confusing and complex – they may involve layers, filters, and adjustment settings, which may need experience to master. Vidmud eliminates these challenges in an automated manner.
Some key advantages include:
- Quick image enhancement
- AI-powered sharpening
- Better image clarity
- Beginner-friendly interface
- Time-saving workflow
- Improved low-quality photos
For those who create digital content regularly, it’s a handy tool to have on hand for creating high-quality visuals in a hurry.
Step-by-Step Guide to Using Vidmud Photo Enhancer
Step 1: Open the Vidmud Platform
First,t go to the Vidmud platform by using your browser. The website’s design is simple and easy to navigate for first-time users.
After opening the homepage, find the “photo enhancement” or “image editing” feature.
Step 2: Upload Your Photo
Now you need to upload the image that you wish to enhance. Tap the upload button and select a picture from the device.
The AI photo enhancer supports different image types, allowing users to enhance portraits, landscapes, social media photos, and even older pictures with low quality.
The ideal images for the best results are those not too severely damaged, but the AI can enhance many blurry or highly pixelated photos surprisingly well.
Step 3: Let the AI Analyze the Image
After uploading the photo, Vidmud automatically begins analyzing it. The AI detects areas that need improvement, such as:
- Blur
- Noise
- Poor lighting
- Low resolution
- Weak details
This typically takes a few seconds, depending on the image size.
One of the major features of many users’ preferred editing software is that it is manual, while Vidmud is fully automated.
Step 4: Apply Enhancement Settings
The image analysis is followed by an automatic enhancement process once performed. The AI enhances the image, making it sharper, clearer, and of higher quality.
Other forms of the utility may also have extra options that let the user pick enhancement levels and image styles. These are additional features that offer greater flexibility in editing options.
The overall picture looks significantly clearer and more aesthetically pleasing than the original image.
Step 5: Preview the Enhanced Photo
Please view the enhanced image thoroughly prior to downloading. Most people will find the improved sharpness, lighting, and details to be quite noticeable.
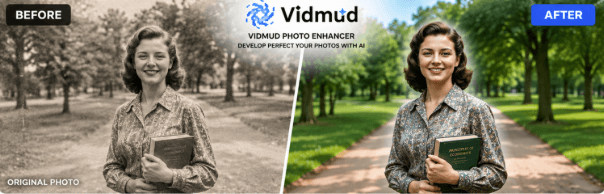
The preview option enables users to view the original and improved documents at the same time. This aids to confirm the results are expected or not.
For bloggers and content makers, it helps since the quality of images influences how they are viewed and how much they grab the attention of viewers.
Step 6: Download the Final Image
Once satisfied with the results, simply download the enhanced image to your device.
The final photo can then be used for:
- Instagram posts
- Website content
- Online stores
- YouTube thumbnails
- Marketing campaigns
- Personal collections
Upload to download normally takes a few minutes for the entire process.
Best Tips for Better Results
To get the best performance from the Vidmud photo enhancer, consider these helpful tips:
Use Clear Original Photos
While AI can remedy blurry photos, it’s best to have a reasonably good photo to work with to achieve a superior result in the end.
Avoid Overedited Images
Pictures that are heavily edited or filtered might not come out as naturally as those that aren’t.
Test Different Images
By testing different types of images, users can gain a better understanding of the AI’s performance in various scenarios.
Use High-Quality Downloads
Save at the highest resolution for the website and social media for better visuals.
Final Thoughts
The Vidmud photo enhancer is a useful and user-friendly tool that can help enhance the quality of images without the need for advanced editing skills. The AI-driven technology enables it to enhance blurry photos, clarify details, and produce high-quality visuals with a few clicks.
From content creators, bloggers, marketers, photographers, to social media fans, everyone can use Vidmud to improve photos quickly and effectively. Its user-friendliness and speed are great for individuals who wish to enhance photographs fast and effectively.
With the fast-changing landscape of AI tools, AI-powered platforms like Vidmud are enabling users to produce high-quality visuals efficiently and creatively.
Popular on OTW Right Now!


About The Author
Gagan Bhangu
Founder of otechworld.com and managing editor. He is a tech geek, web-developer, and blogger. He holds a master's degree in computer applications and making money online since 2015.