
oTechWorld » How To » How to Send Personalized WhatsApp Messages from Excel on WhatsApp Web
How to Send Personalized WhatsApp Messages from Excel on WhatsApp Web
Sending the same WhatsApp message to several people can quickly become repetitive. You have to copy a phone number, open a chat, paste the message, and repeat the process for every recipient.
The task becomes even slower when each message needs a different name, appointment time, order number or company name.
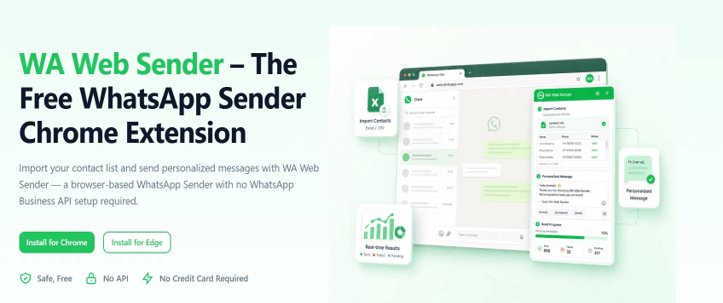
A practical alternative is to prepare the contact information in Excel and use it to create personalized messages through WhatsApp Web. This guide explains how to organize the spreadsheet, import the contacts, and check the results without saving every number to your phone.
What You Need Before You Start
Prepare the following:
- A desktop or laptop with Google Chrome.
- An active WhatsApp account.
- Access to WhatsApp Web.
- An Excel contact list.
- A Chrome extension that supports contact import and personalization.
The numbers that are to be received should be valid WhatsApp numbers with country codes. It’s also important to ensure that the contacts are expecting the message to arrive, and thatthe usere is in compliance with rules and WhatsApp policies.
Step 1: Prepare the Excel Contact List
Open Excel and create one row for each recipient.
The first column has to be the phone number of the WhatsApp ID. Type in the full international telephone number with the country code. Avoid spaces, brackets, and other unnecessary characters.
You can add more columns for information that will be used in the message. For example:
| Phone | Name | Appointment | Branch |
| 14155550123 | Daniel | August 18 at 2:00 PM | Downtown |
| 442071234567 | Emma | August 19 at 10:30 AM | West End |
Be sure to use short and easily identifiable column names. Long labels are not easy to use; fields such as name, company, order,r and date are easier.
Before saving the file, check for:
- Missing country codes.
- Duplicate phone numbers.
- Blank required fields.
- Old appointment or order information.
- Contacts who should no longer receive messages.
A clean spreadsheet reduces errors after the file is imported.
Step 2: Install the Browser Extension
Open the Chrome Web Store and install WAWebSender.
Once installed, you can click the Extensions button in the top-right corner of Chrome and “pin” the extension. This way it will stay visible in the browser’s toolbar.
Then, launch WhatsApp Web. On the WhatsApp mobile app, use the Linked Devices option to scan the QR code displayed in the browser.
After connecting the account, click the extension icon to get the sending interface.
Step 3: Import the Excel File
A browser-based WhatsApp Bulk Sender lets you work with an imported contact list instead of opening each number manually.
Download the Excel template included in the extension, enter the information for your phone number in the column for that purpose, and fill in any personalization fields you will be using. Save this completed file prior to uploading it back to the extension.
After importing, review the contact preview carefully. Confirm that:
- The numbers appear in the correct column.
- Names and other fields match the right contacts.
- No unexpected blank rows were imported.
- The total number of contacts is correct.
Be sure not to begin sending after uploading. It is easier to check a few rows now than to correct messages later.
Step 4: Write and Personalize the Message
Enter the core message in the Editor. Then, you can add fields from the spreadsheet in any location for customized info.
For example:
Hi {{name}}, this is a reminder that your appointment is scheduled for {{appointment}} at our {{branch}} location.
The information in each placeholder is substituted with the info from the same row.
Be sure to maintain the message’s readability without undue personalization. Don’t add a field just because it exists. A short message with the correct name and time of appointment is generally better than a lengthy message with an excess of information.
Look at multiple records prior to the next step. Focus on rows that have long names, do not have an optional field, or contain special characters.
When relevant to the message, you can also include an image, video or document when you are planning to include attachment support.
Step 5: Test With a Small Batch
Do not begin with the complete list.
Select a few contacts that you can safely use for testing. Confirm that:
- The message displays properly in WhatsApp Web.
- Personalized fields will show values that are expected.
- Line breaks and punctuation are correct.
- All other attachments are considered unwanted and will be disposed of.
- The recipient account will not have any problems with formatting.
If something does not seem to be correct, make the necessary corrections in the spreadsheet or in the message template.
Following the test, continue to send controlled batches; do not send the entire list without review. Send in reasonable intervals and keep ready to supervise the process.
Step 6: Review Progress and Results
In the sending session, monitor the progress rather than let the browser run by itself.
The number could be misformatted, not available on WhatsApp, or experience a temporary problem with WhatsApp Web. Examine unsuccessful records and determine the reason for failure, and then repeat the process.
After the run, export or save the results when that option is available. Update the original contact list with:
- Incorrect phone numbers;
- Contacts requiring individual follow-up;
- Messages that need to be retried;
- Requests not to receive future messages.
This prevents the same issue from returning the next time the spreadsheet is used.
Common Mistakes to Avoid
Leaving out the country code
Local Numbers may not be able to link to the desired WhatsApp account.
Using an old spreadsheet
The times of appointments and customers’ status and opt-out information could have been updated.
Adding too many personalization fields
The more variables involved, ed the more opportunities there are to miss or get it wrong.
Skipping the test message
If there is a formatting error, all numbers in the list will be impacted.
Sending more replies than the team can handle
Messages can lead to instant response, or clarifications! Do not have too many students.
Treating every saved number as a marketing contact
Contact individuals for a proper and appropriate reason.
Frequently Asked Questions
Do I need to save every number on my phone?
No. Each phone number doesn’t need to be entered in the phone’s address book, as the extension can make use of the numbers in the imported contact list.
Can I use information other than the recipient’s name?
Yes. Company, appointment time, order reference, or location are examples of fields that can be recorded in spreadsheet columns. Only use information that has been checked for accuracy.
Does this require the WhatsApp Business API?
No. This approach is very simple; it’s accessible onthe WhatsApp Web browser, and there is no separate API setup.
Can I close WhatsApp Web while messages are being processed?
During the sending process, the browser, WhatsApp Web, and the extension should stay open. The process may be interrupted when closing the tab or disconnecting the linked account.
Final Thoughts
You can save a lot of time sending personalized messages on WhatsApp through its Web version by importing contacts from Excel.
Importing a huge list isn’t the key. Set up the numbers correctly, utilize trustworthy personalization fields, test out the message, and track the results.
Some of this can be avoided by spending a few minutes to review thespreadsheet, to make sure that names, details, and messages were not sent to the wrong contacts.
Popular on OTW Right Now!




About The Author

Gagan Bhangu
Founder of otechworld.com and managing editor. He is a tech geek, web-developer, and blogger. He holds a master's degree in computer applications and making money online since 2015.