7 Ways to Remove Write Protection from USB in Windows [2026]
How to Remove Write Protection from USB Effortlessly
Have you ever tried to format your pen drive but received the frustrating error message, “The disk is write-protected”? You’re not alone. When a USB drive is locked, it becomes read-only, allowing you to view files but not make any changes. This common problem can happen for several reasons, but the good news is that there are different ways to remove USB write protection. In this full guide, we’ll walk you through how to remove write protection from a USB on Windows 11/10/8/7. Let’s get started!

Why Is My USB Stick Suddenly Write-Protected?
Many Windows users often ask questions like “How to undo write-protected USB?” on tech forums and help sites. Before you panic or try random solutions, it’s crucial to understand what might be causing the problem. The table below shows the main reasons and how to solve them.
| Cause | Description | Solution |
| Physical Lock | Your USB stick might have a tiny switch on the side that got turned on by accident. | Method 1 |
| Virus or malware infection | Your USB drive could be infected with a virus, which can lock it and stop you from copying, deleting, or editing files. | Method 3 |
| Hardware issues | There are bad sectors on the USB stick, or it is full. | Method 2 or Method 7 |
| Disk errors | Your USB might have been removed without ejecting properly. | Method 2 |
| Registry settings | Improper system settings can block writing to the USB drive. | Method 4 or Method 5 |
How to Remove Write Protection from USB on Windows 11/10/8/7?
Preparation: Rescue Data from Write-protected Drive
Before you can remove USB write protection, it’s often recommended to extract files from the affected drive. Tools such as Tenorshare 4DDiG offer a very accessible solution for USB drive data recovery. Not only compatible with all major Windows versions, but it can also handle over 1,000 data types.
With a success rate of 99.3%, 4DDiG can help you safely retrieve files in various data loss situations, whether your USB is logically corrupted, write-protected, or accidentally formatted. Here’s an example of how to use it to recover data from an inaccessible drive:
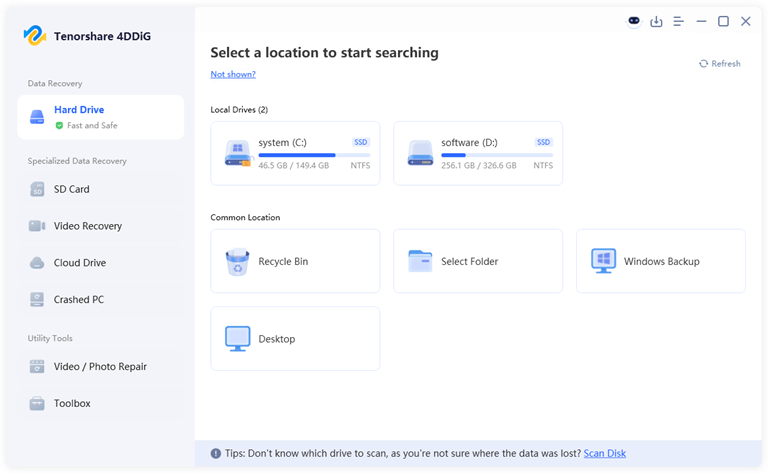
Step 1: To get started, install the free version of 4DDiG on your Windows machine. Then, plug the write-protected USB stick into the same computer. Launch the program, and on the main interface, select your USB drive as the target for recovery.
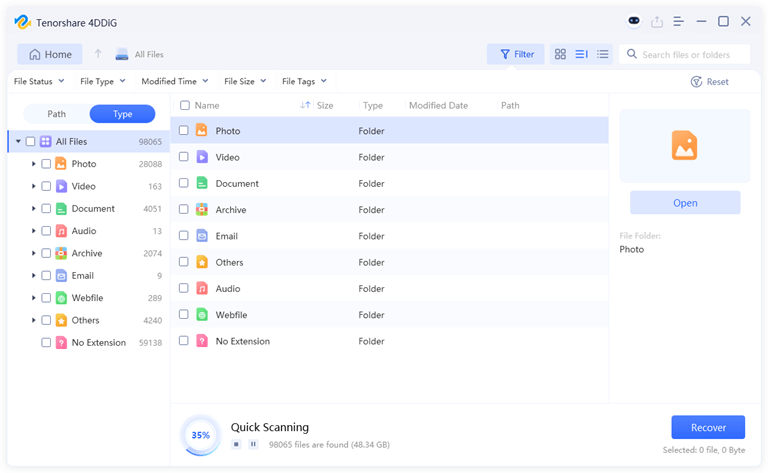
Step 2: Click the Scan button to start analyzing your USB drive. The software will perform a quick scan first and then a deep scan if needed, searching for more recoverable files.
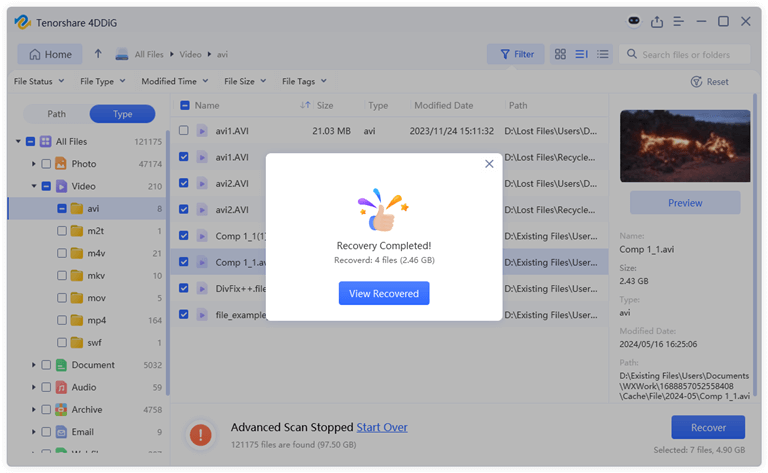
Step 3: After the scan is complete, 4DDiG will display a list of recoverable files. You can preview files to make sure they are intact before recovery. Then, select the files you wish to restore.
Step 4: Tap Recover and pick a location for your files. Besides saving to your PC, you can also send them directly to a cloud drive such as Google Drive.
Method 1: Turn Off Physical Lock
First of all, have a glance at your pen drive. On some older USB models, there is a small physical switch on the side, which writes protection. Once this switch is switched on, you will receive an error message that the disk is write protected USB. The majority of the contemporary USB sticks are not fitted with this provision; however, in case your USB has a switch, unplug and slide the switch to the unlocked state, that is, and re-plug again.
Method 2: Run DiskPart
There’s a possibility that Windows mistakenly treats your USB stick as read-only. In this case, you can try removing the restriction using DiskPart, a built-in command-line tool. Here’s a guide on how to disable write protection on USB with the help of DiskPart:
Step 1: Start by opening Command Prompt as an administrator. After that, type diskpart followed by pressing Enter.
Step 2: Run the list disk command to locate your affected USB drive, then select it using select disk X (replace X with the correct disk number).
Step 3: Finally, execute the attributes disk clear readonly command.
Method 3: Clean Up Virus
And you are still wondering how to go about erasing write protection on a USB? The cause of the write protection would be a virus or malware, which could be especially true in the case where the USB stick has been used across several computers or public PCs. It can also happen that the USB drive has some abnormal behavior, including unknown files, deleted data, and files that are not openable.
In this case, give your computer and USB drive a scan through a trusted antivirus software. Always ensure that you run your security software at the latest possible version before you decide to run a full scan, so that it can be able to pick up the latest threats.
Method 4: Edit the Registry
One effective way to remove write protection froma USB is to edit the Windows Registry. Sometimes, Windows may prevent writing to removable drives for security reasons. The following steps are how to undo write-protected USB with the aid of the Registry:
Step 1: To open the Registry Editor, press Win + R, input regedit, and click OK.
Step 2: Navigate to the following path:
HKEY_LOCAL_MACHINE\SYSTEM\CurrentControlSet\Control\StorageDevicePolicies
Step 3: Look for a value called WriteProtect. Once found, double-click it and set its value to 0.
Step 4: After completing the change, reboot your PC. Now, your USB drive should become writable again.
Method 5: Remove USB Write Protection via Group Policy
In shared work environments, someone may have restricted write permissions on your USB drive to prevent accidental edits. You can change these settings to allow your account to modify files. The detailed steps are as follows:
Step 1: Open File Explorer, right-click the write-protected USB drive, and pick Properties.
Step 2: In the Properties window, click the Security tab.
Step 3: Then, hit the Edit button to change permissions.
Step 4: Select your user account in the next window.
Step 5: Under Permissions for [Your User Name], check Allow for Full control.
Step 6: Click Apply, then OK to save changes.
Method 6: Use a Third-party Software to Remove USB Write Protection
You have a question: Can you write to a USB in write-only mode? The tools that you will encounter the most are disk manager software or USB formatting programs. The real question is, are they really working, but it again depends on why you have your USB write-protected in the first place. They could perform miracles in case it is a logical problem, such as a damaged file system. However, in case your USB is outdated or has physical damage, no software will be capable of removing the write protection.
Method 7: Buy a New USB Drive
Unable to eliminate write protection on USB despite having tried all the techniques mentioned above? The broken USB drive can be time to get a new one. There are USB flash drives that are programmed to permanently enter read-only mode when they are past their useful life. This is a hardware limitation that cannot be resolved through software or system settings. USB drives are also based on NAND flash memory, which has a restricted number of write cycles. When that threshold is exceeded, the drive can lock to avoid additional damage.
Bottom Line
Working with a write-protected USB disk is also annoying, particularly when it is holding valuable files. To date, we have described six useful ways to disable write protection of USB in Windows 11/10. It can be a simple switch to a physical lock, the command Diskpart, or even the registry, and you can easily and quickly restore access to your USB stick. Also, as a precaution, it is always a good practice to reformat your USB files and then make the changes.
Popular on OTW Right Now!


About The Author
Gagan Bhangu
Founder of otechworld.com and managing editor. He is a tech geek, web-developer, and blogger. He holds a master's degree in computer applications and making money online since 2015.