
How to Make a Photo Talk with AI: A Tool-Agnostic Workflow and Troubleshooting Guide
To make a photo talk with AI, you typically need a still image, a script or voice track, and a tool that will animate a face from the audio. Each service will have its own buttons and limitations, but the general process is the same: you’ve got your image, you’ve got your script/voice, you make a draft, and then you check the timing and the visuals before you publish.
What You Need Before Making a Photo Talk
Prepare these three things:
- A suitable image. Pick a clear image where the face you’d like to animate is easily visible. Just make sure the image conforms to the tool’s file type, file size, and face requirements.
- Words or a voice track. You can write a script for text-to-speech, record your own voice, or upload audio if that’s an option.
- Permission to use the materials. Only use images and voices that you own or have permission to use. If you’re going to animate a real person, then make sure they’ve given their consent as to how you’re going to use them.
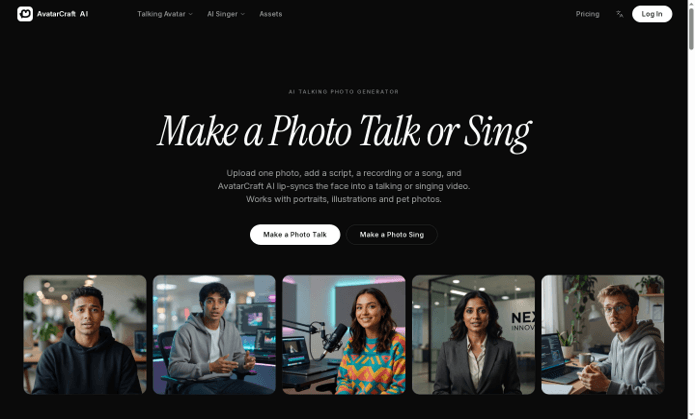
Some services accept illustrations and pet photos as well as portraits. For example, AvatarCraft AI describes a public workflow using portraits, illustrations, or pet photos with text, recorded speech, or uploaded audio. The screenshot below shows its public product overview.
Step 1: Choose a Suitable Photo
Start with a single subject and a face that’s easy to see. A front or slightly turned face, even lighting, and a clear view of the mouth will all help the tool work. Only do group shots if the product specifically says it supports multiple faces.
For the public ‘talking photo’ workflow on AvatarCraft, the Talking Photo page recommends a single, clear front-facing face with nothing over the mouth. It will take JPG, PNG and WebP images up to 10MB. Other tools may have different rules, so be sure to check the upload instructions if you’re planning on editing or converting your image.
Step 2: Prepare a Short Script or Audio Track
Write a short message with one key point. A short script is far easier to review than a long paragraph and is the ideal first draft. Just read it out loud to pick up any odd phrasing, any long pauses or any words that might sound wrong.
Choose an audio method:
- Text-to-speech: Type your script and pick a voice. That’s the method you’d use if you wanted to alter the text at a later stage.
- Recording: Record your own voice if you want to control how it sounds.
- Audio upload: Use an audio recording that you already have (as long as the tool will take it in the required format and size).
AvatarCraft’s public page lists all three input methods. The Talking Photo page lists audio uploads in MP3, WAV and M4A format up to 50MB. Always check the current requirements prior to exporting your audio.
Step 3: Add the Image and Speech to the Tool
Open the still photo or talking photo feature, upload your image, and then add your script or audio. If you’re adding text, then listen to the voice preview if one is available. If you’re uploading audio, then make sure that the file you’ve uploaded has the exact line that you want the animated subject to say.
Don’t assume that a video avatar tool and a talking photo tool work in the same way. Some of the products you’ll come across will require a photo; others will start with a pre-built avatar or a video. Choose the option that is appropriate to what you have.
Step 4: Check the Output Settings and Generate a Draft
Before you generate, check the duration, resolution, aspect ratio and credit cost as listed on the page. Free plans may have shorter videos or lower resolution than the paid plans. Text-to-speech may also use up extra credits.
For AvatarCraft, the public pricing FAQ states that free video generation is at 540p for up to 20 seconds at one video credit per second. Paid 720p generation is two credits per second, and text-to-speech will use additional credits. New accounts get 30 free credits. Always check the current pricing before you submit, as plans and credit rates are subject to change.
If the service allows you, do a quick draft first. That way you can spot a bad photo, a wrong pronunciation or a script that’s too long.
Step 5: Review the Whole Video
Watch the entire result, not just the preview frame. Check:
- Whether the mouth movement follows the speech.
- Whether the very first and very last words are present.
- Whether the names and numbers sound right.
- Whether the face changes in a distracting way?
- Whether the video has the resolution and aspect ratio you require.
If your video works but you need captions, a logo, or a call to action, then just add those in a video editor. Keep your original image and voice files in case you do want to make another version at a later stage.
How to Fix Common Talking-Photo Problems
| What you see | What to try |
| The mouth barely moves | Use a clearer face photo, make sure the audio contains speech, and try a shorter spoken line. |
| The face looks distorted | Replace the image with a well-lit, front-facing photo and remove anything covering the mouth. |
| Speech is cut off | Reduce the script or audio length and compare it with the tool’s maximum duration. |
| A name is pronounced incorrectly | Try a phonetic spelling in text-to-speech or record the name in your own audio. |
| The video costs more credits than expected | Check whether resolution and text-to-speech have separate rates before generating. |
| Several people appear in the image | Crop to one face or choose a service that specifically supports multiple speakers. |
Creative Ways to Use a Talking Photo
A talking photo can be used to introduce a character, answer a quick FAQ, add a voice to a pet photo, or share a short social media update. It’s not the right format if you need people to actually see a process, need to give them product details, or have them watch a number of people. For those scenarios, you’d be better off with live video or a multi-speaker format.
Frequently Asked Questions
Can I make a photo talk using text?
Yes, if it has text-to-speech. You type in your script and pick one of the available voices. Otherwise, you’d have to record or upload the audio.
What kind of photo works best?
A clear photo with one face in it and nothing over the mouth is a good starting point. Stick to the tool’s upload limits and start with a short clip before going any longer.
Can I use a pet or illustrated character?
Some tools will take them. AvatarCraft’s public product page has pet photos and illustrations listed, but just because they’ll take an image doesn’t necessarily mean it will animate as you’d expect.
Can I use the finished video in an advertisement?
Check out the service’s plan terms. The current pricing FAQ for AvatarCraft states that free outputs are for personal, non-commercial use in accordance with the Terms of Service, and commercial use is permitted on the paid plans. You’ll also need permission for the image, the voice and any music you use.
Can one photo create a multi-person conversation or translate a video?
Not with every tool. The current AvatarCraft FAQ states that each video animates one face and doesn’t support multi-speaker scenes, video translation or dubbing. If you need any of those features, then you’ll need to pick a product that explicitly offers them.
Popular on OTW Right Now!




About The Author

Gagan Bhangu
Founder of otechworld.com and managing editor. He is a tech geek, web-developer, and blogger. He holds a master's degree in computer applications and making money online since 2015.