
IPTV in Canada Explained: How It Works, What You Need, and How to Set It Up on Any Device
If you’ve heard the term IPTV thrown around in a Reddit thread or a family group chat and nodded along without really knowing what it means, you’re in good company. Most Canadians who use it couldn’t explain the technology either; they know that a friend set it up, it cost about a fifth of what they were paying Rogers, and the hockey game was on. This guide explains what’s actually happening under the hood, what equipment you need, and how to get a service like TellyCanada IPTV running on the devices you already own, in plain language and without the usual sales pitch.
What IPTV actually is
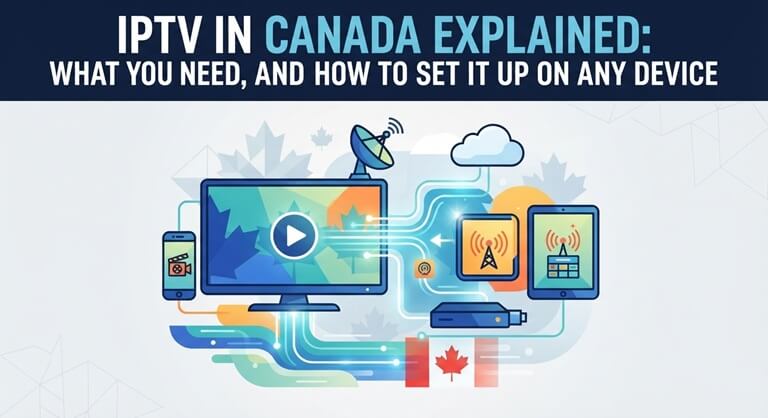
IPTV stands for Internet Protocol Television. That’s it. It means television delivered as data over your internet connection instead of as a broadcast signal over coaxial cable, fiber-to-the-home TV ports, or a satellite dish.
If that sounds like streaming, it’s because it is, technically. The difference is in what’s being delivered. Netflix streams a library of on-demand titles. IPTV streams live television channels, the same way cable does, plus usually an on-demand catalog on the side. You get a channel list, a program guide with what’s on now and next, and you flip through it like you always have. The signal arrives through your router.
Bell Fibe TV and Telus Optik TV are IPTV. They’ve been IPTV for years. When people say “IPTV” colloquially in Canada, though, they usually mean an independent provider that sells the service directly, without the cable company’s bundle, contract, or rented set-top box.
Why it took off here specifically
Canada is an unusually good market for this for three reasons.
The first is price. Canadian TV bundles are among the most expensive in the world, and there’s little real competition in most regions. The second is geography and content rights: Canada is licensed separately from the US, so Canadians often can’t access the same catalogs their American friends have, and the Canadian versions of streaming services are thinner and pricier. The third is language. A quarter of the country watches TV in French, and mainstream platforms offer sparse French-language catalogs.
That last point is worth expanding on because it shapes which provider makes sense for you. English-first services organize their lineups around Canadian and American channels. Quebec-focused services like Tiviplus IPTV, lead with TVA, Noovo, Radio-Canada, RDS and the French versions of international channels, and offer support in French. If your household is bilingual, that ordering matters more than the size of the channel count.
What you need
Less than you’d think.
An internet connection. In reality, 25 Mbps is the sustained rate for HD video and 50 Mbps or greater is for 4K video. This is no problem for most urban Canadian plans. On a rural or fixed wireless connection, try the trial first before paying a fee.
A device. Any of these will work: An Amazon Fire Stick (the 4K version of the PlayStation is the most popular and about $50-70 in Canada), an Android TV box or Nvidia Shield, an Apple TV, a Samsung or LG smart TV, a MAG box, or even your phone, tablet, or laptop. There is no special equipment required.
A subscription. The provider emails you credentials, typically a username, password, and server URL, or an M3U link. Enter those into the app.
An app. The two most widespread IPTV apps on Android and Fire Stick are IPTV Smarters Pro and TiviMate. For Apple devices, use IPTV Smarters or GSE Smart IPTV. Use Smart IPTV or IPTV Smarters (Samsung / LG TV App Store). Many providers also have their own brand, and many of these are typically the simplest option.
Setting it up on a Fire Stick (the most common path)
I think about 60% of those who ask me about this end up on a Fire Stick, so here is the walkthrough.
Allow apps from unknown sources: Settings, My Fire TV, Developer Options, and switch to the On position. If you don’t see Developer Options, you can access it by clicking the Fire TV Stick name seven times in About.
Download the Downloader app from the Amazon Appstore. Open it, and enter the download code or URL your IPTV provider provides you with (typically a short code or URL with numbers). The app installs.
Start the IPTV app and select “Login with Xtream Codes API” or “Add playlist. Use the username, password, and server URL you received in your welcome email. The channel list and guide will be loading the first time; please wait a minute.
That is all that is required. The first load is a minute or two, as it’s fetching the guide data for thousands of channels, but it will open in seconds thereafter.
Setting it up on a smart TV, Apple TV, or phone
If you own a Samsung or LG TV, go to the TV App Store and search for IPTV Smarters or Smart IPTV, download the app, and provide the same credentials. Download IPTV Smarters Pro or GSE Smart IPTV on Apple TV, iPhone, or iPad from the App Store. For Android mobile devices, download IPTV Smarters Pro from the Play Store.
The credentials are consistent with one another across devices. The typical provider will permit just one or two connections at the same time, so make sure you don’t set up three TVs if you’re looking for that kind of functionality.
The problems you’ll actually run into
Buffering in the evening but not during the day. This is typically not the provider, but the ISP implementing video traffic control on a less expensive plan. Usually, installing a VPN that has a server in Canada or the USA resolves the issue. If it buffers at any time, it’s your Wi-Fi: get an Ethernet connection or upgrade to the 5 GHz band.
Channels are loading, but no guide. Force-close the app settings; sometimes it can’t be done while loading.
The app is functioning, and then it prompts you to log in again. Your subscription has expired, or you have been rotated to a different server. Look at your email; trustworthy email providers will let you know ahead of time.
Audio out of sync. Change the player’s decoder to software in the app settings. It’s a single-shot solution.
How to choose a provider without getting burned
Some are well established with real websites and Canadian payment methods, while others are anonymous resellers of Telegram and disappear after a quarter. They are separated reliably by a few things.
A free or low-cost 24-hour trial, which was tried out during a Saturday night game. The introduction of Interac e-Transfer as a payment option, a sign of a genuine Canadian operation. A written money-back guarantee on the website. Per-device setup guides. Support that answers in the evening, in your language. And a provider who will request only an email address to register.
Anything that only takes crypto, has no website, or wants your ID is a pass. As a reference point for what a legitimate setup looks like, tellycanada.ca lists its device compatibility, money-back terms, and support hours directly on the homepage, which is the level of transparency you should expect before handing over a card number.
A brief legal note
Not legal counsel; not legal advice. IPTV is a legal and popular technology used by your own cable company. The legal question is whether a particular provider has the rights to distribute what it distributes, which is the provider’s responsibility. As a consumer, it is wise to choose services from reliable, transparent companies rather than those that act like they are hiding something.
Bottom line
To the majority of Canadian households, IPTV is not a hack or a workaround. It’s the same type of delivery as the cable companies provide, just without the “bundle.e” It will only take 10 minutes to set up, uses $50 equipment that you may already have in your gear, and costs a fraction of a traditional package per month. The real challenge is to find a provider that will be around next year, and the checklist above is the way to do it.
Popular on OTW Right Now!




About The Author

Gagan Bhangu
Founder of otechworld.com and managing editor. He is a tech geek, web-developer, and blogger. He holds a master's degree in computer applications and making money online since 2015.