[Fix] Microsoft Edge Keeps Closing After a Few Seconds
Does Microsoft Edge keeps closing after a few seconds on your computer?
Microsoft Edge is a default browser on Windows OS, which is known for its speed, security, and integration with Windows. However, like any browser or software, it can sometimes encounter issues.
One of the most frustrating issues is when it keeps closing after just a few seconds. If you’re experiencing this problem, don’t worry. You can easily fix this issue.
However, most of the Microsoft Edge problems are gone by just restarting the PC or resetting the browser to its default state. But this problem won’t be fixed until you identify or address the problem.
So, in this post, I’ll show you how to fix Microsoft Edge that keeps closing after a few seconds.
Why does Microsoft Edge keep Closing After a Few Seconds?
Several factors, including corrupted files, incompatible extensions, or system issues could cause this issue. So, understanding the root cause can help you find the appropriate solution.
One of the main reasons for this problem is when the browser conflicts with another program or software. Mostly the antivirus or firewall software causes this issue because antivirus and firewall software provide different types of protection to browse the web safely.
Sometimes antivirus software detects Edge as a threat or conflict with its operation and closes the browser.
However, some other reasons can also cause this problem, such as malicious extensions, corrupted browser files, insufficient system resources (low RAM or storage space), corrupted system files, etc.
How to Fix Microsoft Edge Keeps Closing After a Few Seconds Problem
There are several fixes that you can try or use to solve this problem.
1. Disable Antivirus or Internet Security Program on your PC

Windows OS provides built-in Windows Security that provides the basic level of security to your computer. But, most people install third-party antivirus programs to stay protected from online threats.
Sometimes, antivirus software interferes with the Edge browser. So, you need to disable the antivirus software and try to open the browser.
If the problem is gone after disabling the installed antivirus software, it means the antivirus software interferes with the Edge browser.
However, if you identify that the antivirus is causing this problem, you don’t need to disable the antivirus completely because all security software provides different types of options to enable or disable.
For example, if you’re using ESET antivirus, you need to disable the “Enable Banking and Payment Protection” option to fix this issue.
Some users report that Norton 360 also causes this problem.
If the problem is fixed after disabling the antivirus and you can’t find the option in your anti-virus software that caused this problem, then you might need to shift to another antivirus program.
2. Reinstall or Repair Microsoft Edge
By default, Microsoft doesn’t allow users to uninstall the Edge browser because the browser is integrated with system files. But, you can re-install the Edge browser to repair it or solve all its problems.
Note: Your computer must be connected to the internet to reinstall or repair the Microsoft Edge browser.
The steps are given below to reinstall Microsoft Edge to solve its problems:
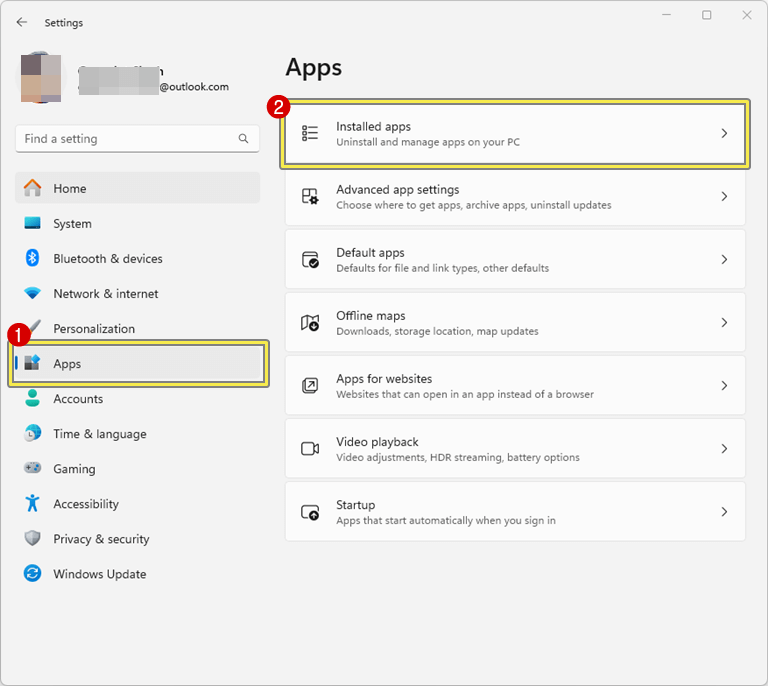
- Open the Settings app on a Windows 11 or 10 computer by pressing the Win Key + I from the keyboard.
- After that, click on the Apps option from the left side navigation pane and open the Installed Apps option from the right side.

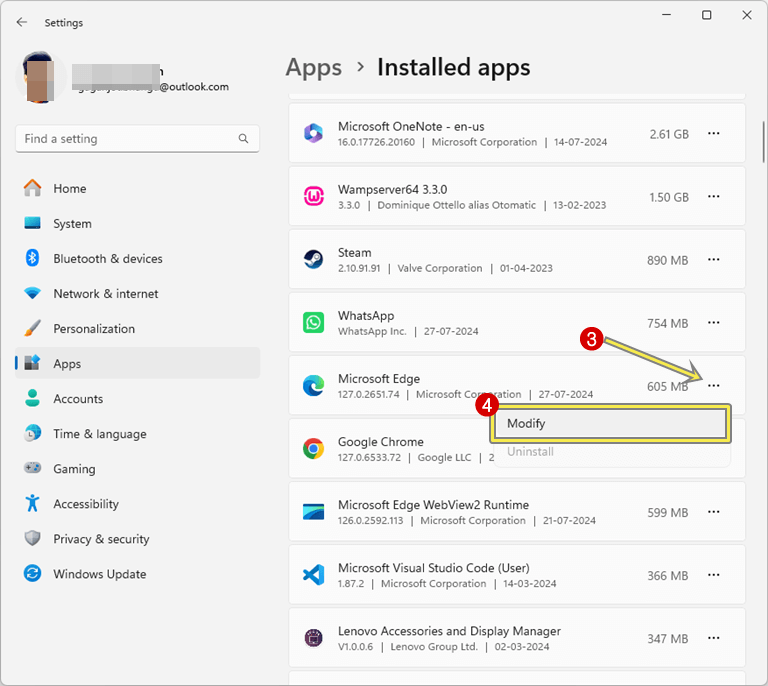
- You’ll see all installed apps on your computer. Locate Microsoft Edge from the list and click on the three horizontal dots next to Microsoft Edge.
- After that, select the Modify option from the context menu.
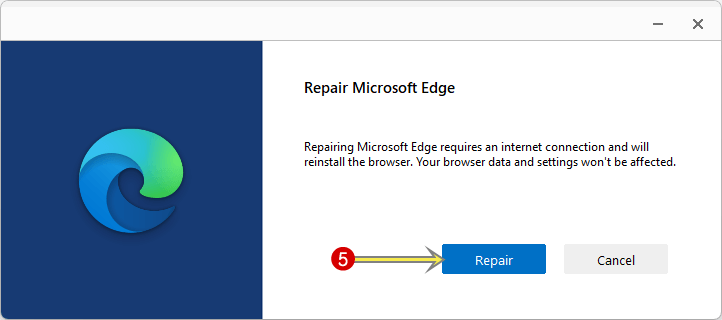
Note: If the User Account Control pop-up window occurs, click on the Yes button to proceed. - Now you’ll see the popup window with the Repair button. Click on the Repair button.

- After that, the downloading will start. You’ll see the download progress. After downloading, the browser is automatically installed on your PC.
- That’s it
3. Disable Extensions
A corrupted or malicious extension can cause the Edge browser to crash. So, you need to identify which extension causes the problem.
You can disable or turn off installed extensions to check whether the extensions cause the errors or not.
The steps are given below to disable the installed extensions on the Edge browser:
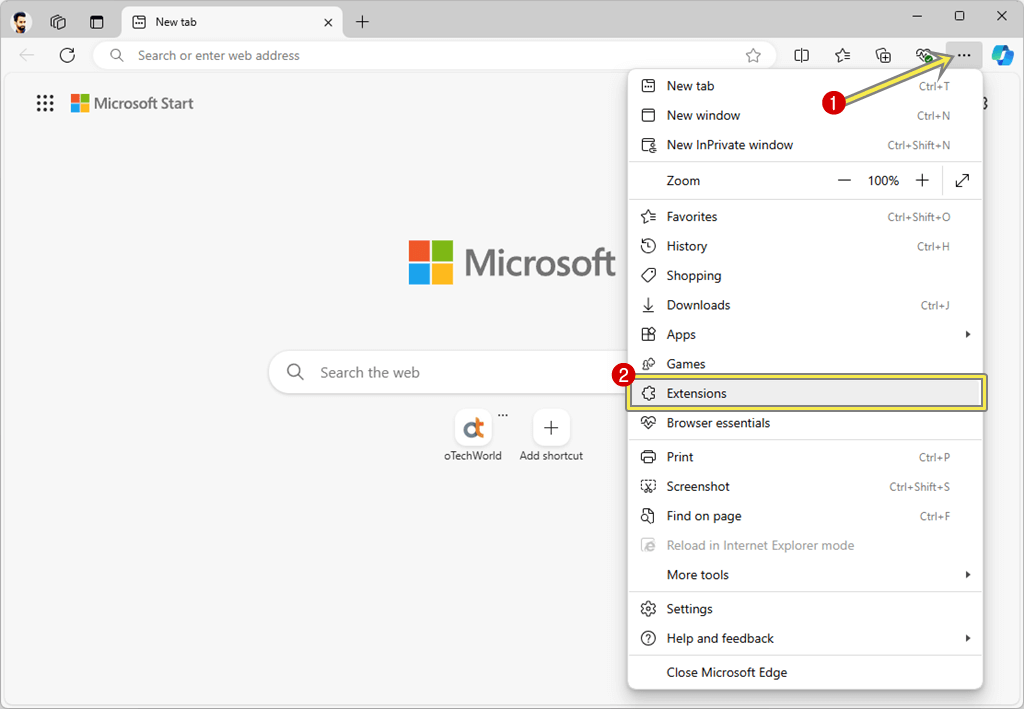
- Open the Microsoft Edge browser and click on the three dots (Settings and more) from the top right.
- Select Extensions from the context menu.

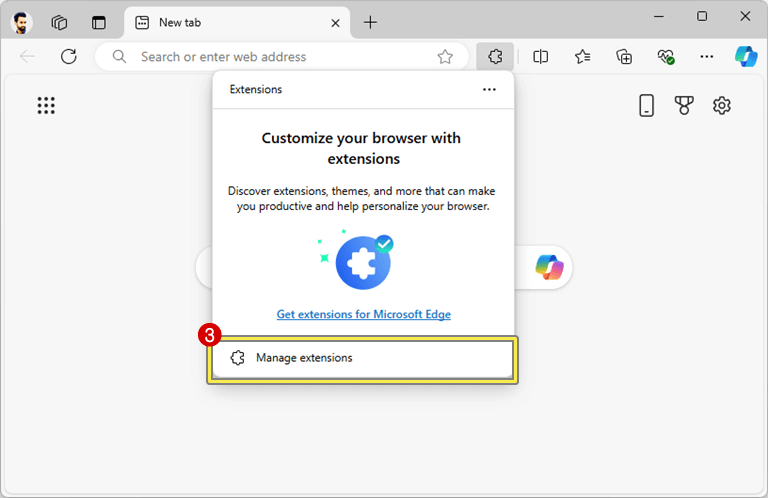
- After that, you’ll see the popup. Click on the Manage Extensions option from the popup.

Note: You can directly open the Extensions page using the Edge internal settings URL. Just type edge://extensions in the address bar and open the URL. - Now you’ll see the list of all extensions that are installed on your Edge browser.
- Toggle off the buttons next to the extensions.

- That’s it.

If you’re unable to follow these steps and the browser crashes before disabling, then you can open the Edge browser with disabled extensions.
Read how to start Microsoft Edge without extensions.
4. Check your RAM Usage and Close Unnecessary Programs
If your device has low RAM, then you might face this problem. You can check your RAM usage from the task manager.
Just open the task manager by pressing Ctrl + Shift + Esc and see the RAM usage in percentage under the Memory tab.
Otherwise, click on the Performance tab and check the total RAM and usage under the Memory option.

If the RAM usage is too high, such as more than 80% or 90%, you need to upgrade the RAM. Otherwise, you can close unnecessary programs from the task manager.
You can also control or disable startup programs to prevent unnecessary programs from running on startup, which helps to reduce your RAM usage.
Read how to disable unnecessary startup programs in Windows 11.
5. Check and Free Up Disk Space
If your disk storage is nearly full, Microsoft Edge might close after a few seconds of opening. Freeing up disk storage on your C drive can improve your computer’s performance and create more space for important files.
So, you should check your C: Drive disk storage where Windows and other programs are installed.

To free up C: Drive storage space, you can run disk cleanup, uninstall unnecessary programs, delete large files, disable hibernation, and delete system restore points.
6. Update the Edge Browser to Latest Version
Updating the Edge browser to the latest version might solve some problems with the browser. Sometimes, bugs cause the browser to crash. So, updating the browser can solve the problem.
The steps are given below to update the Edge browser:
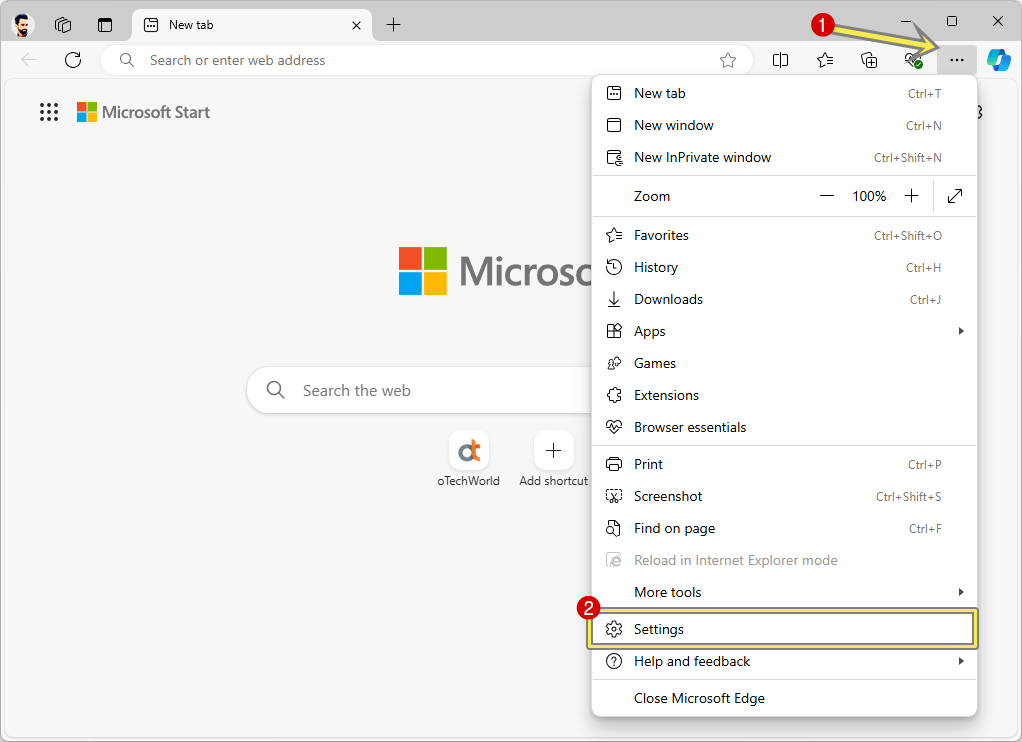
- Open Microsoft Edge and click on the three horizontal dots (Settings and More) from the top right.
- Open Settings from the context menu.

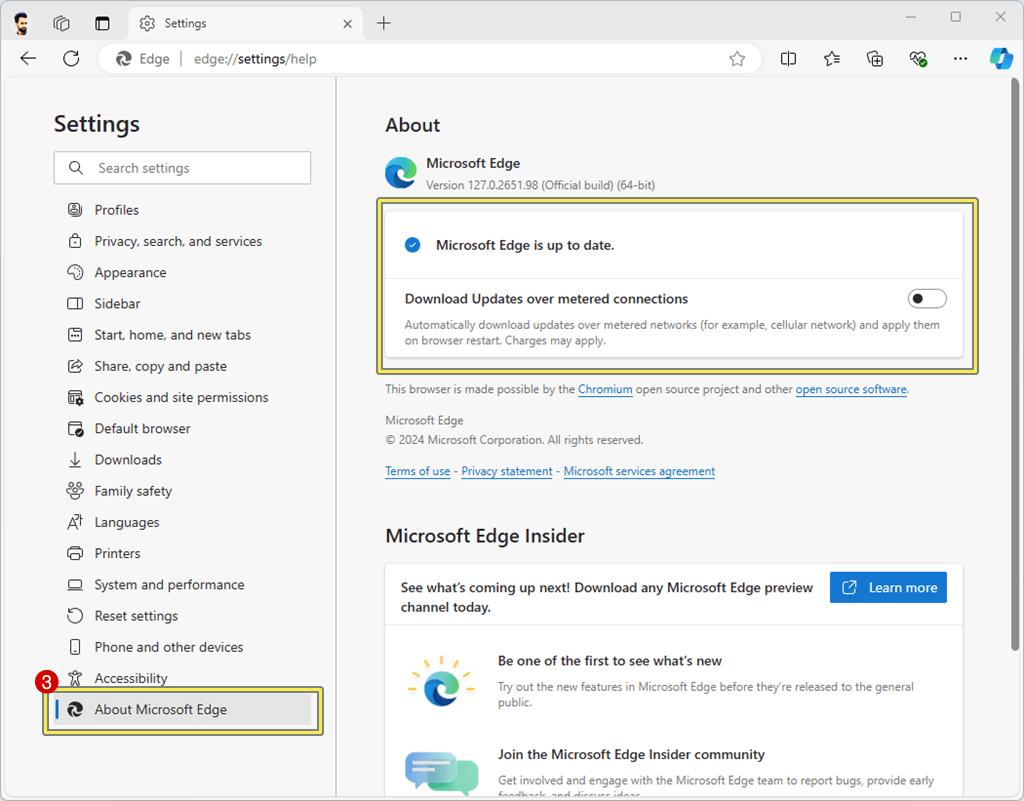
- From the Settings page, click on the About Microsoft Edge from the left navigation pane.
- If you’ll see the “Microsoft Edge is up to date.” Message, it means the latest version I installed on your device. Otherwise, you’ll see the option to install the update.

If you’re unable to update the browser, i.e., the browser crashes or closes before updating, you need to reinstall the browser.
7. Install Latest Windows Updates
Windows updates can sometimes fix problems with the Microsoft Edge browser, but it depends on the nature of the issue.
Microsoft regularly updates Windows to improve compatibility between the operating system and various software, including Microsoft Edge.
To update the Windows OS to the latest version, open the Settings app by pressing Windows Key + I from the keyboard and click on Windows Update from the left navigation pane.
After that, check for the available updates and install them. 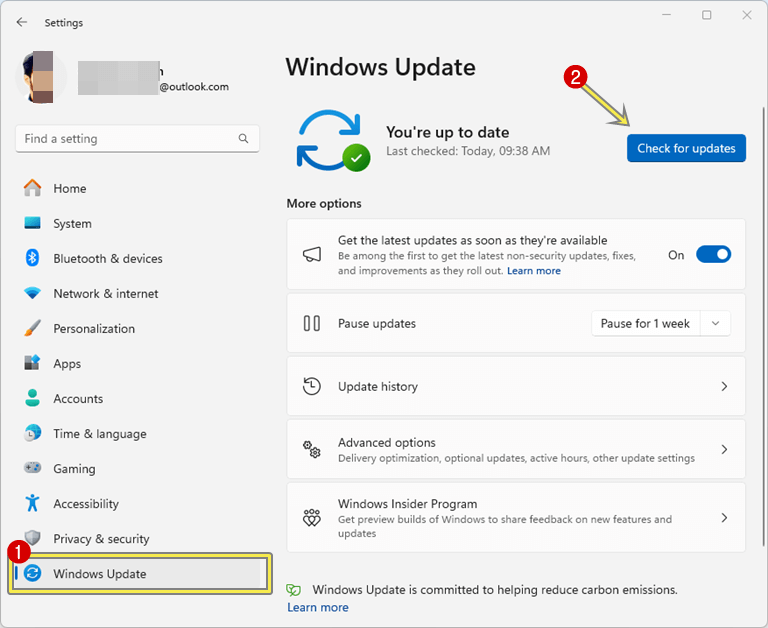
8. Reset Edge to Default Settings
You can also reset the browser to its default settings to solve browser-related problems such as crashes, slow performance, or unwanted changes caused by extensions or malware.
When you reset the Edge browser, it will disable all extensions, clear temporary data, and reset settings to their defaults without affecting your bookmarks, history, and saved passwords.
Also, it will reset your startup page, new tab page, search engine, and pinned tabs.
The steps are given below to reset Edge to Default Settings:
- Open Microsoft Edge and click on the three dots (Settings and more) from the top right.
- After that, open Settings from the list.
- From the settings page, select Reset Settings from the left navigation pane and click on the “Restore settings to their default values” option from the right side.

- After that, the reset settings popup will be open for confirmation. Click on the Reset button to proceed.

- That’s all.


9. Run the System File Checker
However, you can reinstall the Edge browser to solve all its problems. But the browser is integrated with system files. Sometimes corrupted system files can cause browser crashes. So, you can run the system file checker to fix the issue.
The steps are given below to run the system file checker on Windows 11 and 10:
- Press Windows + X and select Windows Terminal (Admin) from the list of options.
Alternatively, you can right-click on the start menu (Windows) icon.
- In the terminal window, type “sfc /scannow” (without quotes) and press Enter.
- After that, you’ll see the file verification progress. This will scan the system files and replace the corrupted system files.

- That’s it


10. Clear Browsing Data
A corrupted cache or browsing data can also cause Edge to close unexpectedly. Clearing this data can often fix the problem.
The steps are given below to clear browsing data in Microsoft Edge:
- Open the Edge browser and click on the three-dot menu from the top right.
- Open Settings options from the list.
- After that, click on the Privacy, search, and services option from the left navigation pane.
- Click on Choose what to clear next to Clear browsing data from under Delete browsing data.
Alternatively, you can use Ctrl + Shift + Delete keyboard shortcut or Edge internal URL – edge://settings/clearBrowserData.
- Select All time from the time range and select “Cached images and files” and “Cookies and other site data”. You can also select other data if you suspect it might be causing issues.
- After that, click on the Clear Now button.

- That’s it


11. Scan for Virus and Malware
Malware or viruses can interfere with the normal operation of your browser and lead to browser crashes.
Windows 11 and 10 come with built-in Windows security features that protect your computer from malware and viruses.
Running a full system scan can help detect and remove any threats. However, you can use any other antivirus software to scan your system.
Conclusion
Now you know how to fix Microsoft Edge keeps closing after a few seconds. Microsoft Edge closing unexpectedly can be annoying, but it’s often a problem that can be resolved with a few troubleshooting steps.
By reinstalling the browser, checking for updates, disabling extensions, and clearing browsing data, you can solve the problem and get Edge working smoothly again.
Popular on OTW Right Now!


About The Author
Gagan Bhangu
Founder of otechworld.com and managing editor. He is a tech geek, web-developer, and blogger. He holds a master's degree in computer applications and making money online since 2015.