Fix Blurry YouTube Thumbnails to Make Click-Worthy Covers
You’ve experienced this: you design a thumbnail that looks great on your computer screen, upload it to YouTube, and suddenly it appears washed out in the feed. Low source resolution, heavy compression from YouTube’s servers, and small display sizes all chip away at quality. The result? A thumbnail that signals low production value and drives potential viewers away.
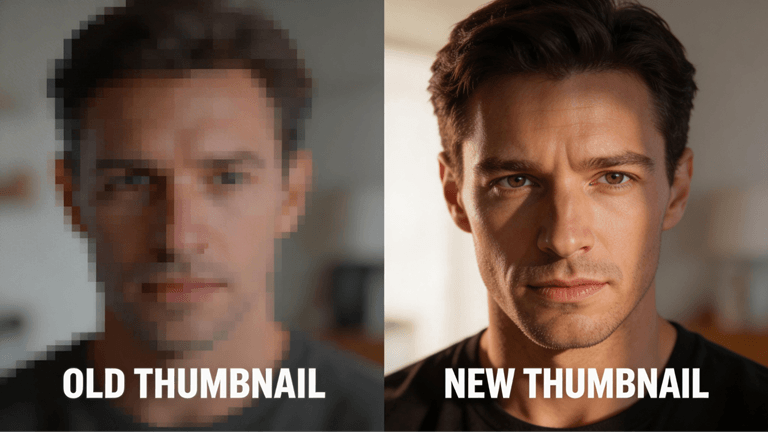
The solution is not as difficult as you believe. Imglarger is an artificial intelligence-based product to upscale, sharpen, and improve your thumbnails before you post them – creating clean, clickable images that will shine in any feed.
This guide covers everything you need to know: why thumbnails lose quality, how AI photo enhancer fixes it, and a step-by-step process you can complete in under two minutes.
Why YouTube Thumbnails Look Blurry
YouTube suggests uploading 1280×720 pixel (16:9 ratio) JPG, PNG, or GIFs, and a 2MB file size (recently increased to 50MB by most creators). Sounds straightforward. However, there are a number of things that may fail in between what you actually design and what people are watching.
Common causes of blurry thumbnails:
Starting with a low-res source
When the original image or graphic is smaller than 640×360 pixels, then when it is scaled within your design tool (Canva, Photoshop, etc.), it simply copies pixels. It may work well with small-scale, but not in the YouTube featured placements or recommended videos.
Screenshot grabs
Phone screenshots or video frame compressions usually arrive at 72 DPI, which is far less than what is visible as sharp on new retina displays and 4K screens. When the compression algorithm on YouTube kicks into action on these low-quality sources, the blurriness only gets worse.
YouTube’s own compression
On uploading, YouTube re- compresses your thumbnail. A thumbnail that was already border sharp may even get distinctly blurry under this operation. The platform is very mobile phone friendly and hence the blurring of thin lines, flattening of colors, and making of small text illegible.
Template resizing
It is impossible to salvage a blur that has been caused by downloading a thumbnail template in the wrong size and stretching it to fit, though no design tool can repair this. The pixels just are not there to start with.
Poor export settings
Exporting with low quality settings in order to save files loses detail. What appears good in your editing software turns out to be a nightmare once it has been subjected to another bout of compression at YouTube.
The answer is to provide YouTube with the best source image that is as sharp as possible. That is to say, improve and upgrade before uploading and not after uploading.
What an AI Thumbnail Enhancer Actually Does
An AI thumbnail enhancer like Imglarger uses advanced machine learning to analyze your image and add real detail—not just make the file bigger. Conventional bicubic or bilinear scaling (the default option of Photoshop and most design programs) is basically removing the edges in their attempt to conceal the fact that they are making guesses about new pixels.
Enhancement by AI is otherwise.
The modern AI models are trained on millions of pictures. To them, when you feed them a low-resolution thumbnail, they perceive patterns; they see the curve of a face, the edge of some text, the grain of a background texture, and re-create it at a higher resolution. The result is a well-informed reconstruction, not an educated guess.
What changes when you use AI enhancement on a thumbnail:
- Essays get sharper rather than softer and are difficult to write.
- There is no pixelation or smeary faces and skin tones.
- Background gradients fade away, rather than displaying banding.
- Image is more successful in dealing with the re-compression of the YouTube since it has more detail to endure the process.
The actual outcome: thumbnails which appear crisp everywhere, including search results, homepage suggestions, sidebar, mobile feed, and even on big television screens.
Imglarger is more than mere upscaling. Its AI Image Enlarger has the potential to enlarge the resolution to up to 800 percent, and its AI Image Sharpener is specific to bad images, and it can recover the clarity that it had previously lost. The AI Image Enhancer enhances the general quality through color enhancement, contrast control, and noise reduction in a single platform.
How to Fix Blurry YouTube Thumbnails: Step-by-Step
The whole process takes about 90 seconds.
Step 1: Export your thumbnail from your design tool
Always ensure that you are exporting the best quality that you can.
- In Canva: Use Download → PNG at the full 1280×720 resolution
- In Photoshop: Use “Export As” rather than “Save for Web” (Save for Web applies extra compression)
- In Figma: Export at 2x to ensure you have enough pixels to work with
When you have a screenshot or a frame of a video, make sure to shoot at the highest quality possible. 1080p video frames make you a clean source of a 1280×720 thumbnail. 720p also works. Any less and you are on the losing end.
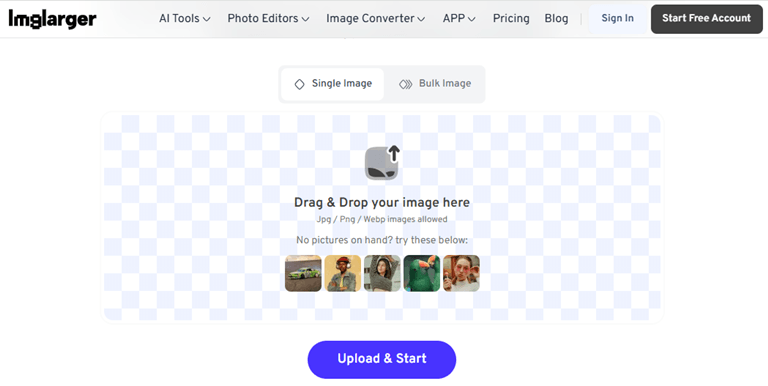
Step 2: Go to Imglarger and select the right tool
Go to Imgur using your browser. There are three tool categories: AI Tools, Image Editing Tools, and Image Converters.
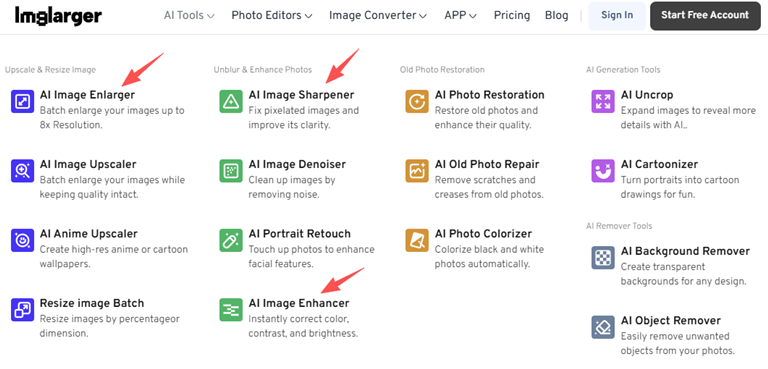
To have blurred thumbnails, there are three possibilities:
- AI Image Enlarger – This tool is used when your thumbnail is too small and has to be enlarged (200% or 400% or even 800%).
- AI Image Sharpener – This is used when the thumbnail is the correct size, but it appears blurred or out of focus.
- AI Image Enhancer – This is used in improving the overall quality with enhanced colors, contrast, and detail.
Select the tool that matches your specific problem.
Step 3: Upload your thumbnail
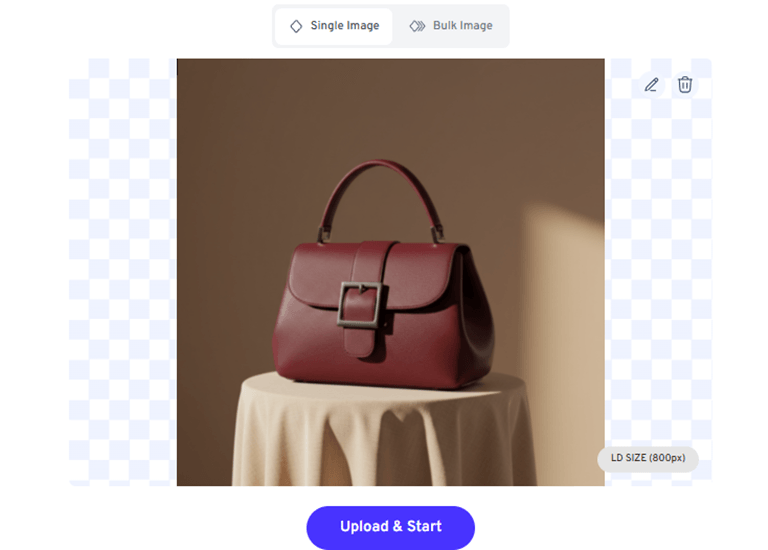
Click on the upload section or drag and drop the thumbnail file to the workspace. Imglarger has JPG, PNG, and WebP.
Free users will be able to process images up to 3000px, in most of the cases of thumbs. Premium users will have control of larger files up to 4000×4000 and also have access to batch processing on several thumbnails simultaneously.
Step 4: Configure your settings
This is where you tailor the enhancement to your specific thumbnail.
For AI Image Enlarger:
- Choose 200% upscaling if you’re starting at 1280×720 and want extra detail to survive compression
- Choose 400% if you’re working from a smaller source (640×360 or below)
- Premium users can select 800% for maximum resolution (overkill for most use cases)
For AI Image Sharpener:
- The tool automatically detects blur and applies sharpening
- No manual configuration needed—the AI handles the optimization
For AI Image Enhancer:
- The AI analyzes your image and applies appropriate enhancements
- Focuses on improving colors, contrast, and overall clarity automatically
With the majority of YouTube thumbnails, you would prefer a final size of 1280×720 to 2560×1440. YouTube will accept any resolution of over 1280×720, and hence a source of high quality guarantees an optimum result upon post-YouTube compression.
Step 5: Process and download
Click Upload and Start, and leave the AI of Imglarger to work. The processing is usually done in a few seconds.
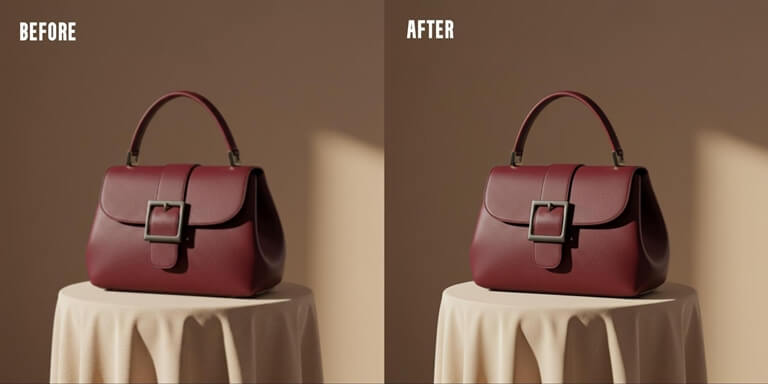
After completion, there will be a before-and-after comparison. View the Refine button to examine the advancements: all sharper text edges, cleaner faces, and enhance colors, and remove noises or compression artifacts.
Should you be happy with the results, you can download the improved thumbnail to your device. The file has been prepared to upload to the YouTube Studio.
FAQ: YouTube Thumbnail Enhancement
Q1. Does enhancing a YouTube thumbnail actually improve click-through rate?
Indirectly, yes. Poor production value is indicated by a blurry thumbnail to the viewers, decreasing the number of clicks. The improvement erases that bad message. The rate of Click-through will be determined by your design, title, and topic, but removing the blurriness will eradicate an obvious obstacle. Imagine it in the following way: a thumbnail with a sharp edge will not get you a click, whereas a blurred one will surely cost you some of your clicks that would otherwise have been achieved.
Q2. What is the ideal size for a YouTube thumbnail before enhancement?
The recommended size of YouTube is 1280x 720 pixels (16: 9 ratio). In the case that you are dealing with a smaller source, 640×360 is an adequate minimum size to use with AI enhancement. You can see the AI introducing the artifacts below that, particularly in faces. In the case of very small sources, 4x upscaling can be preferable to 2x.
Q3. Will YouTube compress my thumbnail after I upload it?
Yes. All thumbnails are uploaded again to YouTube. With a higher-resolution file (2560×1440 after enhancement) the compression algorithm has more to work with, and a better initial image than had been uploaded at 1280×720 would result in a sharper final image.
Q4. Can I enhance a thumbnail screenshot from my own video?
Yes. Video frames of regular 1080p will provide you with a clean source of a 1280×720 thumbnail. It is also effective to improve the frame of a 720p video to 1280×720. In the case of a 360p or less video, you may find that the frame quality is too poor to achieve any useful results; instead, you need to design a thumbnail yourself.
Q5. Does enhancement change the aspect ratio?
No. The aspect ratio of 16:9 is maintained in the process of enhancement. An image 1280×720 with 2x enhancement will still be 2560×1440, and the proportions remain the same. YouTube takes any resolution greater than 1280×720, thus the bigger file uploads without problem.
Q6. Is an online thumbnail enhancer safe to use?
Yes, reputable tools like online image enhancer process your images securely and do not store them beyond the session. Imglarger automatically deletes all files within 24 hours of processing, ensuring your content and data remain private.
Q7. Should I use JPG or PNG for my thumbnails?
It depends. PNG has an advantage as it is more suited to the thumbnails with a text overlay, graphics, or when the quality is paramount. The JPG contains photographs better when space is not an issue. The image converters of Imglarger may assist you with changing the formats if necessary.
Conclusion
The bad quality of thumbnails is costing you clicks, and it is easy to fix. Imglarger is a service that takes your current thumbnail, be it a screenshot, a photograph, or a design export, and recreates the subtlety that makes it look crisp in any YouTube positioning.
It only takes less than two minutes: upload, choose your enhancement tool, and download. Easy as no software to download, no design skills needed, and no watermarks on your final image.
Now, improve your thumbnails using the free artificial intelligence tools of Imglarger. The difference will be shown in your click-through rate.
[Try Imglarger Free](https://imglarger.com/) – No account required.
Popular on OTW Right Now!


About The Author
Gagan Bhangu
Founder of otechworld.com and managing editor. He is a tech geek, web-developer, and blogger. He holds a master's degree in computer applications and making money online since 2015.