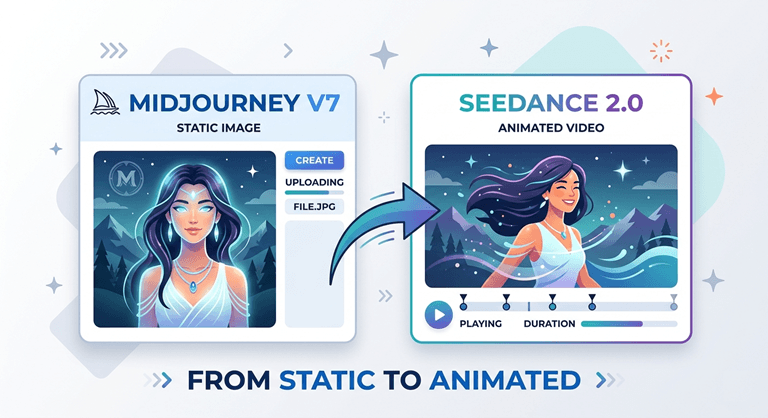
How to Animate Your Midjourney V7 Images With Seedance 2.0
Plenty of people can generate a gorgeous still in Midjourney V7. Far fewer get a clean, watchable video out of it. The gap is not the tools; it is the handful of decisions you make between generating the picture and animating it. Seedance 2.0 turns a Midjourney V7 image into a short clip through its image-to-video mode, but the quality of that clip is mostly decided before Seedance ever runs.
This is a practical guide to those decisions: what kind of image animates well, how to describe the motion, where it tends to break, and how to keep the cost down while you experiment.
Start With the Right Image, Not the Prettiest One
The most common mistake is animating your most detailed Midjourney V7 image. A frame can look stunning as a poster and still move badly, because every extra element is one more thing the video model has to keep coherent as it invents motion.
When using Seedance 2.0, it’s best to have a clear subject that stands out, with some empty space around it. This is especially important when generating images with Midjourney V7. Try to focus on a single point of interest and leave some room for the subject to breathe. For example, a character in an open scene will animate much more smoothly than the same character surrounded by cluttered background details. If you find that your best image is too busy, you can use Midjourney V7’s outpainting and canvas-edit tools to widen the frame and give the subject some space to move into. This will help create a cleaner and more dynamic animation. By doing so, you’ll be able to achieve a more polished and professional-looking result.
Describe Motion the Model Can Actually Perform
Seedance 2.0 reads a short text prompt alongside your image, and this is where most clips are won or lost. The instinct is to describe a feeling. The fix is to describe a physical action.
When it comes to getting the best out of a model, being specific is key. Instead of using vague terms like “cinematic and emotional”, which don’t give the model much to work with, it’s better to use concrete descriptions. For example, saying “slow push-in, hair moving in a light breeze” provides a clear camera move and specific motion, resulting in a more controlled outcome. It’s all about providing the right amount of detail – name the camera, describe what’s moving, and that’s it. A single sentence with concrete details can be more effective than a whole paragraph of mood words. And if you want to add sound to the mix, tools like Seedance 2.0 can generate an audio track at the same time, so a line like “ambient room tone, soft footsteps” gives the audio something to work with, too. By being specific and providing the right details, you can get a much better result from the model.
Keep Faces and Products Consistent
The problem with animation is that when characters are switching between shots, the face ends up falling apart. And that’s where the two tools really work together nicely. Seedance 2.0 allows images to be fed into the Omni Reference, which will keep the same subject and face or product generation after generation, whereas Midjourney V7 does not. It’s expensive to use, so only use it for projects where the identity is important for repeat use.
If you add in Midjourney V7’s Style Reference, which essentially ensures that the overall style remains the same as the image you provided, you can get a bunch of frames before any of them get animated that don’t just have the same character, but also the same style. This is the only thing Seedance 2.0 needs to do – recreate who or what is on the screen.
Know What Still Trips It Up
Don’t be afraid to say that something is not ideal; after all, there are things that just do not work as expected. Some things can still cause issues with these models, such as hands, crowded scenes, and signs with words on them, and if your video heavily depends on these features, it may not be as smooth. Another note, the clips will be limited to 15 seconds, which is great for a social media post, but if you’re looking to make something longer, you will need to do some editing.
The problem is that these models can produce something that looks real, and it doesn’t necessarily mean it is. If you’re creating a picture or video that’s supposed to be “about” something actual: a place, a person, or a fact, you should consider what they come up with in a first draft. Don’t believe what they say; verify the information to ensure it is correct. Whether it sounds assertive or not, the model will be very confident in itself; it is up to you to verify and double-check.
Get Length Right With Frame Handoff
Although the fifteen second time limit may seem like it’s a lot, it’s not. Seedance 2.0 allows you to actually start a clip with the last frame of another one. This will cause each new clip to start at the end of the previous clip, resulting in a smooth appearance and allowing you to add more clips to a sequence without having to cut and join them together. Unlike the word “render,” it is not a requirement, so that can be very helpful. Instead, you can just focus on one scene, get it just right, and then use that as the foundation for the next part of your sequence. It’s a more versatile method of working, and it can certainly help you create the effect you’re looking for.
It is also awesome for use with Midjourney V7 for creating specific key frames at the start and end of a sequence, and then letting Seedance 2.0 fill in the movements between them, resulting in a smoother and more efficient movement.
Keep It Cheap While You Experiment
Knowing the two tools bill on different units saves money. The cheap part is the iteration of the still, as MidJourney v7 is per request, with four images per request. Seedance 2.0 is charged per second of video, and the price increases as you increase the resolution.
When working with images, it’s a good idea to get everything just right before moving on to the next step. Therefore, it is recommended to make a perfect image in Midjourney V7 first. When you’re satisfied with the appearance, you can trial run your motion in Seedance 2.0, but start small and simple. Don’t bother with a high-resolution, long version until you’re sure everything is working the way you want it to. The great thing is that both Midjourney V7 and Seedance 2.0 are on the same platform, at the same time, anare d named reAPI, which makes things a lot easier. You can use public image links, and your still image will automatically be ready for the video step – no need to download or re-upload anything. That way, you can concentrate on getting your image and motion just right, with no hassle in between. You can find Midjourney V7 at midjourney-v7 and Seedance 2.0 at seedance-2-0, both on the reAPI platform at reAPI.
The Short Version
Seedance 2.0 is more than just a simple process of pressing a button to generate a video from your Midjourney V7 image. It’s before and after that click. First, you must provide the model with a clean, simple frame to work within, which will allow for the animation to move around in. Rather than give a feel or mood, describe an actual, physical action that you want to see? Another thing to remember is to be consistent with your characters so that they will look similar throughout the animation, using reference features. And use a cheap, fast render to check the concept, before putting all your time and money into a nice final rendering. Follow the instructions, and the picture you have pictured will not only move, but it will actually come to life. In taking the time to make thoughtful decisions about your animation, you can produce a video that is interesting, believable, and truly captivating.
Popular on OTW Right Now!
About The Author
Gagan Bhangu
Founder of otechworld.com and managing editor. He is a tech geek, web-developer, and blogger. He holds a master's degree in computer applications and making money online since 2015.