How to Remove Bing from Windows 11 Search
Do you want to remove Bing from Windows 11?
Well, Bing is a search engine by Microsoft, that’s why it is integrated into Windows 11 and Edge browsers.
Windows 11 offers a search box on the taskbar that helps you quickly find whatever you’re looking for. Using this search box, you can search for the web and your local Windows device (apps, files, and settings).
When you click on the search box, you’ll see the content suggestions from Bing in the search home. Also, you can search the web directly by using the search box from the taskbar.

On the other hand, the Edge browser is also integrated with Bing. You’ll see the Bing chat icon on the top right of the Edge browser. Also, the default search engine of Edge is Bing. However, you can easily change the search engine in Edge.
Sometimes, you might want to remove the Bing search functionality from the Windows 11 taskbar and Edge browser.
So, in this guide, I’ll show you how to remove Bing from Windows 11 search.
Why do you need to Remove Bing from Windows 11?
Well, Windows 11 comes with a redesigned start menu, taskbar, and plenty of new features. Its taskbar search box allows quick access to web information, open settings, files, apps, etc.
The search box is quite useful in most cases. But, if you don’t like it, you can easily hide it from taskbar settings.
Also, there are chances that you like the search box, but don’t like the Bing integration and its content suggestions. Or you might want to make your search menu clean. So, in that case, you might want to disable Bing.
Similarly, if you’re familiar with another search engine such as Google, you might want to set your favorite search engine as default in Edge browser.
How to Remove Bing from Windows 11 Search
To disable the Bing in Windows 11 search box, there are three ways available to do this job. You can do that from Settings, Registry Editor, or Group Policy Editor.
However, there is no direct option available in the settings to completely remove Bing search functionality. But you can remove content suggestions.
Using the registry editor or group policy editor, you can easily get rid of Bing from the search box completely. The step-by-step guide is given below.
Method 1. Disable Bing Content Suggestions and Cloud Content Search from Settings
Windows 11 offers some settings to customize search functionality. Note that this method doesn’t remove Bing completely from the search box. When you search for any query, you’ll see the web results. But you can filter these results according to your requirements from the top of the search menu.
The steps are given below to do this job.
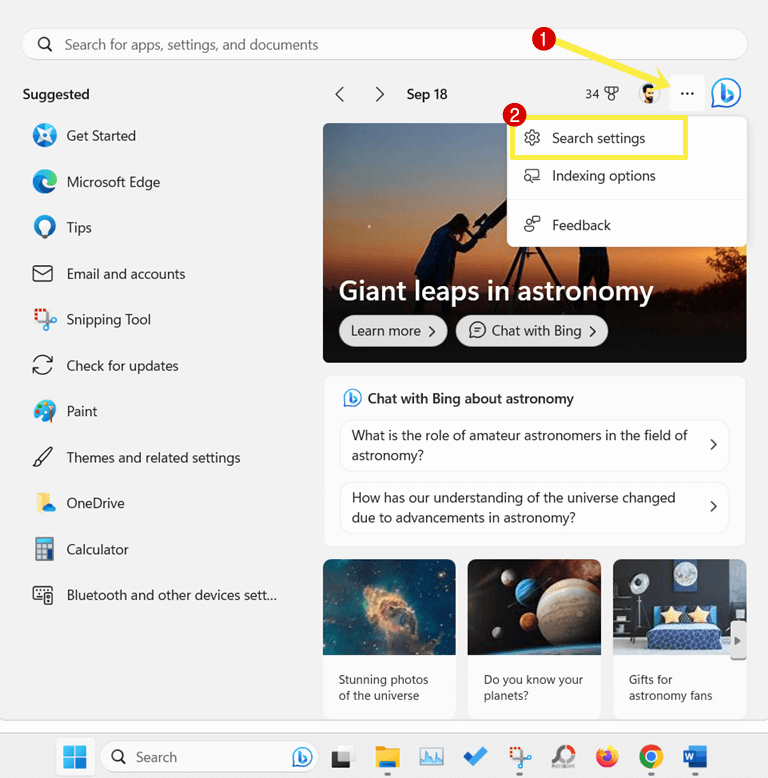
- First, click on the search bar from the taskbar and the search menu will open.
- Now click on the three dots (options) from the top right (next to the Bing icon) and select the Search Settings option from the context menu.

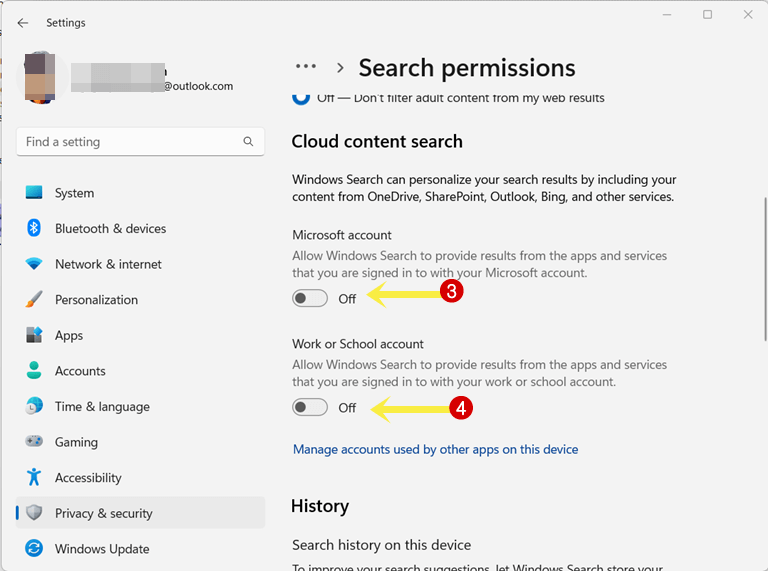
- After that, the settings app will open. Toggle off the buttons next to the Microsoft account and Work or School account options from under the Cloud Content Search title.

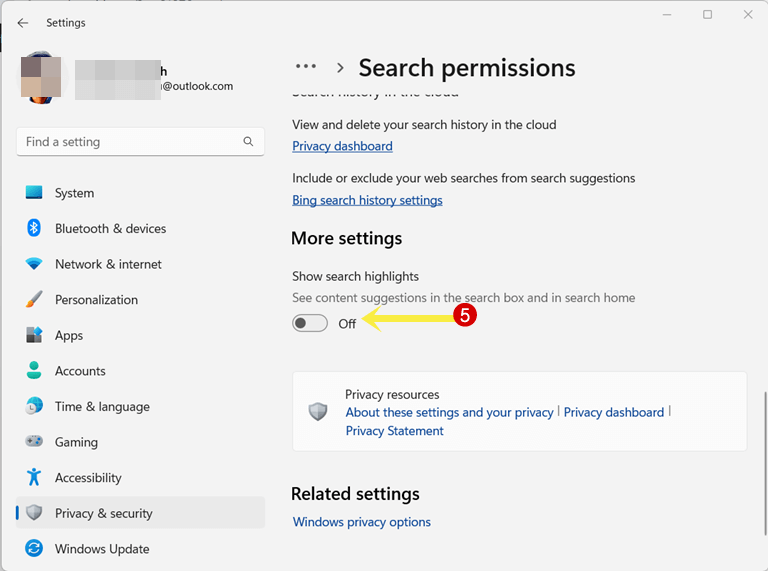
- Scroll down and toggle off the Show search highlights option from under More Settings.

- That’s all.
Now when you click on the search bar, you won’t see any content from Bing.
Method 2. Use Registry Editor to Remove Bing from Windows 11
Using the registry editor, you can completely remove the Bing functionality from Windows 11 search. The steps are given below.
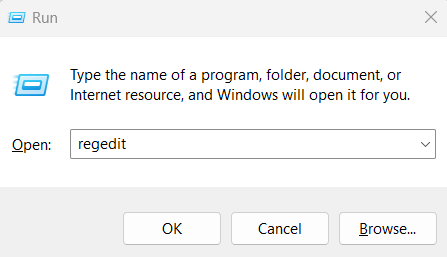
- Open the registry editor on your Windows 11 computer. For this, press Windows Key + R to open the Run command and type “regedit” (without quotes) in the Run command. Click on the OK button. After that, click on the Yes button from the User Account Control prompt.

Alternatively, you can search for the registry editor using the search box from the start menu or taskbar and open it from the results. - Now navigate the following path.
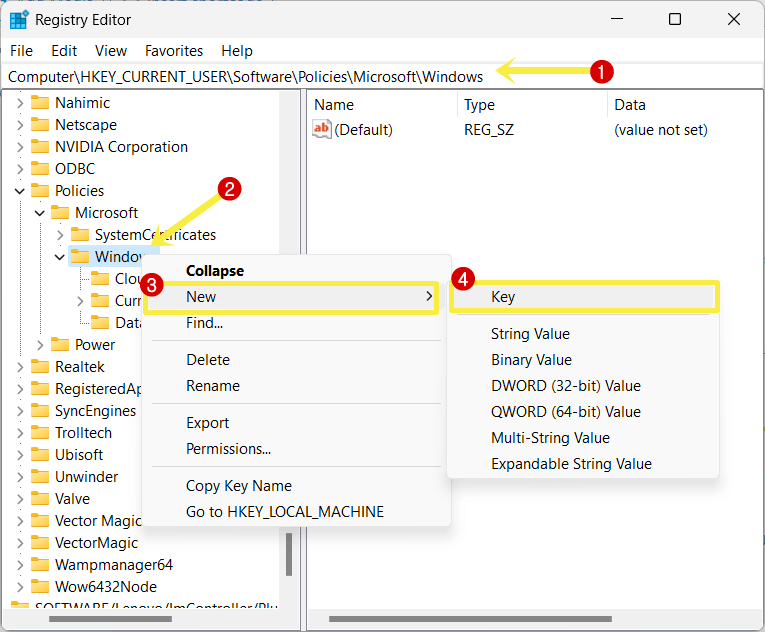
Computer\HKEY_CURRENT_USER\Software\Policies\Microsoft\Windows\Explorer
- If the Explorer folder doesn’t exist, then right-click on the Windows folder and select New » Key. Name the key as Explorer.

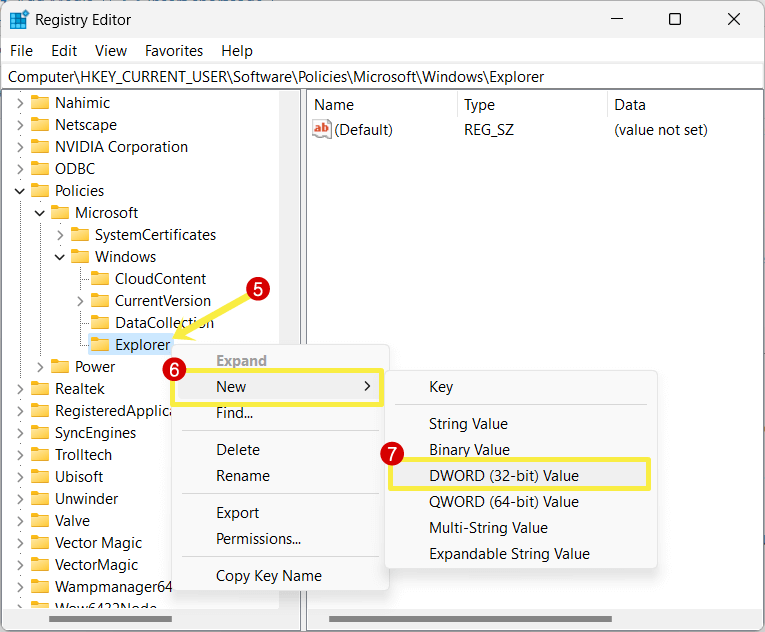
- After that, right-click on the Explorer folder from the left pane and select New » DWORD (32-bit) value.

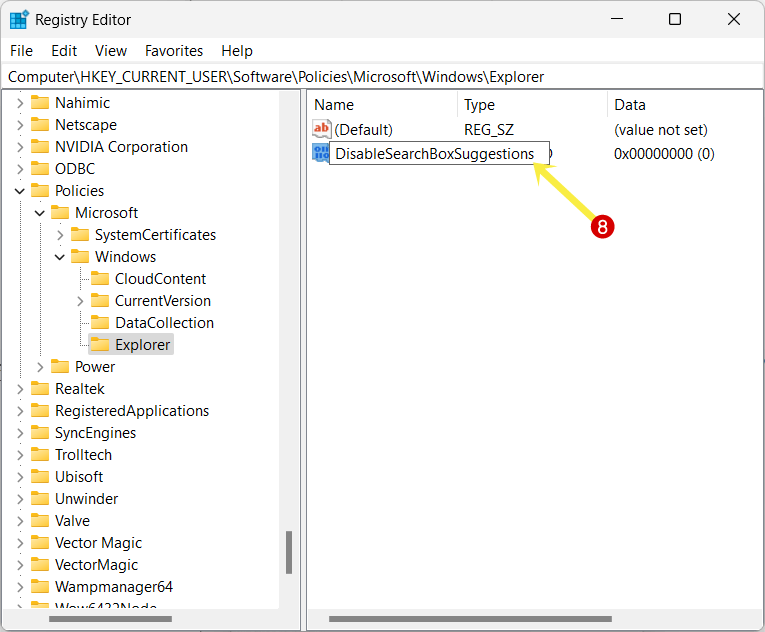
- Name the value as DisableSearchBoxSuggestions.

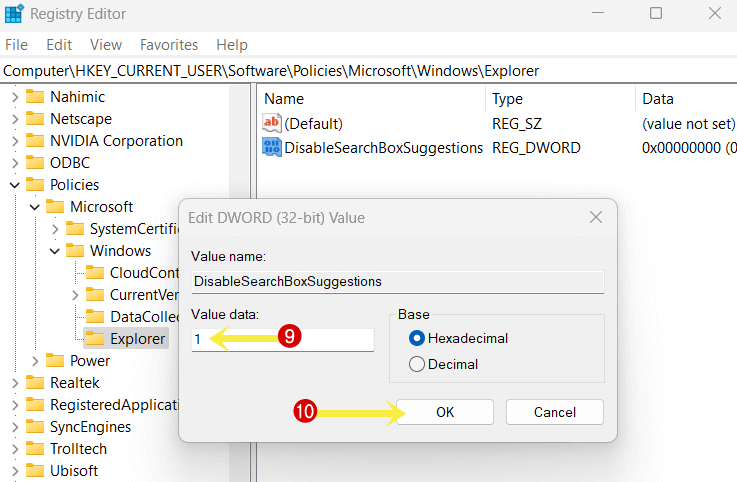
- After that, open the newly created value by double-click on it and type 1 in the Value Data field. Click on the OK button.

- Now navigate to the following path.
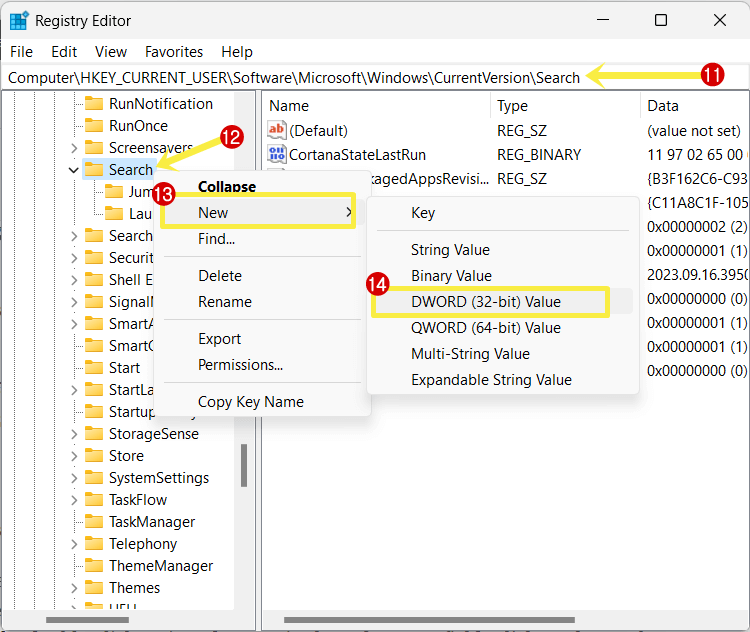
Computer\HKEY_CURRENT_USER\Software\Microsoft\Windows\CurrentVersion\Search
- After that, right-click on the search folder from the left pane and New » DWORD (32-bit) value.

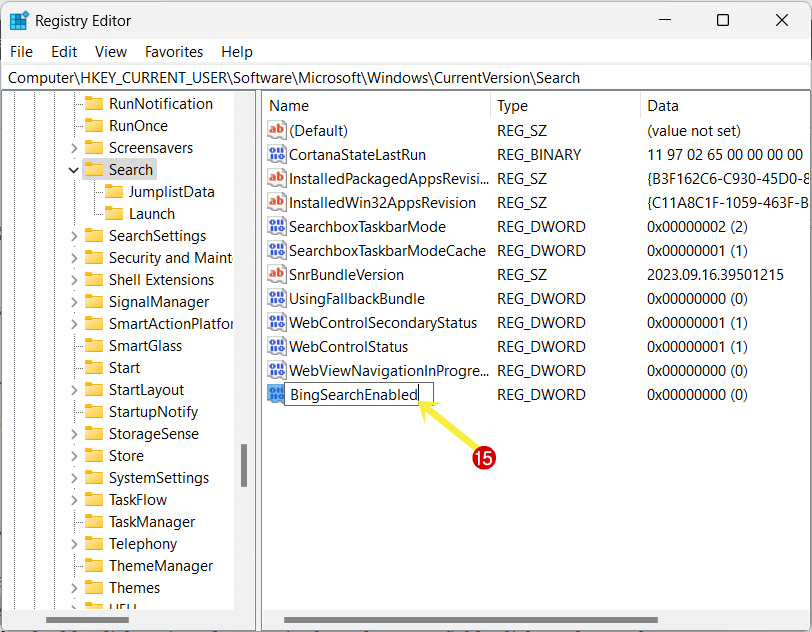
- Name the value as BingSearchEnabled.

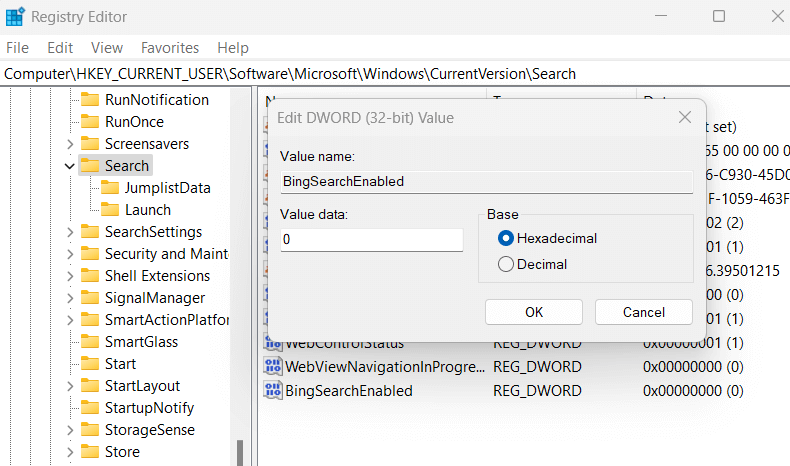
- After that, open the newly created value by double-click on it and type 0 in the Value Data field. Click on the OK button. However, by default, the value is 0 and you don’t need to change it. You can just confirm it by opening the value.

- Now Bing will be removed from the search. If not, restart your computer to make the changes.
- That’s all.
The first registry disables the content suggestions and you can also do that from search settings as mentioned in the first method. The second registry removes the web search.
Method 3. Use Local Group Policy Editor to Remove Bing from Windows 11
Local Group Policy Editor is a Microsoft Management Console that is used to configure Group Policy settings. By default, Local Group Policy Editor is unavailable in Windows 11 Home edition and available only in Windows 11 Pro/Enterprise editions. But you can install it in the home edition manually.
The steps are given below. Let’s get started.
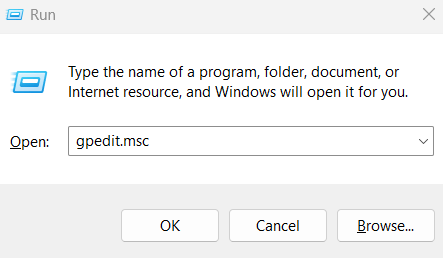
- Open Local Group Policy Editor on your Windows 11 computer. For this, open the Run command by pressing the Windows key + R from the keyboard and type gpedit.msc in the Run command. Click on the OK button.

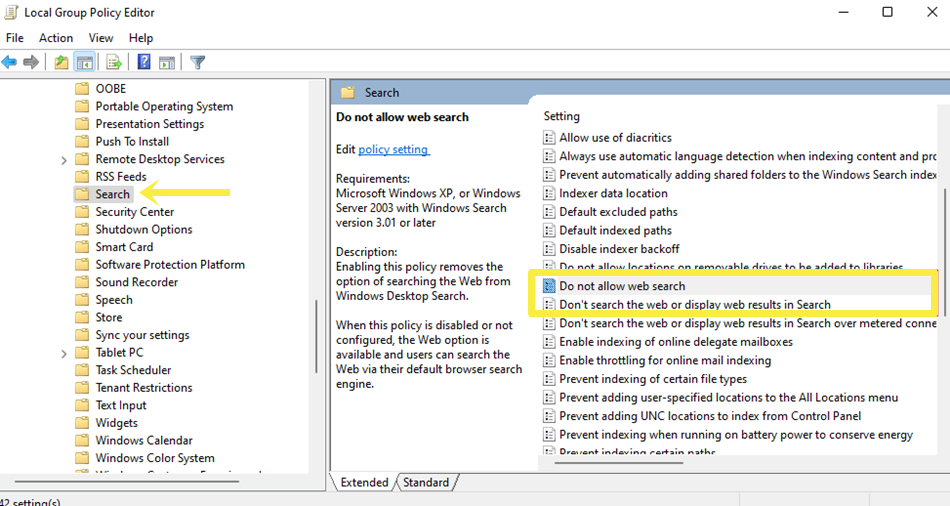
Alternatively, you can search for gpedit.msc using the search box from the taskbar or start menu, and open it from the results. - After that, using the left navigation pane, go to the Computer Configuration » Administrative Templates » Windows Components » Search.
- When you click on the Search folder, you’ll see the list of policies on the right side of the window. You need to modify or enable two policies: “Do not allow web search” and “Don’t search the web or display web results in Search”.

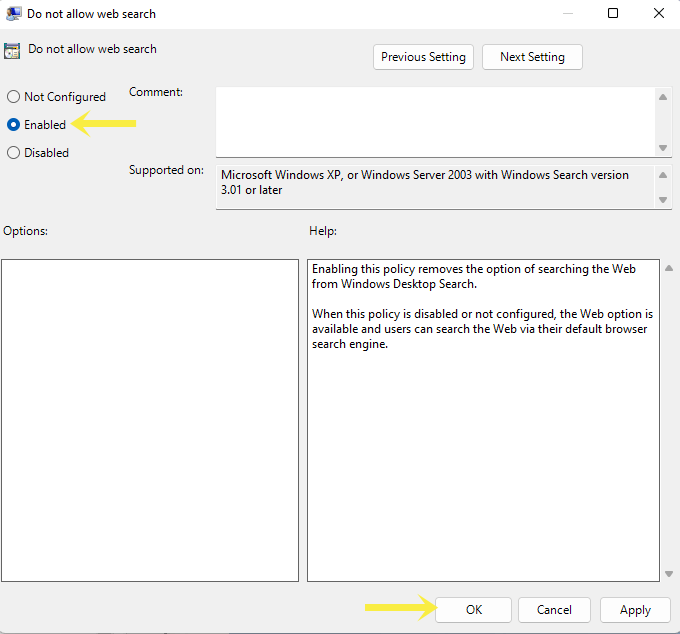
First, double-click on the “Do not allow web search” and select the Enabled option. After that, click on the Apply and OK button.
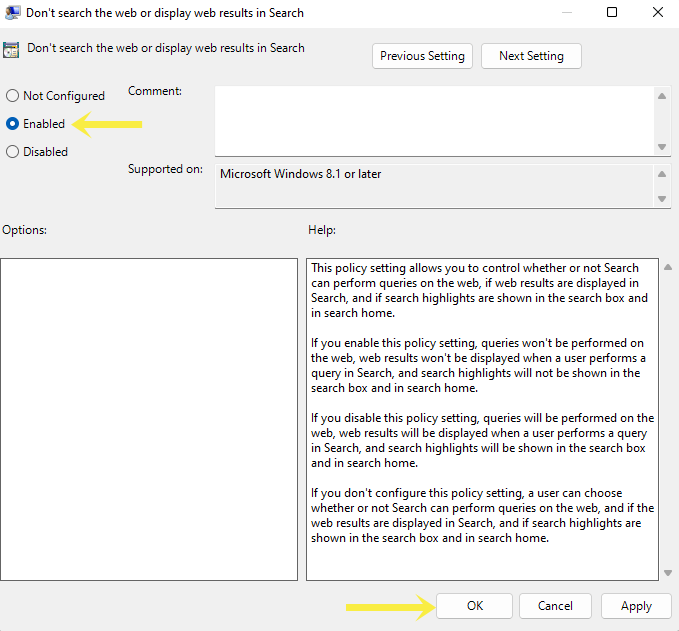
Second, double-click on the “Don’t search the web or display web results in Search” and select the Enabled option. After that, click on the Apply and OK button.
- Now close the Local Group Policy Editor and restart your computer.
- That’s all.
Frequently Asked Questions
1. How to Uninstall Bing from Windows 11?
Bing is integrated with Windows 11 and you can’t uninstall it. However, you can disable it from settings, registry editor, or local group policy editor.
2. How to get back the Bing Search after disabling it?
You can easily get back the Bing after disabling it from settings, registry editor, or local group policy editor. From settings, toggle on the options again. Otherwise, if you disable it from the registry editor, delete the keys created by you. You can also change the values of the keys. If the value is 1 then set it as 0, and if the value is 0 then make it 1.
Final Words
I hope this article helped you learn How to Remove Bing from Windows 11 Search. If you’re one of them who doesn’t want to change the registry settings, then the first method is best for you.
However, from settings, you can only disable the content suggestions. But it helps to make your search menu clean. Using the registry editor, you can get rid of Bing search.
