
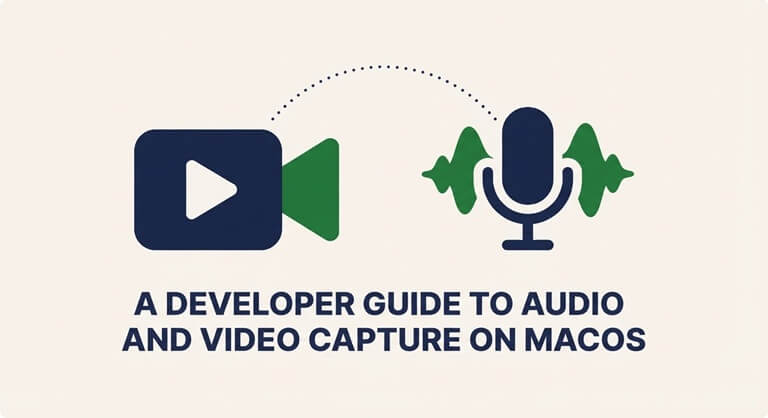
A Developer Guide to Audio and Video Capture on macOS
Building audio and video features on macOS can seem straightforward at first. A developer may only need access to a camera, microphone, screen, or system audio. Once development begins, however, the project quickly involves permissions, capture sessions, device management, media formats, performance, and decisions about which Apple framework best fits the product.
The right approach depends heavily on what you are building. A video recording application has different requirements from a meeting assistant, screen recorder, transcription tool, or communication platform. Understanding the main capture options on macOS can help you design an architecture that is easier to maintain as your application grows.
Start With the Type of Media You Need
Before choosing an API, define exactly what the application needs to capture. This decision will shape much of the implementation that follows.
For example, an application may need microphone input from the user, video from a connected camera, the contents of a display, audio produced by another application, or several of these sources at the same time. Each use case introduces different technical requirements.
It is also important to decide what happens after capture. Some applications save media directly to a file. Others process audio in real time for transcription, stream video to another service, or analyze frames as they arrive.
Defining these requirements early prevents you from choosing a framework simply because it is familiar. The best capture approach matches how the media will actually be used.
Understand Camera and Microphone Capture
Camera and microphone access are common requirements for macOS applications. Apple provides native frameworks that allow developers to discover available devices, configure input sources, and receive media data.
A typical capture workflow begins by identifying the appropriate hardware. A Mac may have a built-in camera and microphone, but users can also connect external webcams, microphones, audio interfaces, and other devices. Applications should therefore avoid assuming that the default hardware will always be used.
Device changes also need to be handled gracefully. A user may connect a new microphone during a session or disconnect a camera that the application is currently using. Your interface should clearly indicate which source is active and respond appropriately when a selected device becomes unavailable.
Plan Your Capture Session Carefully
Media capture usually involves several connected components. You have an input source, a capture session, one or more outputs, and code that processes or stores the resulting data.
Configuration should happen deliberately. Before beginning capture, determine which inputs and outputs are required and verify that the requested combination can be supported. Applications that attempt to change several media settings while capture is active can create unnecessary complexity.
Think about how your application should behave when something goes wrong. A camera might already be in use, an external microphone may disappear, or the requested configuration may fail. Clear error handling makes these situations easier for users to understand and easier for developers to troubleshoot.
Choose the Right Native Framework
Apple offers several media technologies, and each serves a different purpose. Choosing between them should be based on the source you need to capture and what you plan to do with the resulting media.
For developers working with camera and microphone capture, AVFoundation is one of the central frameworks to understand. Recall.ai explains how it provides APIs for capturing, processing, playing, and working with audiovisual media across Apple platforms. For developers building meeting recording or transcription products, understanding this native media layer can be especially useful when deciding how local capture should fit into a broader recording architecture.
The framework is powerful, but it is not automatically the right answer for every capture problem. Screen content and certain audio capture requirements may involve other macOS technologies. Developers should choose tools based on the media source rather than forcing every form of capture through a single framework.
Treat Screen Capture as a Separate Requirement
Capturing a display or application window is different from receiving frames from a camera. A screen recording product may need to capture an entire display, a specific window, or selected content while excluding other information.
This is why it is vital that the source is chosen. Users should know what it is they are sharing or recording prior to capture. If multiple capture options are available in your app, specify the display or window that is being captured.
The content displayed on a screen may also change frequently. Windows can be resized, displays can be connected or removed, and the user can switch between applications. For best results, your capture workflow should account for these changes rather than relying on a source selection that doesn’t change during a session.
Think Carefully About Audio Sources
Audio capture is more complex when an application needs more than microphone input. For instance, a meeting app might require the local user to use their microphone and sound from other participants that comes from their Mac.
They can be different media sources. Your architecture should distinguish between microphone input, application audio, and any other audio stream you want to process.
This separation is especially crucial in the case of transcription products and recording products. Merging the streams of audio too early may make it more challenging to identify who is talking and/or to process them separately. Properly separating sources for the life of the application can offer more flexibility later in the pipeline.
Handle Permissions as Part of the Product Experience
Media capture needs access to high-level areas of a buyer’s computer. Permission requests should not be the least significant end of a journey—just a technical process that occurs.
Ask for access when the user understands why. When a user clicks a button to begin recording from a microphone, then the purpose of the permission request is clear. When the application starts, people might not look into the details and request access then.
Your application should handle denied permissions gracefully and fail gracefully if permission is denied. Describe the functionality and give clear instructions for the user on what they can do next. Do not put the app in a state where nothing is happening, and it doesn’t seem to know why.
Some permissions may vary based on the type of media being captured. The design and testing need to be carried out independently for each of the three areas of camera, microphone, and screen access.
Decide How You Will Process Captured Media
Capturing media is not enough. The developers also have to determine what to do with every frame or every sound sample when they are released.
When saving a local recording, you have to consider encoding, file formats, storage, and what happens if the recording is interrupted. If you’re streaming media, you require a pipeline that will process and send data with no capturing.
Applications that are performing transcription or analysis might require access to samples of the audio stream as they are received. Video applications may need single frames for effects, computer vision, or preview.
Don’t do costly work in a path that will need to be responsive for capture. Where possible, keep media acquisition apart from more intensive processing to avoid slowing down the whole recording process.
Design for Performance From the Beginning
Audio and video processing can significantly impact a computer, especially when it’s capturing multiple sources or running other audio and video processing simultaneously.
Don’t assume all users will have the same hardware setup. Pay attention to the behaviors of the application with various workloads and what you think should happen when resources are limited.
With video frames, managing memory is especially crucial. Unnecessary frames in memory can quickly consume resources. Process media as necessary and release data when necessary.
The highest possible video quality may not be the most important factor either. The media requirements for a product that is mostly used for transcription of speech are going to be very different from that of an application that would be primarily used for professional video production.
Prepare for Device and Session Changes
Actual users don’t work in absolute control situations. A microphone can be unplugged, a laptop lid can be closed, another display can be connected, another audio device can be connected, or a permission can be revoked.
These events are to be expected in your application. Track changes that are pertinent and make the decision on what the capture session should do. Sometimes it may be suitable to consider using an alternative device if available. In others, it might be safer to stop capture and let the user choose a new source.
Explicitly indicate any changes to the user. The audio and video sources of a recording may be different from the one intended by the user if the device is changed while in silence mode.
Test More Than the Ideal Workflow
The path testing is fairly straightforward to test, since the user grants all the permissions, chooses a working device, presses “record,” and stops recording as normal. Production will need to handle much more than that perfect sequence.
Experiment with what happens if there is a loss of access, a device is lost, storage is removed, or capture is interrupted. Use a variety of microphones, video cameras, displays and audio setups as appropriate.
Try repeated sessions also. Repeatedly starting and stopping capture may reveal problems in the lifecycle, which would not have been apparent in a single recording.
The aim is not just for the proof to be that capture works. It is important to know how the application responds to changes in the environment.
Build the Capture Architecture Around the Product
No single architecture exists that fits all Mac apps for capturing. A camera recorder can be fairly simple, and a meeting platform can need to manage microphone input, screen content, system audio, transcription, storage, and remote services.
Work from the actual product needs up to the individual sources. Then select the right native technologies, define a concise permission flow, and determine the course of captured media in the remainder of your application.
Separation of capture, processing, and storage, along with separation of the user interface, can also simplify the maintenance of the system. Requirements can change, and you can update one segment of the pipeline without rebuilding the other components.
With audio and video capture treated as a collection of specific media problems, rather than one big recording feature, it becomes easier to reason about capturing audio and video on macOS. Know how to select the right framework, understand how to plan for the future evolution of your devices and permissions, and create a processing pipeline that takes into account the actual needs of your product. That backplane will provide you with more flexibility when you change your application from a simple prototype to a reliable media experience.
Popular on OTW Right Now!

About The Author

Gagan Bhangu
Founder of otechworld.com and managing editor. He is a tech geek, web-developer, and blogger. He holds a master's degree in computer applications and making money online since 2015.