
How to Build a Home Podcast Studio Without Breaking the Bank
Starting a podcast doesn’t require a spare room full of expensive gear. If you can record in a quiet space, speak into a decent microphone, and use simple editing software, you’ll get surprisingly good results at home. The biggest early decision is usually the microphone, and for many beginners, a good USB microphone for vocals is the simplest way to get clean sound without buying extra equipment.
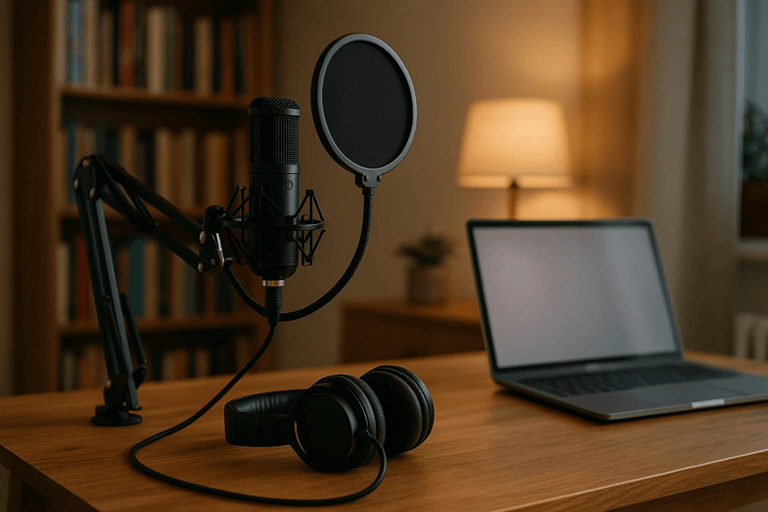
Start With the Room, Not the Gear
Before buying anything, listen to the room where you plan to record. Clap your hands once and notice what happens. If you hear a sharp echo or “ring,” your microphone will hear it too.
A bedroom, closet, or small office often works better than a large empty room. Soft materials are your friend: curtains, rugs, blankets, mattresses, bookshelves, and fabric furniture all absorb reflections.
You don’t need expensive acoustic foam to start. Try this first:
- Record near a full bookshelf or closet
- Put a thick rug under your chair and desk
- Hang a blanket behind or beside the microphone
- Close windows and turn off fans, TVs, and noisy appliances
- Record when traffic, neighbors, or family noise is lowest
Try not to be in kitchens, bathrooms, bare rooms, or other places that are full of hard surfaces. An inexpensive microphone in a treated room can sound better than an expensive microphone in an echoey room.
USB vs XLR: Which Should You Buy?
For a budget home podcast studio, USB microphones are usually the easiest choice. They directly connect to your computer, do not require any audio interface, and require very little setup. For those of you recording solo shows, voiceovers, demos, or remote interviews, a USB mic will be able to last you for years.
XLR microphones have more versatility. Must have a three-pin cable and require an audio interface or recorder. That will increase your costs but provide you with greater upgrade flexibility. XLR is typically more convenient as each microphone is plugged into a separate input when recording several people in the same space.
Choose USB if:
- You’re recording alone
- You want the easiest setup
- Your budget is tight
- You don’t want to buy an interface
Choose XLR if:
- You’ll record two or more people in person
- You want room to upgrade later
- You already own an audio interface
- You want more control over gain and routing
Don’t overthink it. A solid USB microphone, placed correctly, is enough for a clean beginner podcast.
The Microphone Is the Biggest Lever
While the type of microphone you use can have an effect, its position can have a greater impact. A lot of people purchase a good mic, but put it too far away, so that the sound of the voice is thin, echoey, and with room noise.
It is best to start about 4-8 inches away, but not directly in front of your face. This will help minimize these severe “p” and “b” sounds. It is great to have a pop filter or foam windscreen, which is only expensive.
If your room is not perfectly treated, then you should opt for a dynamic microphone and not a condenser microphone. Dynamic mics tend to be more noise-cancelling and less prone to feedback than condenser mics. Condenser mics are great for capturing detail, but can also capture keyboard clicks, A/C noise, and echo.
Setup for interviews varies according to the type of interview (i.e., online, face-to-face, or in-person). If you have guests who will be on the show regularly, take some time to select the proper mic for interviews, just so you don’t become a hassle to work with due to poor audio quality every time.
Make a short test recording prior to each session. Speak at a normal volume, laugh once, a nd speak a few louder sentences. Be sure the sound level is not clipping or distorted. It’s easier to adjust the volume prior to recording than to fix audio issues later.
Build a Simple Budget Gear List
You don’t need a complicated shopping list. For a basic home podcast studio, start with:
- USB or XLR microphone
- Mic stand or boom arm
- Pop filter or foam windscreen
- Closed-back headphones
- Basic recording app
- A quiet, treated corner
Using a boom arm will allow you to place the microphone at a greater distance from your mouth without hunching over. A small stand for the boom arm will do, if that is too much money, but don’t tap the desk while recording.
Closed-back headphones will keep the sound from getting into the microphone. For now, it’s not essential to have a top-of-the-range studio pair of headphones. Any comfortable pair of wired headphones that will allow you to hear yourself and your guest well will work.
If you’re using an XLR microphone, you will need an audio interface. If only one person is recording, then a one-input interface should suffice. If you are using two in-person hosts, then you should have at least 2 microphone inputs.
Use a Basic Recording App
Simplicity is the watchword for software. You will require an app that will record your microphone, display the audio levels, and allow you to edit out errors. Many novice writers spend time before they even record an episode learning some arcane software.
Look for:
- Easy input selection
- Visible recording levels
- Simple cutting and trimming
- Noise reduction or cleanup tools
- Export to MP3 or WAV
Record in a quiet room, save your project, edit the recording for the basic features such as removing long pauses, cutting out obvious errors, adjusting volume,e and then export the completed recording. Do not practice for the first episode. Visual and auditory clear and listenable.
Record away from the house by asking people to wear headphones when recording, and record in a quiet area. Even the best software can’t do everything in a situation where a guest talks over a laptop speaker in a noisy environment.
Beginner Mistakes to Avoid
Most poor podcast audio comes from a few common mistakes:
Recording too far from the mic: Stay close. Distance adds echo and background noise.
Setting gain too high: If the waveform is not wobbling, decrease the input level.
Ignoring the room: Blank walls and hard floors create reflections. Add soft surfaces before buying more gear.
Using Bluetooth headphones: They can have a delay and decrease audio quality. Wired headphones are more secure.
Not backing up files: Save the original recording files prior to editing. Make a duplicate copy in another folder/drive.
Recording without a test: A 30-second test is used to detect whether the microphone is wrong, the battery is low, fan noises are loud, or the levels are bad.
Buying too much too soon: Start small. Upgrade only when you know what problem you’re solving.
A Smart Starter Setup
If you want the simplest budget approach, use this:
- One USB dynamic microphone
- Foam windscreen or pop filter
- Affordable boom arm or stable stand
- Wired closed-back headphones
- Free or low-cost recording software
- Bedroom or closet corner with blankets, curtains, and a rug
This configuration will make great-sounding podcasts. When it comes to adding a co-host, recording in-person interviews,s or having more control, you can switch to XLR microphones and an audio interface.
Final Thoughts
The best home podcast studio isn’t all about the most expensive equipment. It’s about dominating the space, positioning the mic correctly, recording good sound, and not making basic errors!
Use one good mic, a quiet room, and simple software. Make use of items that you already have in your home. Play a couple of practice sessions before upgrading. For every other purchase in the future, you will grasp the workflow and how it is presented.
Popular on OTW Right Now!

About The Author

Gagan Bhangu
Founder of otechworld.com and managing editor. He is a tech geek, web-developer, and blogger. He holds a master's degree in computer applications and making money online since 2015.